
Loading the latest stories…

Learn what equipment and tools you really need to get started weaving on a rigid-heddle loom.
Christina Garton4 min read
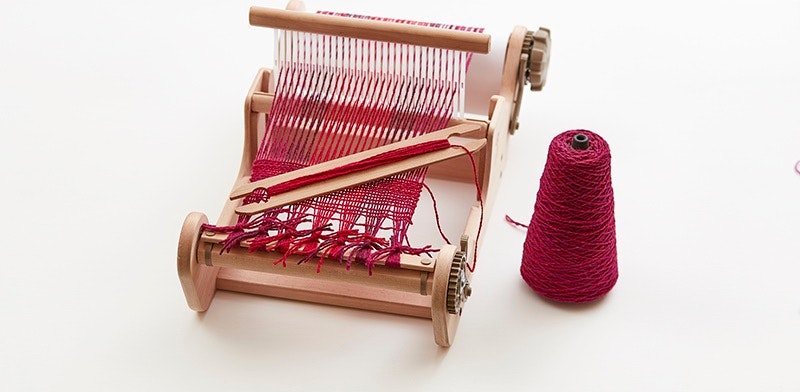
Over the past 10 years of working on Easy Weaving with Little Looms, I’ve helped a lot of new weavers find the tools and equipment they need to get started successfully weaving on a rigid-heddle loom. Whether you’re buying a brand-new loom or getting one secondhand, it’s important to know not just what tools you need, but also why you need them and how to use them. So let’s go over it: What do you actually need to get started weaving on a rigid-heddle loom?
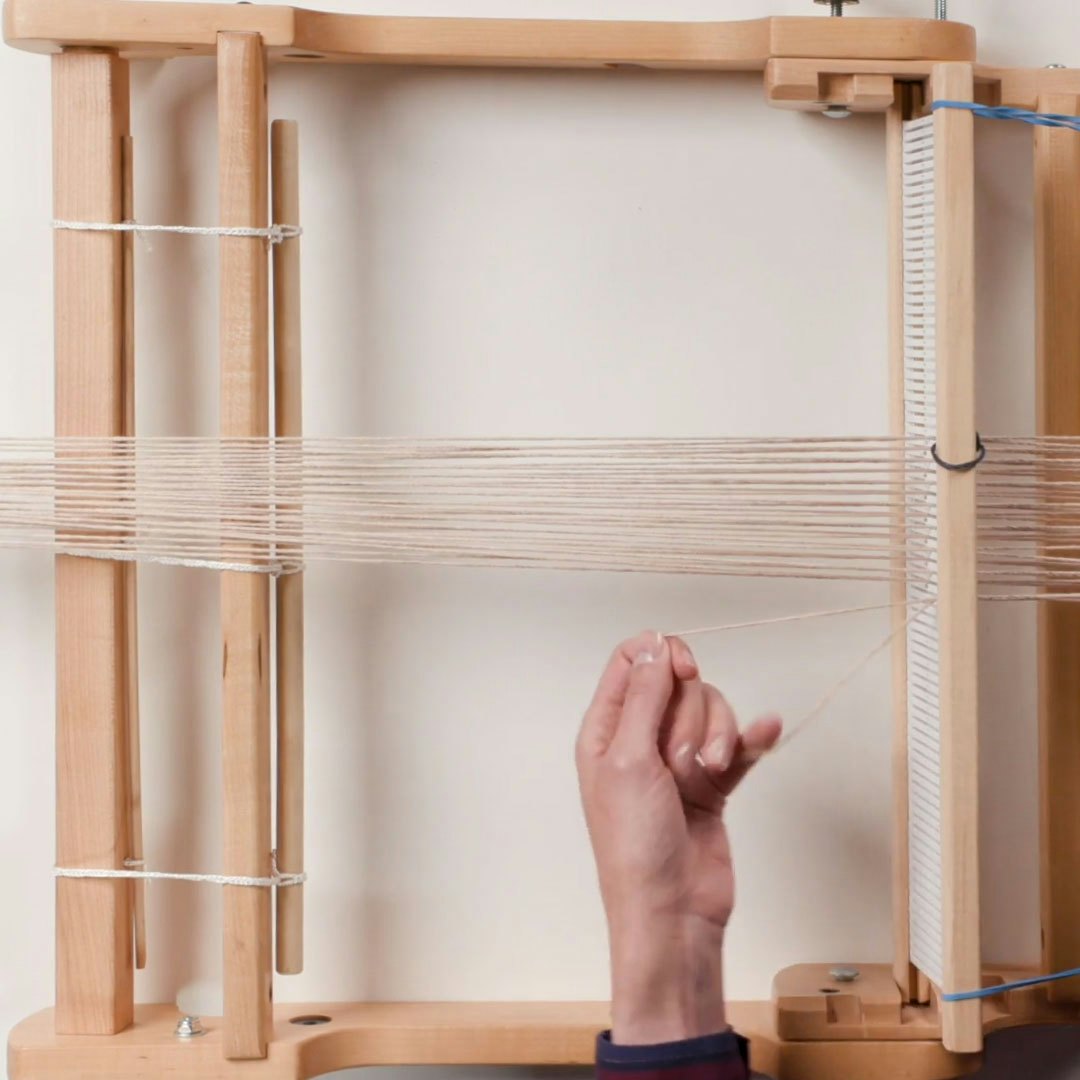 Photo courtesy Long Thread Media
This is what it’s all about! A loom holds the warp in place and under tension, ready for weaving. Your loom should have a removable rigid heddle that has slots and holes for the warp to pass through. When the heddle is raised or lowered, some yarns go up and down with it and others stay in place. Dent describes how close the warp threads are to each other when they pass through the reed (expressed in spaces per inch or other unit). The area where the heddle rests in the up, down, or neutral position is called the heddle block.
To get started warping your rigid-heddle loom, you need three basic tools: a warping peg, a loom clamp, and a threading hook.
 Warping pegs are one of the most important tools needed for direct warping. Photos by Joe Coca except where noted
In order to weave you must be warped. (Pun intentended—with weavers, the pun is pretty much always intended.) Many rigid-heddle projects are started by direct warping, or tying the warp yarn directly to the loom and measuring it from there. Measuring the distance from the back of the loom to a fixed warping peg, such as the one shown above, makes sure that all of the ends are the appropriate length. Along with a warping peg, you’ll also want a loom clamp to hold the loom in place. A loom clamp looks like a warping peg with the wooden peg removed.
 Threading hooks help you carry threads from the loom to the warping peg and to pull threads through the heddle’s slots and holes.
No matter what kind of warping method you choose to use, you will need a threading hook (also sometimes called a sleying hook) to pull the warp through the slots and to the warping peg during direct warping, and then later to pull individual warp ends through the heddle's holes. A double-sided threading hook, like the one shown above, has a deep hook on one side—for extra security when carrying the warp through the slots and to the warping peg—and a smaller, narrower hook on the other side—for manuevering threads through the heddle’s small holes.
Two basic tools are all you need for weaving: a shuttle and one or more pick-up sticks.
 Shuttles, such as the stick shuttle shown here, hold the weft yarn as you weave.
Once you’re warped, you’re ready to weave, which you’ll do by placing your weft yarn between your warp threads. A shuttle holds the weft yarn as it passes through the warp; it’s part yarn storage and part delivery system. The most common shuttle for rigid-heddle weaving is the stick shuttle, a simple piece of wood with a notch on each end. Stick shuttles can also be used to help beat yarn into place as you weave.
 Weavers use pick-up sticks to create textured weaves and more complex patterning in their cloth.
Pick-up sticks are special flat, smooth pieces of wood with beveled edges designed to lift and hold some threads up or down. They are used in some advanced and hand-manipulated weaving techniques. Technically you don’t need a pick-up stick to weave on your rigid-heddle loom, but most new loom kits come with one, so it's good to know what they’re used for.
 Weavers use blunt tapestry needles to hemstitch and to fix errors.
Along with the weaving-specific tools I’ve mentioned already, you’ll want to have an assortment of sewing notions. These are the notions I keep in my weaving kit:
Once you’ve gathered all your tools, equipment, and yarn, it’s time to get warped! (Again, pun intended.) You can learn everything you need to know about how to direct warp your loom here, including a step-by-step video explaining the whole process.
Happy Weaving!
Christina
More from Little Looms
 Designing Borders for Pick-Up BandsLearn tips and tricks for designing borders for your pick-up bands, from simple stripes to more complex color-and-weave designs. Christina Garton · July 2, 2026
 Dealing with Selvedges that Go BumpLace weaves are notorious for creating uneven, scalloped, and overall lumpy-bumpy selvedges. Learn two different methods for handling these selvedges in the first installment of our Summer Selvedge Series. Christina Garton · June 4, 2026
 Whipstitch TutorialLearn step-by-step how to join pin-loom squares together with whipstitch for a nearly invisible finish on the right side of the fabric. Anne Merrow · June 2, 2026
 Weave a Baby Shark (Doo Doo Doo Doo)Baby Shark doo doo doo doo. On a pin loom doo doo doo doo. Baby shark doo doo doo doo. Christina Garton · April 29, 2026
 Get Started: Read a Basic Rigid-Heddle PatternHere's what you'll see in a rigid-heddle pattern in Little Looms—and how to translate that information to the loom!Christina Garton · April 23, 2026
 Fixing a Broken Warp End on a Rigid-Heddle LoomLearn how easy it is to fix broken warp ends with this step-by-step guide for rigid-heddle weavers. Christina Garton · April 16, 2026
 Common Rigid-Heddle Weaving TermsLearn the definitions of common rigid-heddle weaving terms in this handy glossary. Little Looms Editors · April 7, 2026
 Choosing Yarns for the Pin LoomBenjamin Krudwig · March 17, 2026
 How to Fix Unwanted Floats in Your WeavingDiscovering unwanted floats in your weaving can be frustrating. Learn how easy it is to fix these skipped warp threads on or off the loom. Christina Garton · February 24, 2026
 What Every Beginning Weaver Should Know about FringeDo you really need to hemstitch, and are fringe twisters worth the investment?Christina Garton · February 17, 2026
From the Library





Comments
No comments yet — be the first to share your thoughts.
Sign in to join the conversation — commenting is for signed-in members.