

The Confident Weaver’s Guide to Pin Loom
Introduction
One of my greatest joys as editor of Easy Weaving with Little Looms is introducing weavers to the wonderfully versatile pin loom. When I started pin-loom weaving over a decade ago, I had so many questions—what yarn size to use, what a bias weave was, how to join pieces—and I spent hours scouring the internet and books for answers. Getting started shouldn’t be that hard.
It’s those memories of being a new weaver, searching endlessly for information, that led to the creation of this resource page. Here you’ll find answers to those questions and more, plus tips and tutorials on weaving different pin-loom styles, joining and finishing pieces, and beyond.
Use the links below to start weaving or jump straight to a topic. Even as an experienced weaver, I still reach for this page for a refresher—I love how easy it makes finding exactly what I need. Wherever you are in your weaving journey, I invite you to let us help you build your skills and your love for weaving.
—Christina
Why We Want You to Meet Gabi
From the editor: I remember the first time I saw what a hexagon loom could do. While sorting proposals for the 2018 issue, I came across a beautiful, mosaic-like grape table topper—my introduction to the versatile TURTLE loom and its designer, Gabi van Tassell.
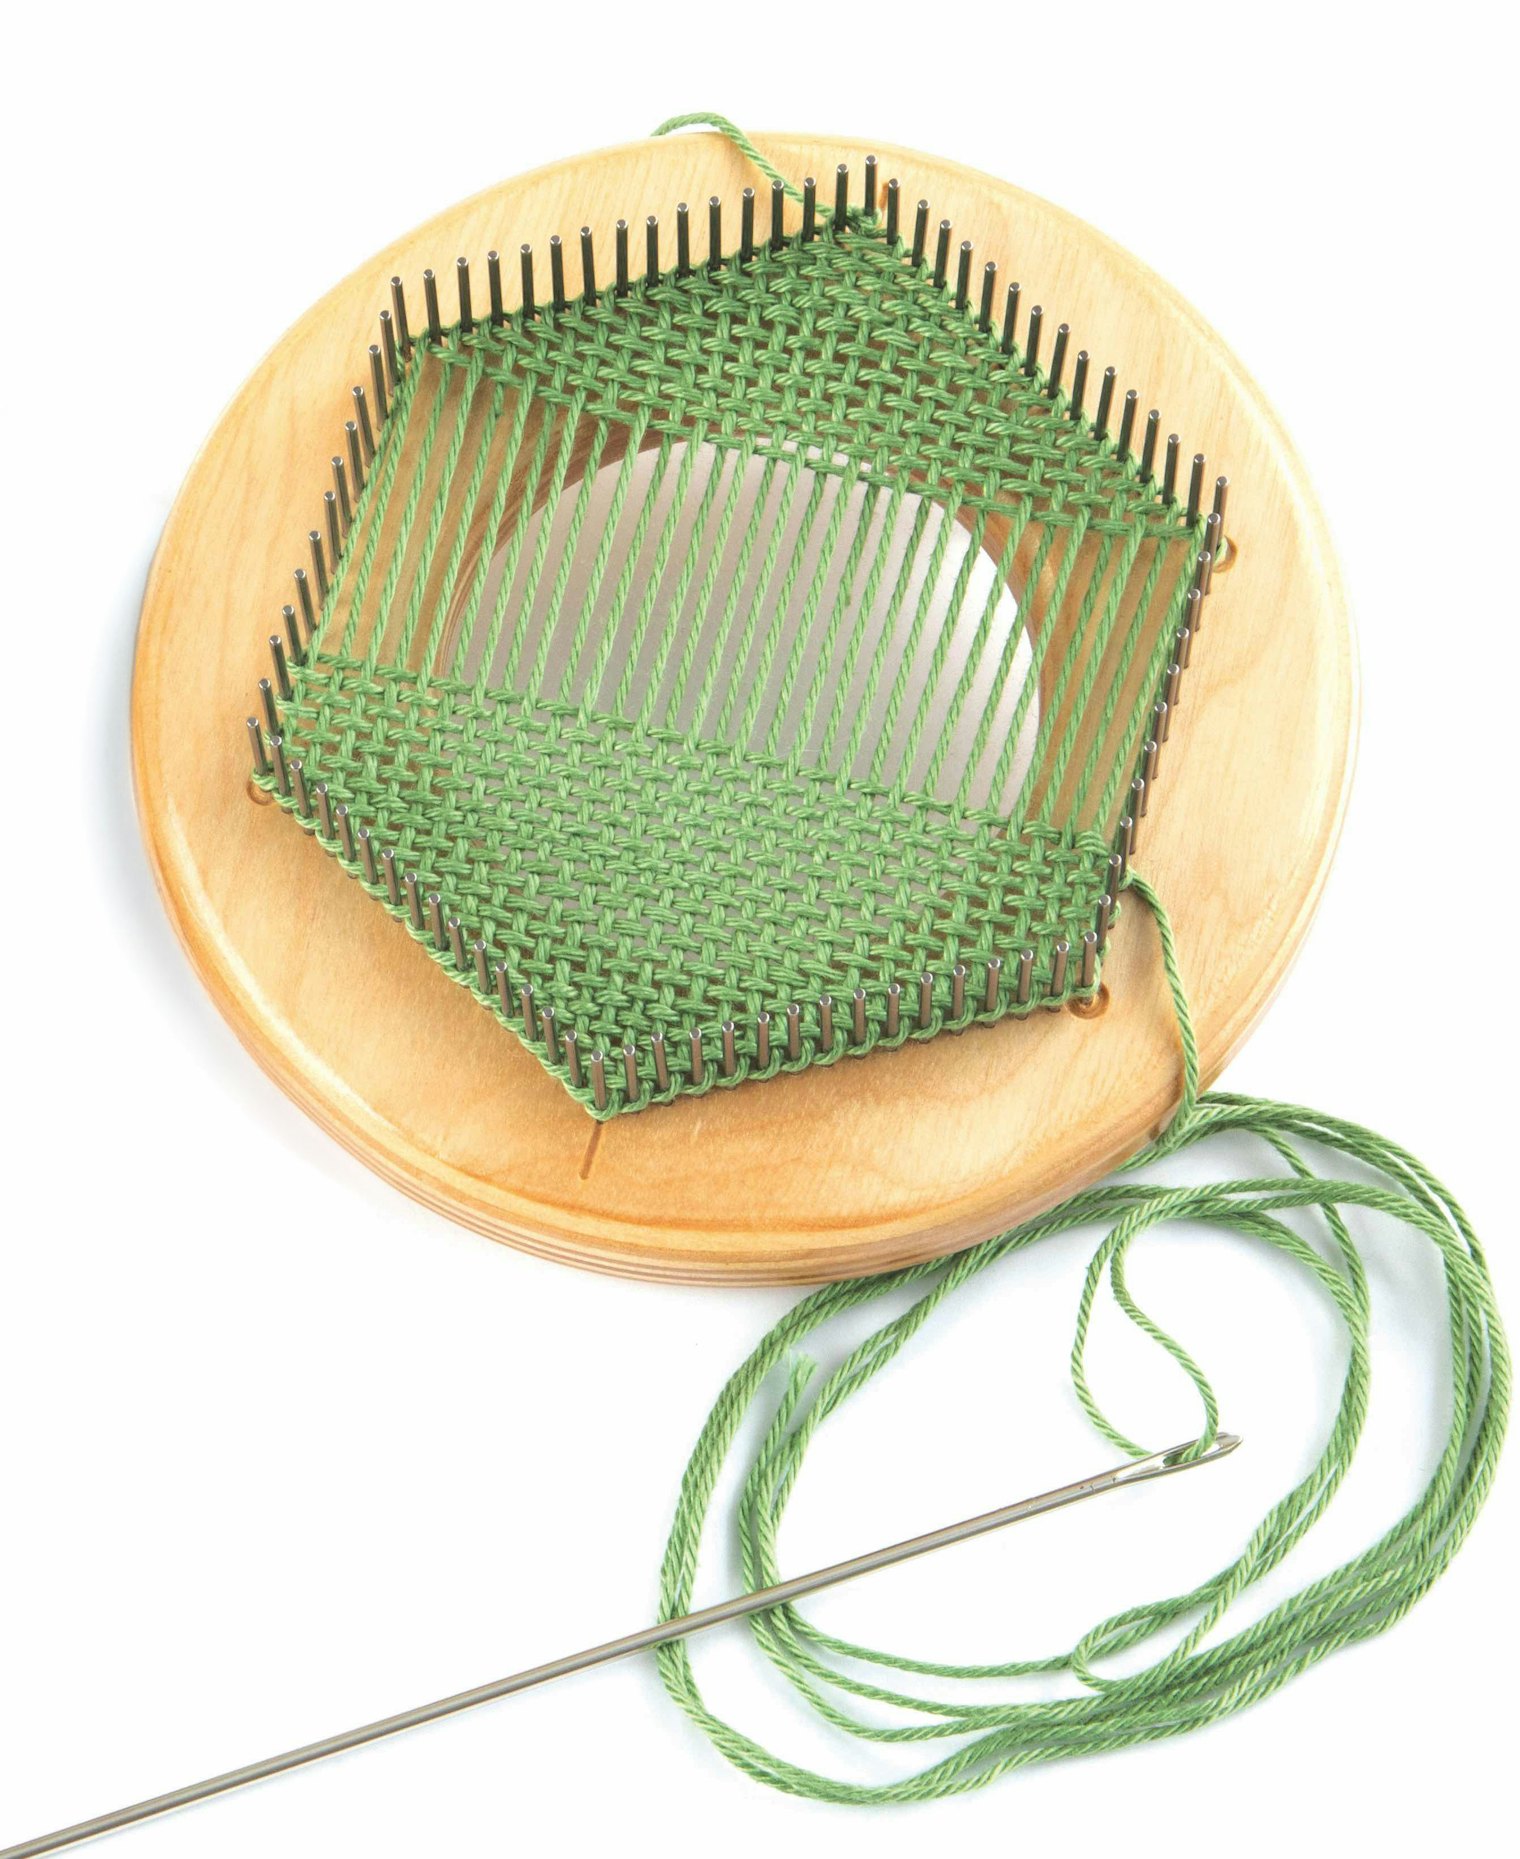
Beyond the Original TURTLE Loom, Gabi has developed a range of innovative pin looms in different shapes, sizes, and setts, each one reflecting her passion for the craft. Use the shapes alone or mix and match for spectacular geometric designs—the possibilities are endless. I especially love the extra-fine sett options, which let me weave fingering weight yarn into shawls with gorgeous drape or shimmering silk-blend scarves. And since TURTLE Looms produce almost no waste, I get to use those luxe yarns guilt-free.
 I could talk all day about how much fun these looms are, but the real story is Gabi herself. She doesn’t just make looms—she makes lifelong weavers. She’s forgotten more about pin-loom weaving than I’ll ever know, and she generously shares that knowledge to lift up the whole community. Whenever I have a question I can't answer, I turn to Gabi.
So when I think of TURTLE Looms, I think of more than looms and projects—I think of Gabi and everyone she’s encouraged along the way. TURTLE Looms isn’t just a company; it’s a pillar of our community.
—Christina, Editor of Easy Weaving with Little Looms
Yarn and Tools
Finding a Project
Joining Your Pieces
Finishing Ideas

Tips and Troubleshooting
Going Beyond
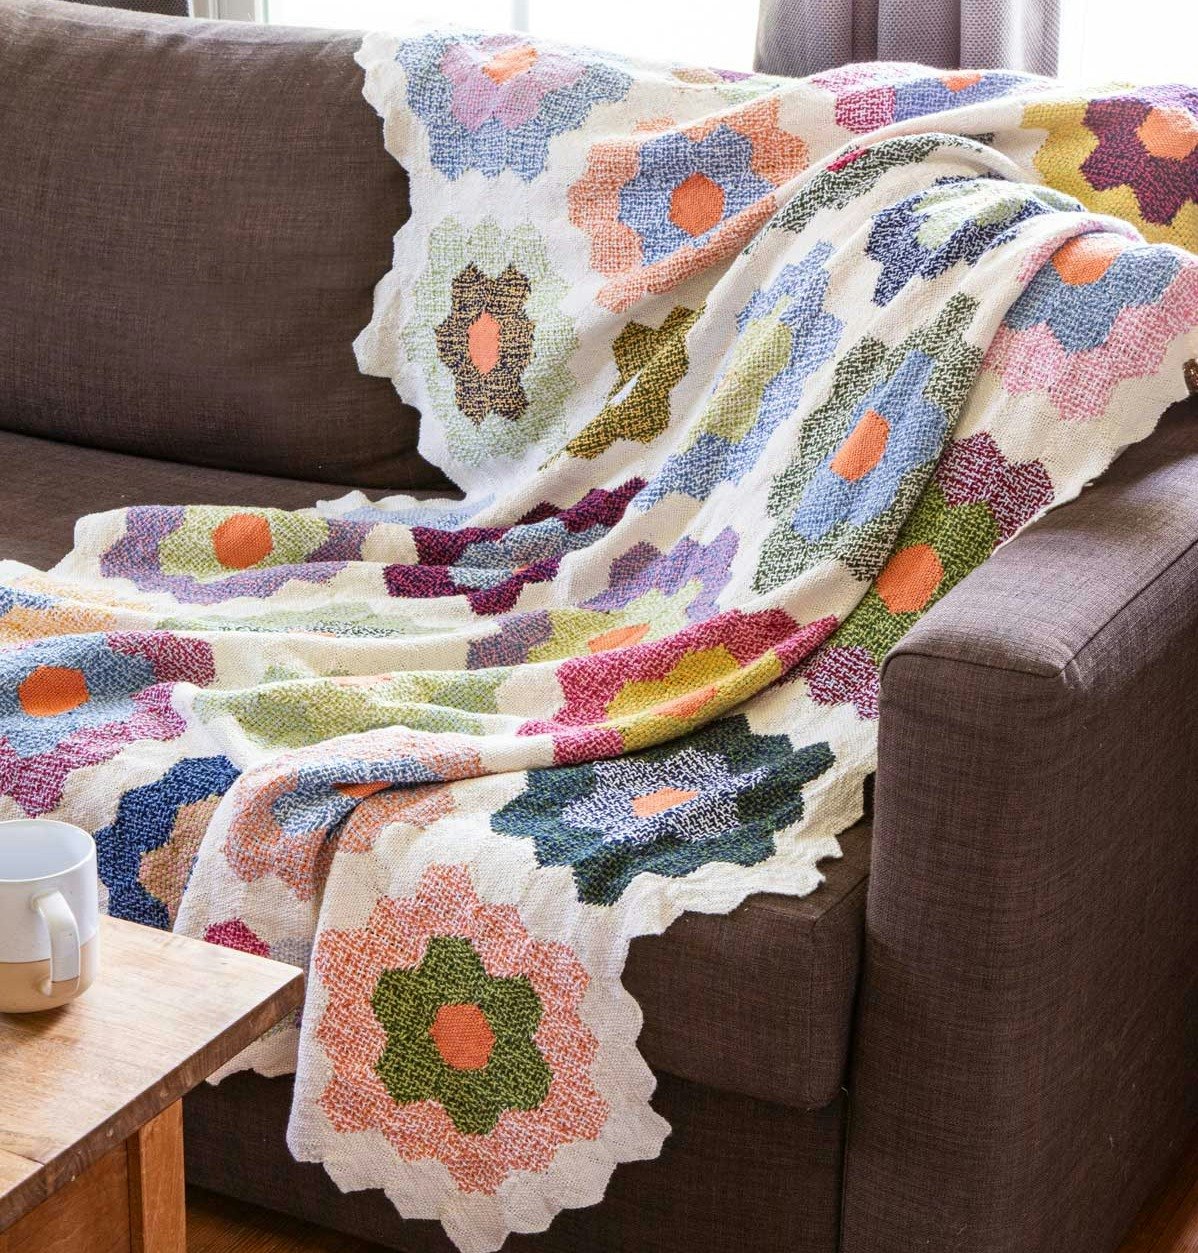
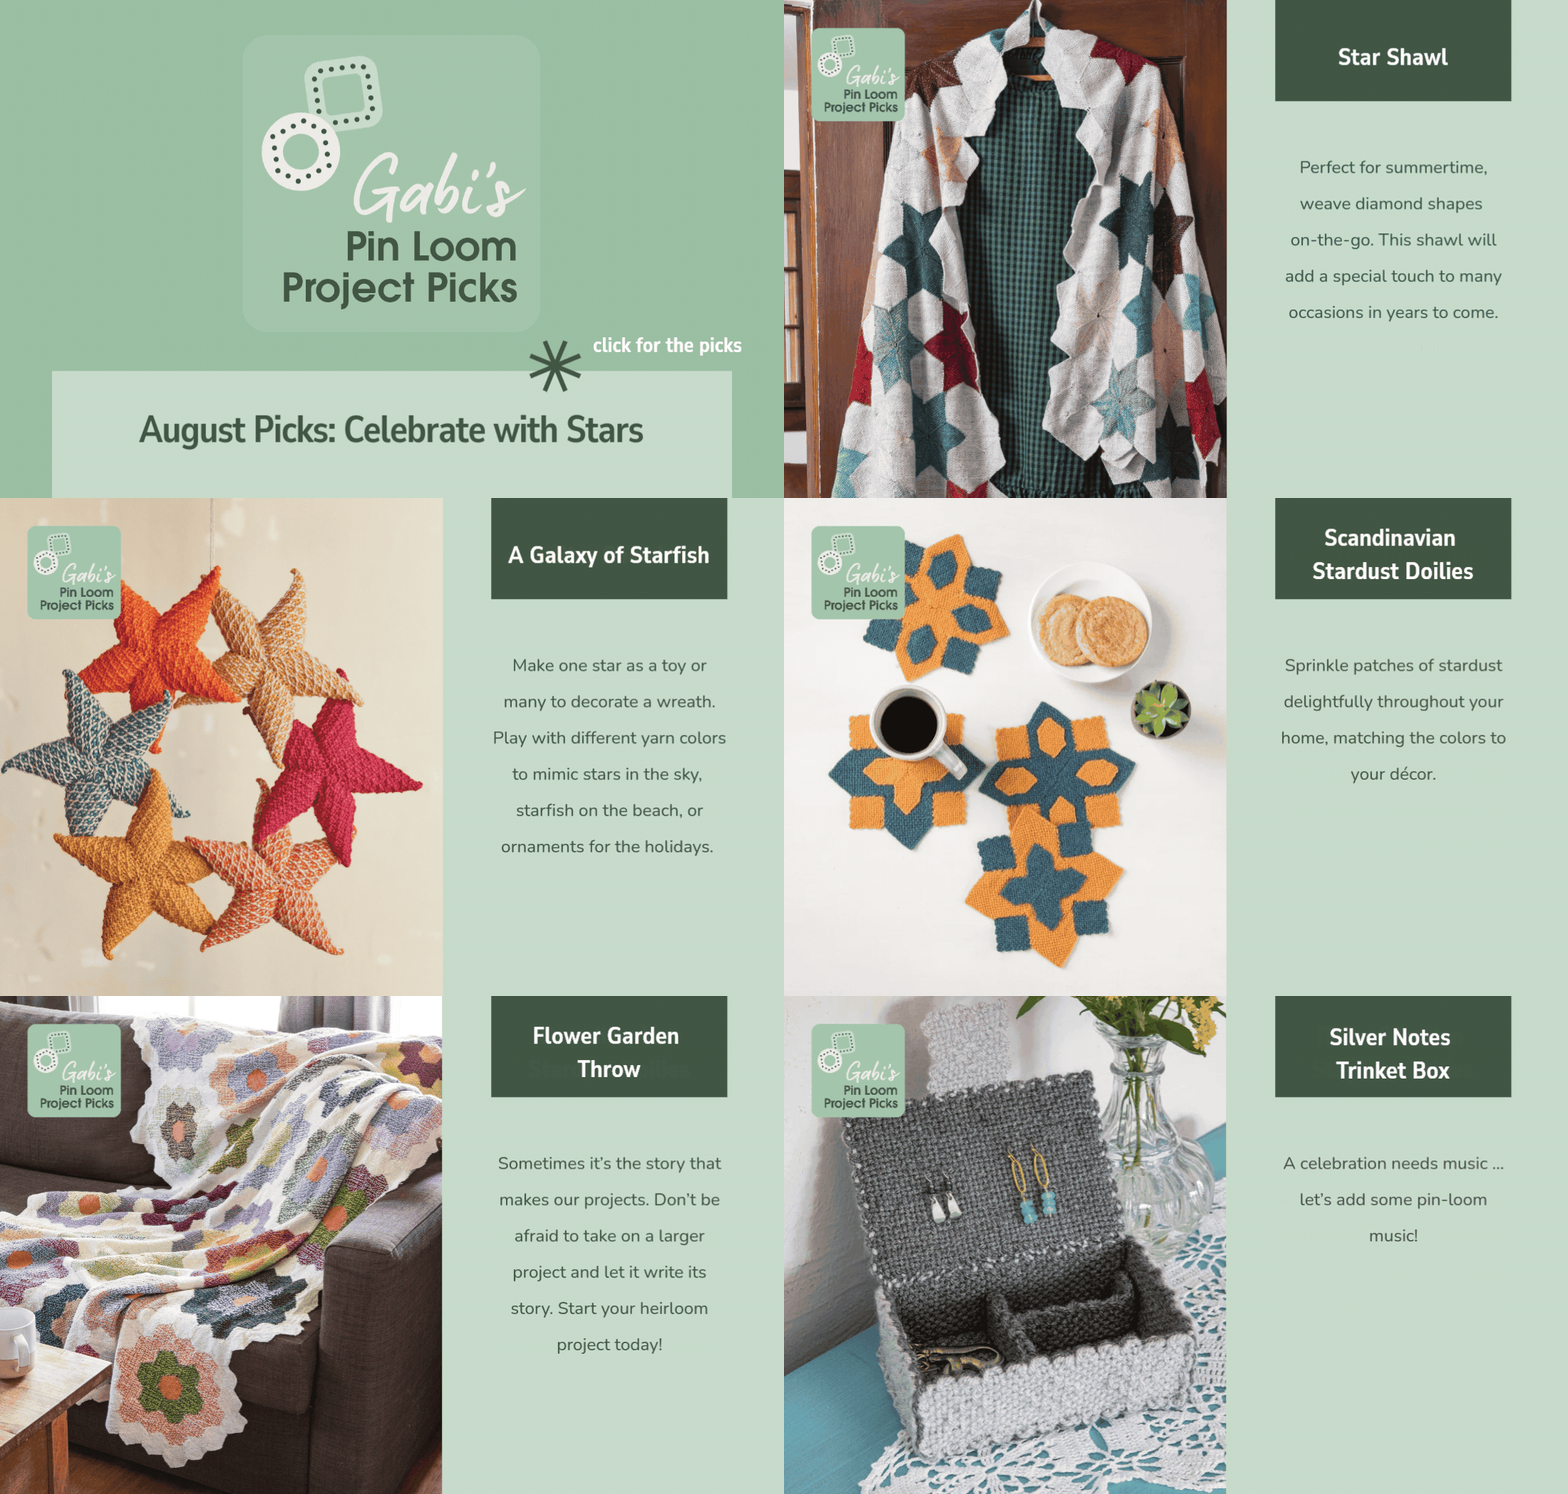
What to Weave in August: Gabi’s Picks
Watch and Learn
- Get started with the fundamentals and explore creative design ideas with Creative Pin-Loom Designs.
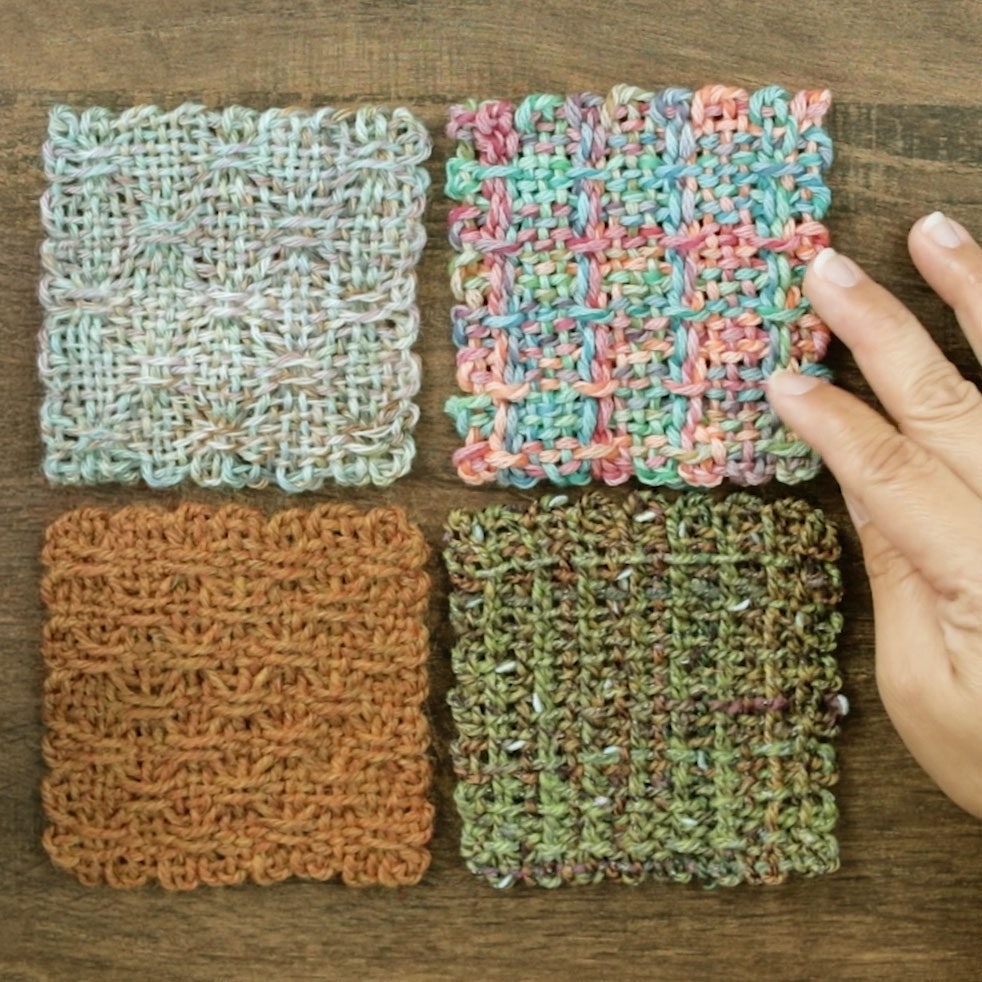
- Go beyond plain weave to explore texture and patterns with the video, Weave Patterns on the Pin Loom.
- Squares are just the beginning. From plaids and stripes to 3-D designs, explore more with Pin Loom Weaving in New Dimensions.
Keep Reading for More Pin-Loom Resources!
Skill Guide: A Weaver’s Guide to Fiber
No matter what loom(s) you love to weave on, understanding the different characteristics of a fiber can help you make better choices when picking yarns for projects.
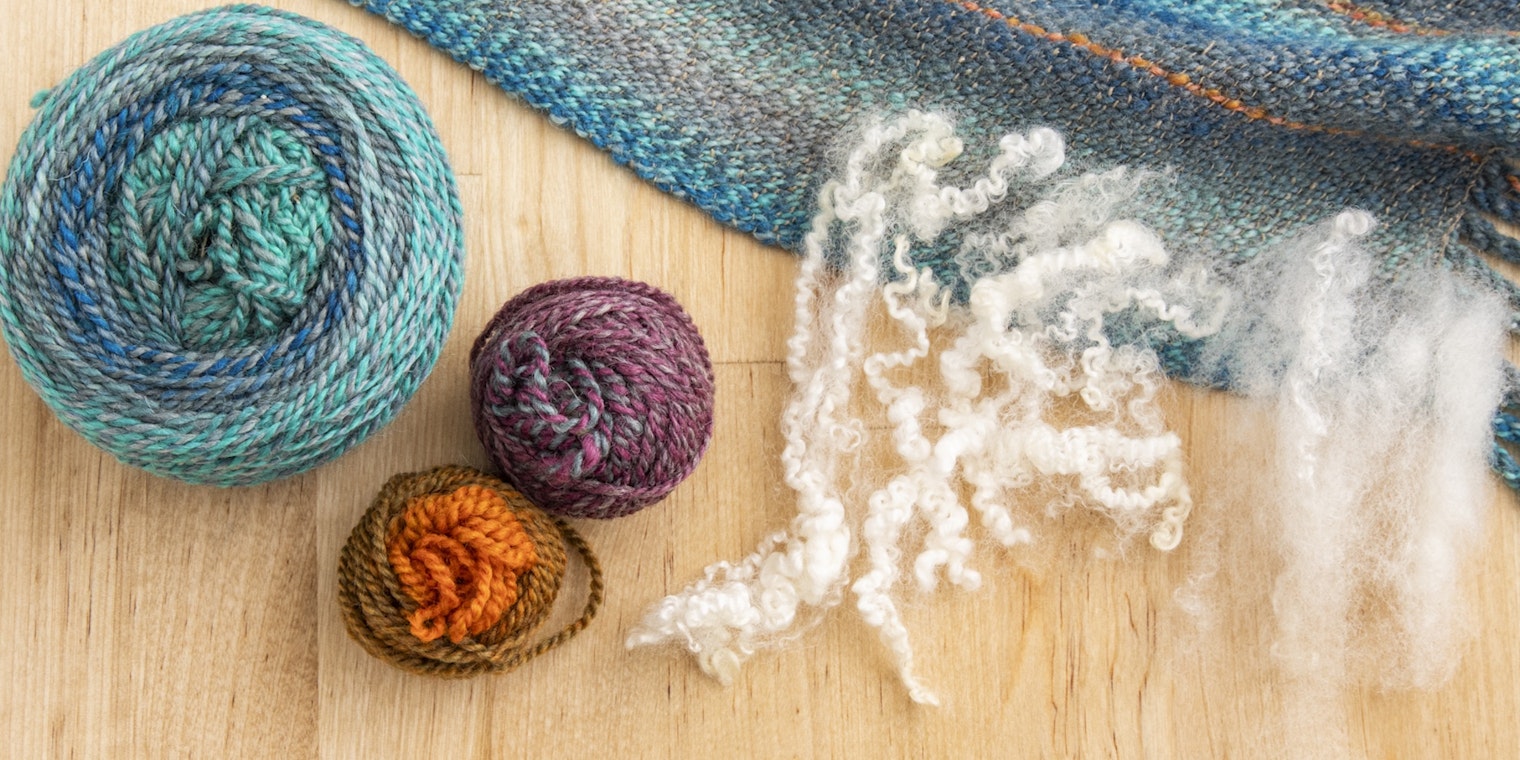
If you’re new to the world of fibers, choosing the right yarn for your weaving project can feel overwhelming. Fortunately, with a little education on the most commonly available weaving fibers, you can go into any yarn shop and confidently pick out a skein or two (or three or four). No matter what kind of weaving you do—rigid-heddle, pin, inkle, tapestry, or tablet—understanding the differences between fibers will help you become a better weaver. Today’s skill guide will give you a solid foundation as we go over the basics of protein (animal), plant, and synthetic fibers. As you read, you’ll learn facts about these fibers, including:
- The origins of different fibers: plant, animal, and other.
- The different methods used to process fibers into yarns and what that means to you as a weaver.
- Unique characteristics of different fibers and yarns that can affect your weaving.
Every item we’ve selected for this guide is part of your All Access program and will help you get the most out of your subscription. Check out the Little Looms Library and our video course website for more learning opportunities.
Happy weaving,
Christina
Protein (Animal) Fibers
Sheep
For this article, the term wool is used to mean the fiber from sheep, although many fiber folks use wool to mean fiber from any animal. Most sheep wools share some common characteristics: they are warm, elastic, and durable. Wools can absorb a significant amount of water and still be warm; they are strong when dry and much weaker when very wet. Wools usually require handwashing to prevent fulling, although the amount they shrink varies across breeds.
Characteristics
Other characteristics of wool also vary considerably across breeds. Some produce very soft fiber (Merino or Cormo), while others produce exceptionally strong and durable fiber (Suffolk or Montadale). Fabrics made from breeds such as Targhee are wrinkle-resistant, while those made from Merino are not.
Tutorial: Continuous-Strand Weaving
Learn the basics of using the continuous strand–weaving method on a pin loom.
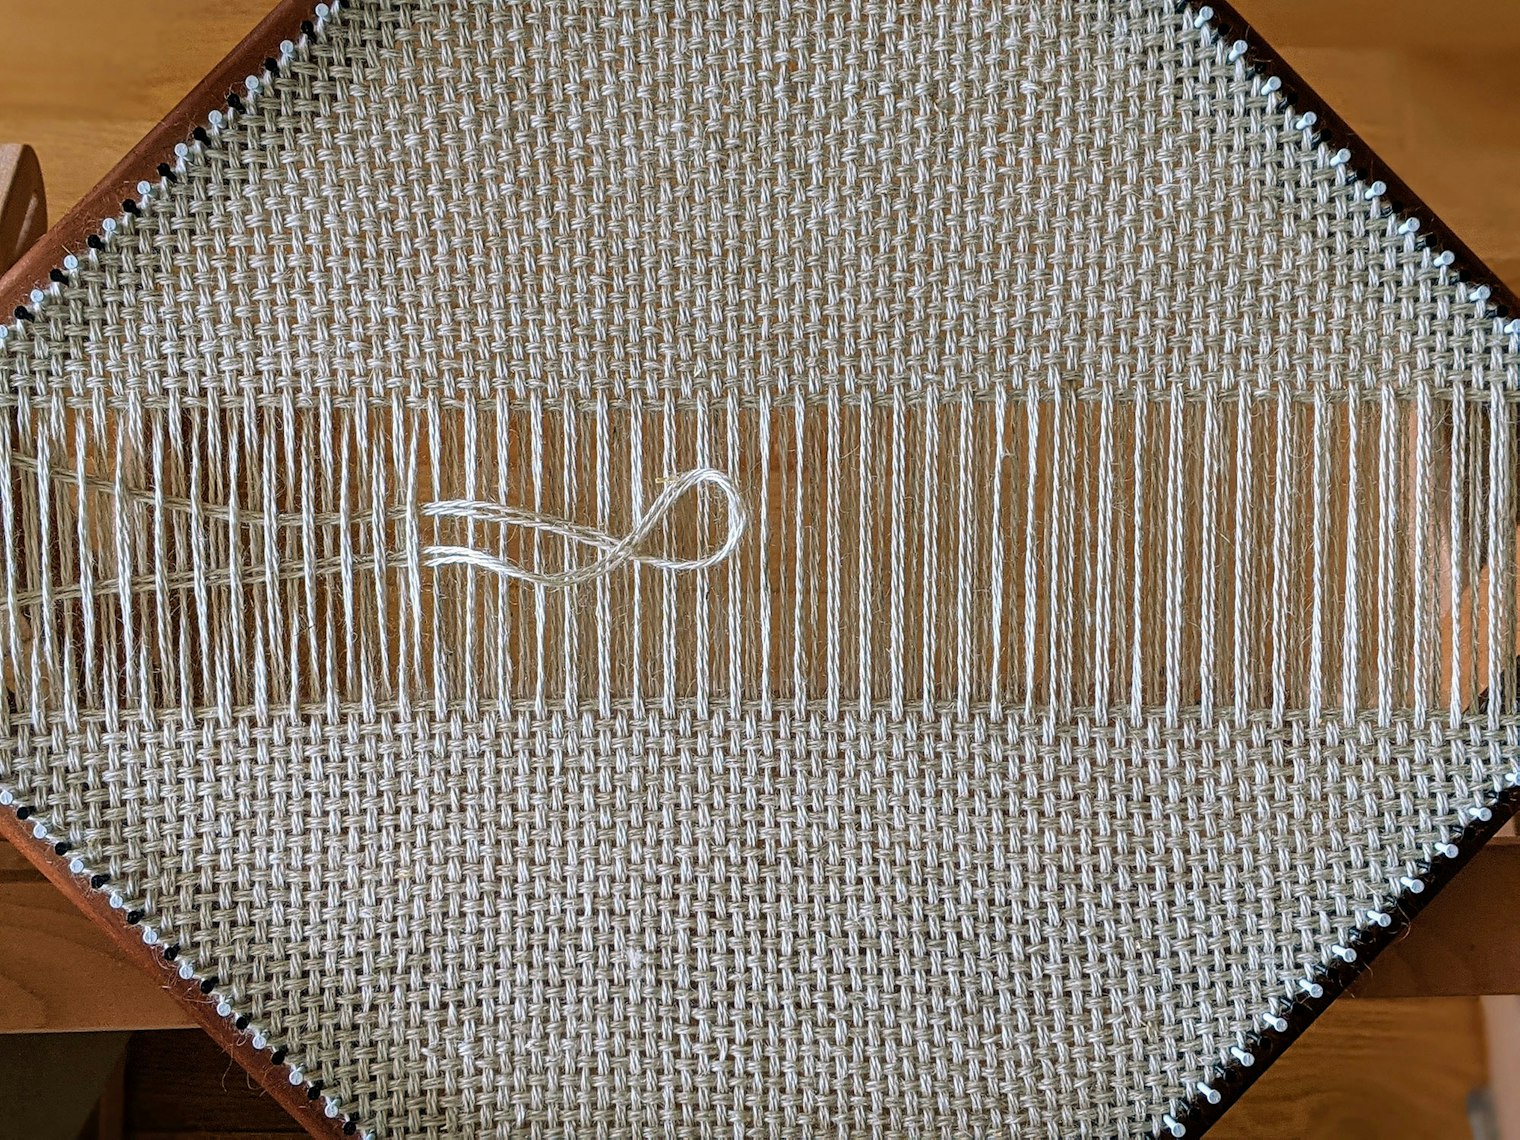
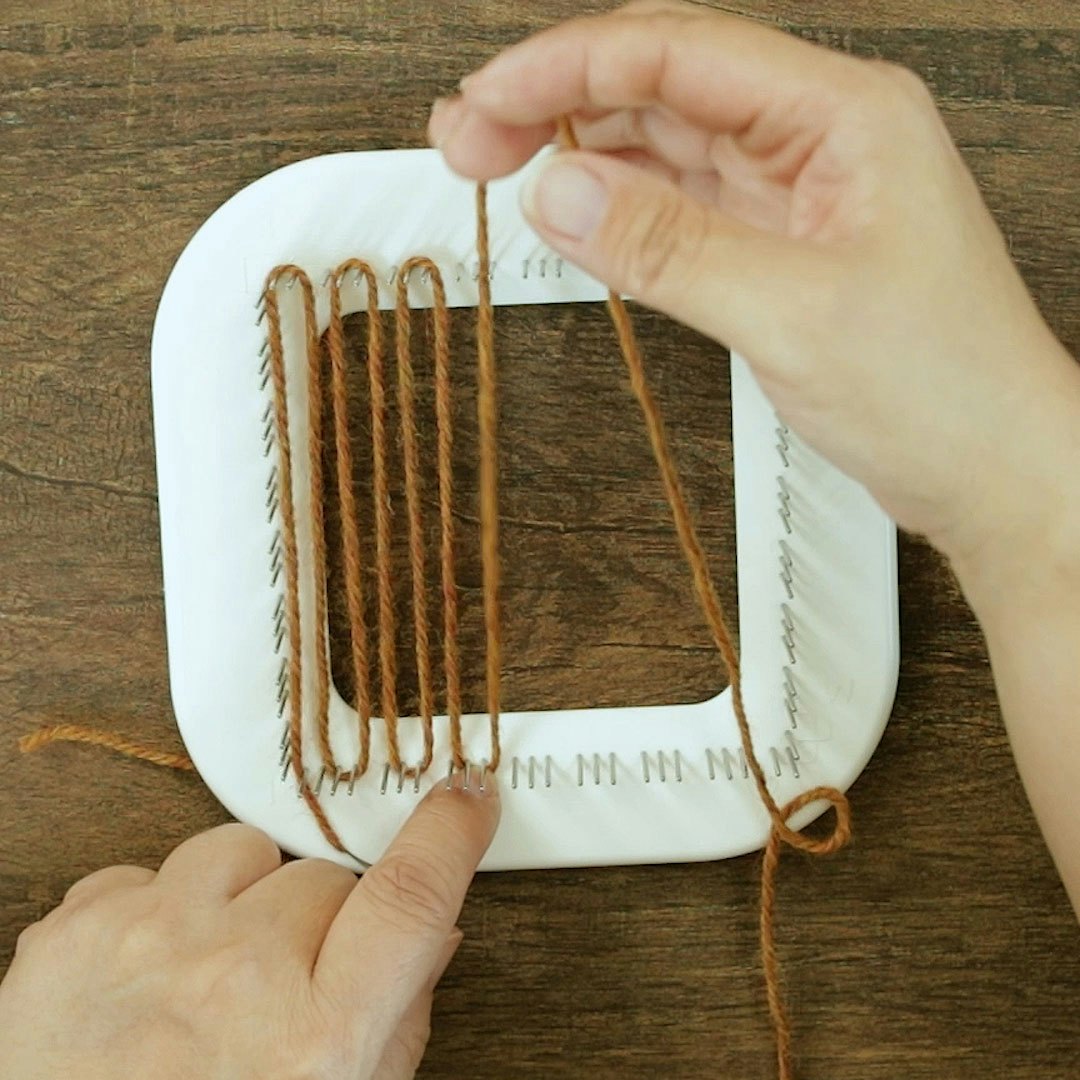
Continuous-strand weaving, sometimes called bias weaving, is a great technique for weaving on your pin loom. While there are ways you can use this method on looms with the 3-pin configuration, you’ll usually see it done on pin looms with equidistant pins. With this method, you warp and weave at the same time.
If that sounds confusing, never fear! In this exclusive Little Looms tutorial, we have instructions for weaving using the continuous-strand method from this article by Jennifer Chapman.
—Christina
Continuous-strand weaving is an exciting and efficient technique that simultaneously warps and weaves an evenly spaced pin loom with a single strand of yarn. The result is a zero-waste, bias-woven piece of fabric. This method can be used on looms of many shapes and sizes—squares, rectangles, triangles, hexagons, and even diamonds.
To start off, here’s the basic method for weaving on a square pin loom.
You’ll need the following supplies:
- Pin loom with uniformly spaced pins
- Packing fork
- Either a locker hook or a crochet hook
- Long weaving needle or blunt tapestry needle
Continuous Weaving Steps
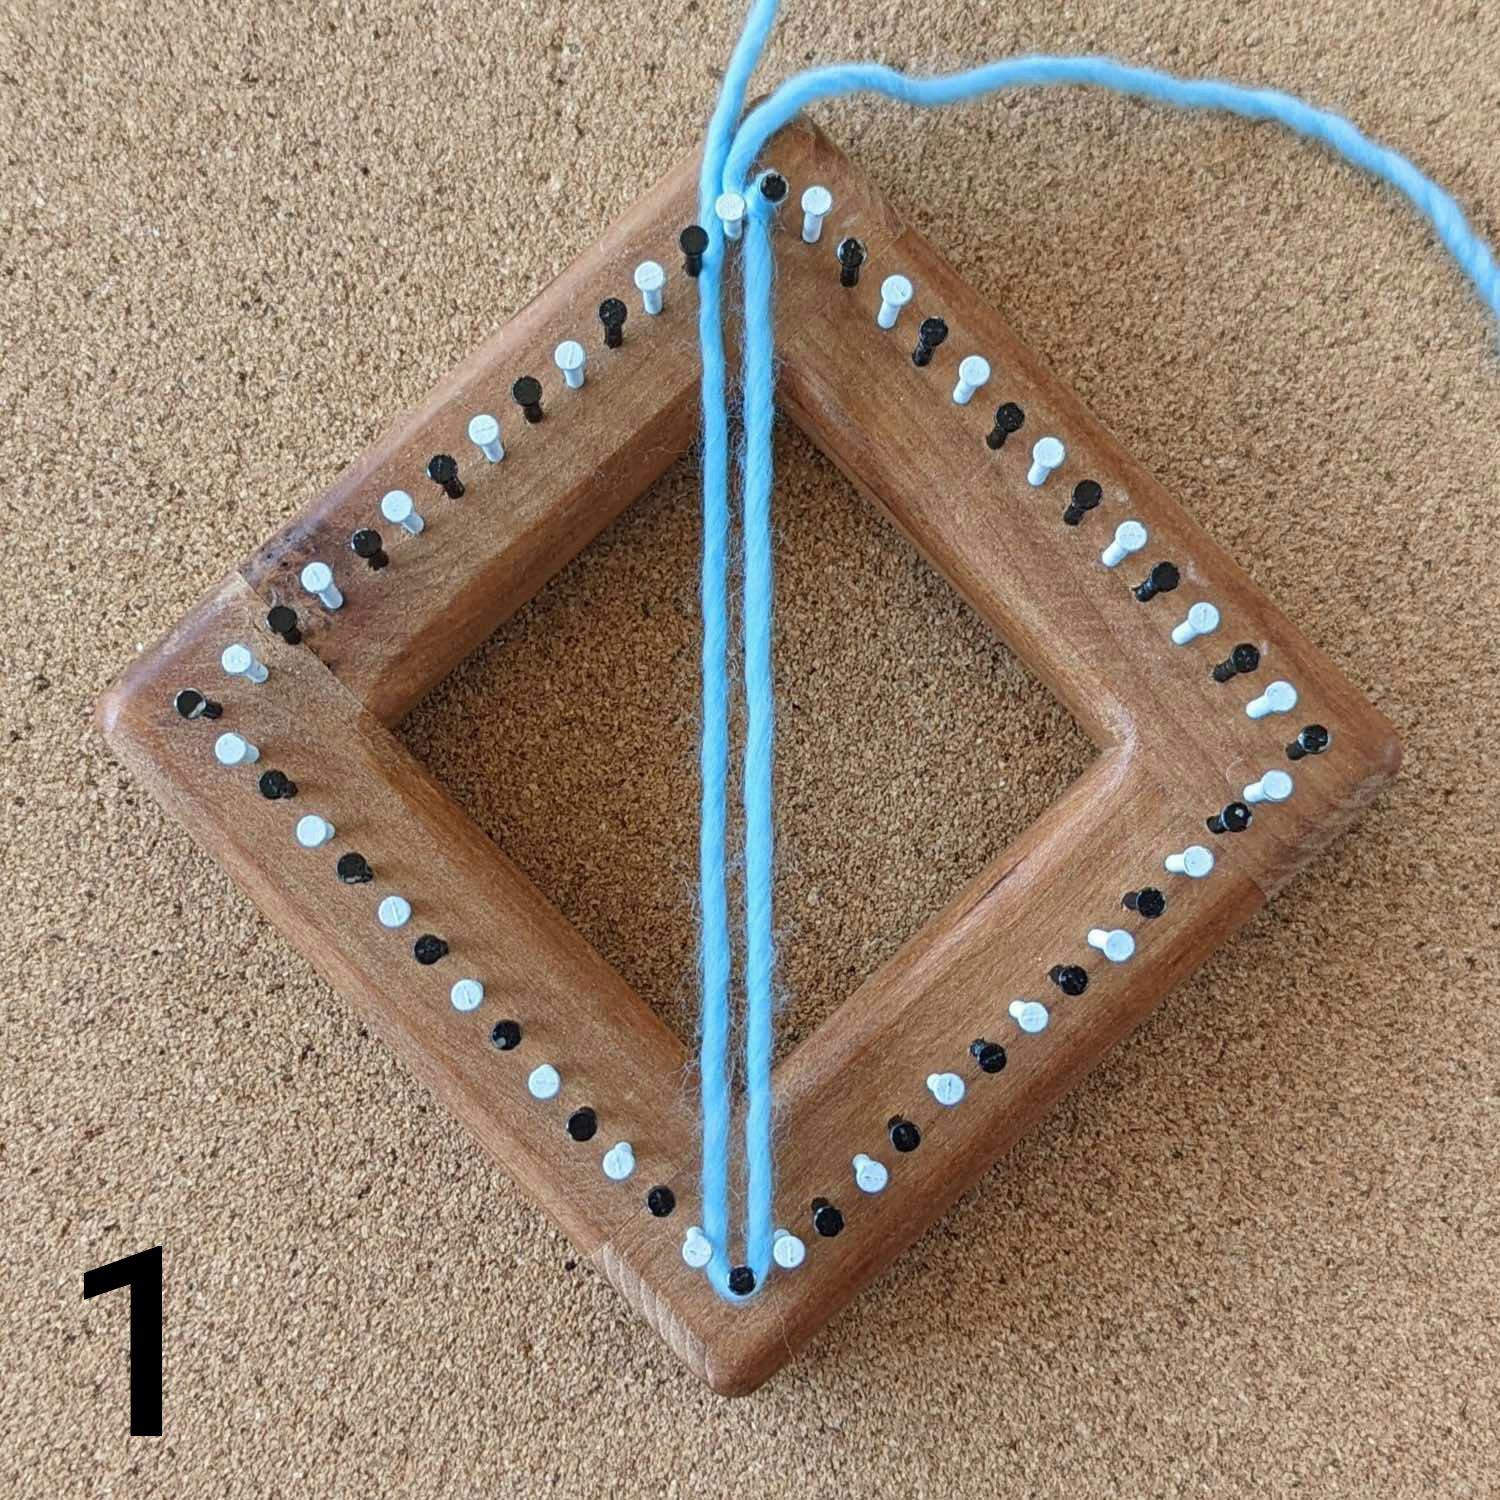
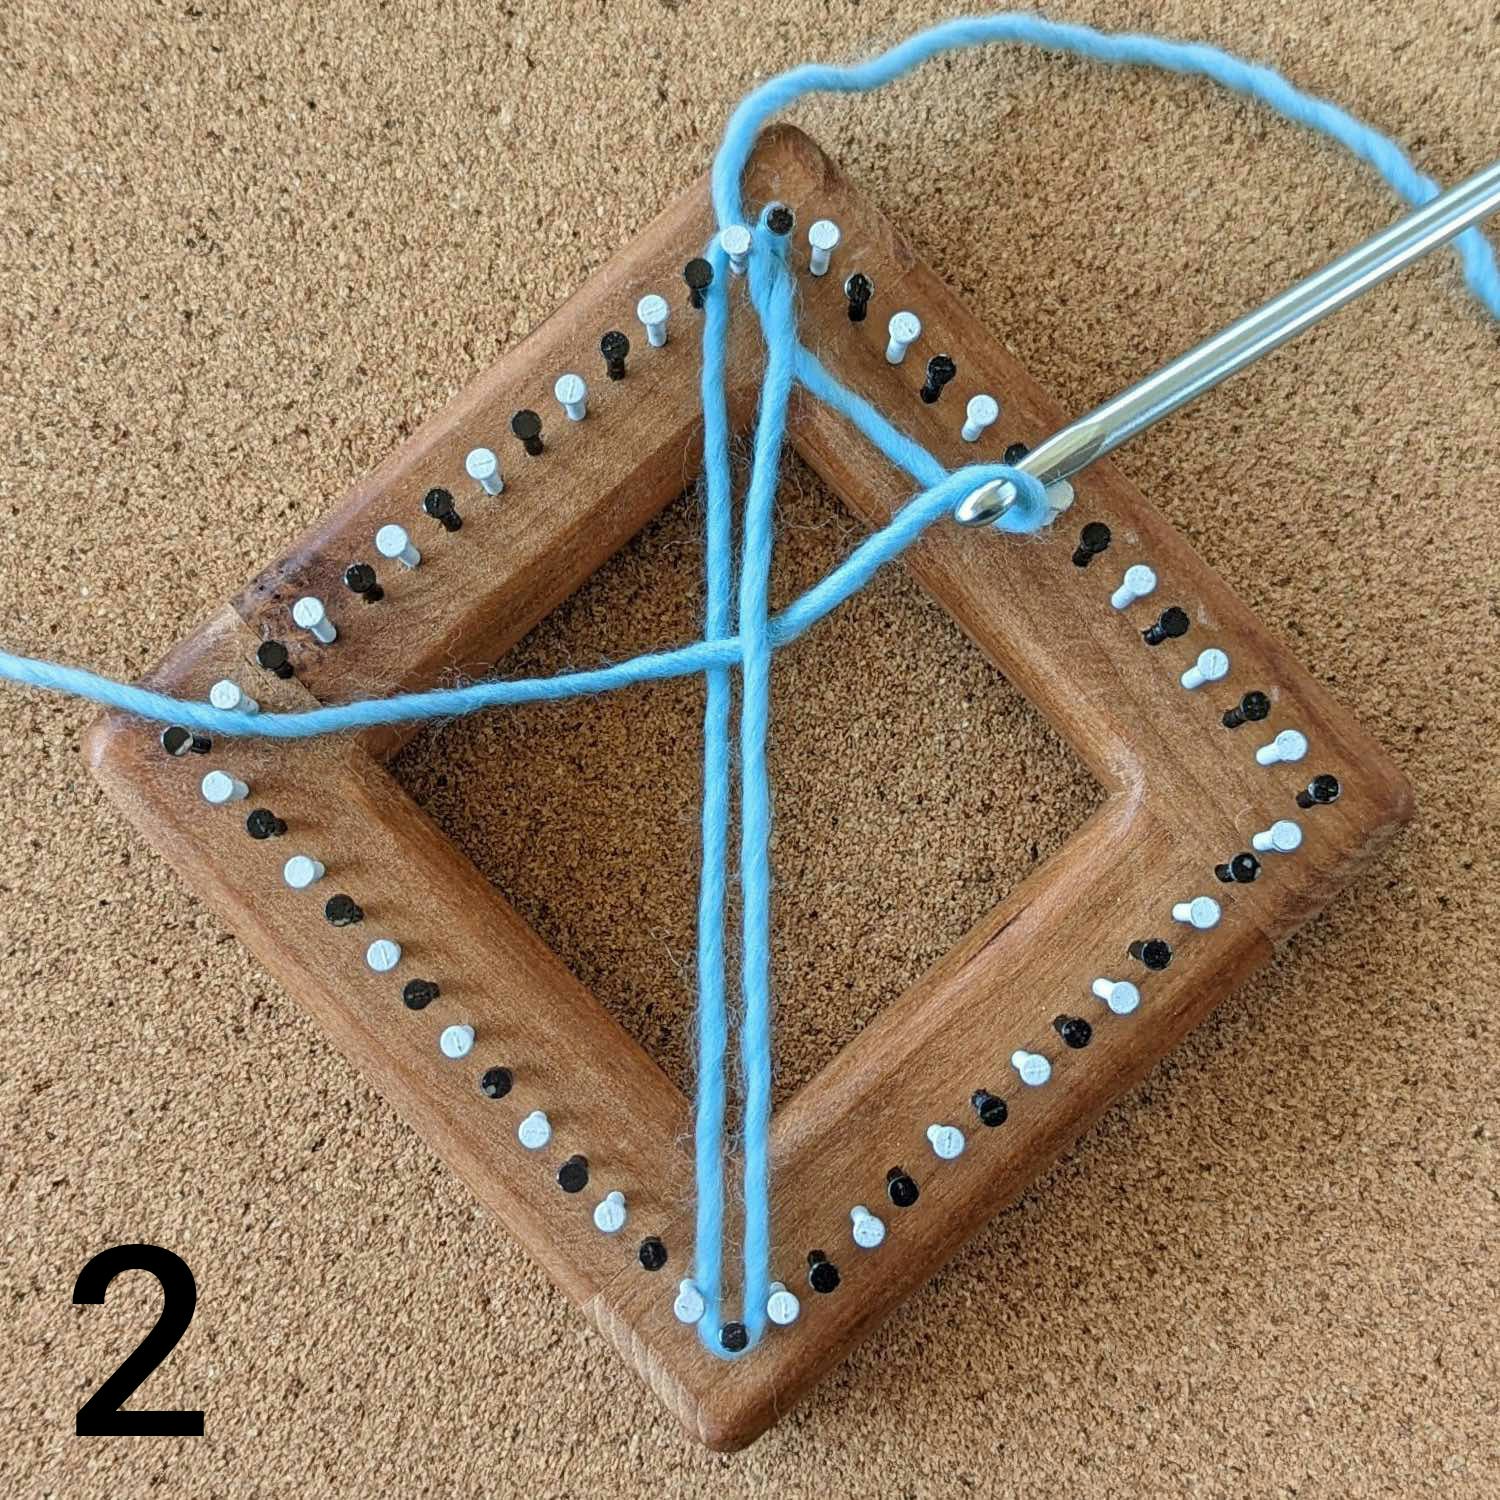
Steps 1-3. Click on each photo in the gallery to see it larger. Process photos by Jennifer Chapman
1.) Orient the loom as a diamond and attach the yarn onto the top nail with a slipknot.
2.) Bring the yarn down to the right side of the bottom nail and around it clockwise, heading back up to the left side of the nail to the left of the starting nail (photo 1).
3.) Move the yarn clockwise around the nail.
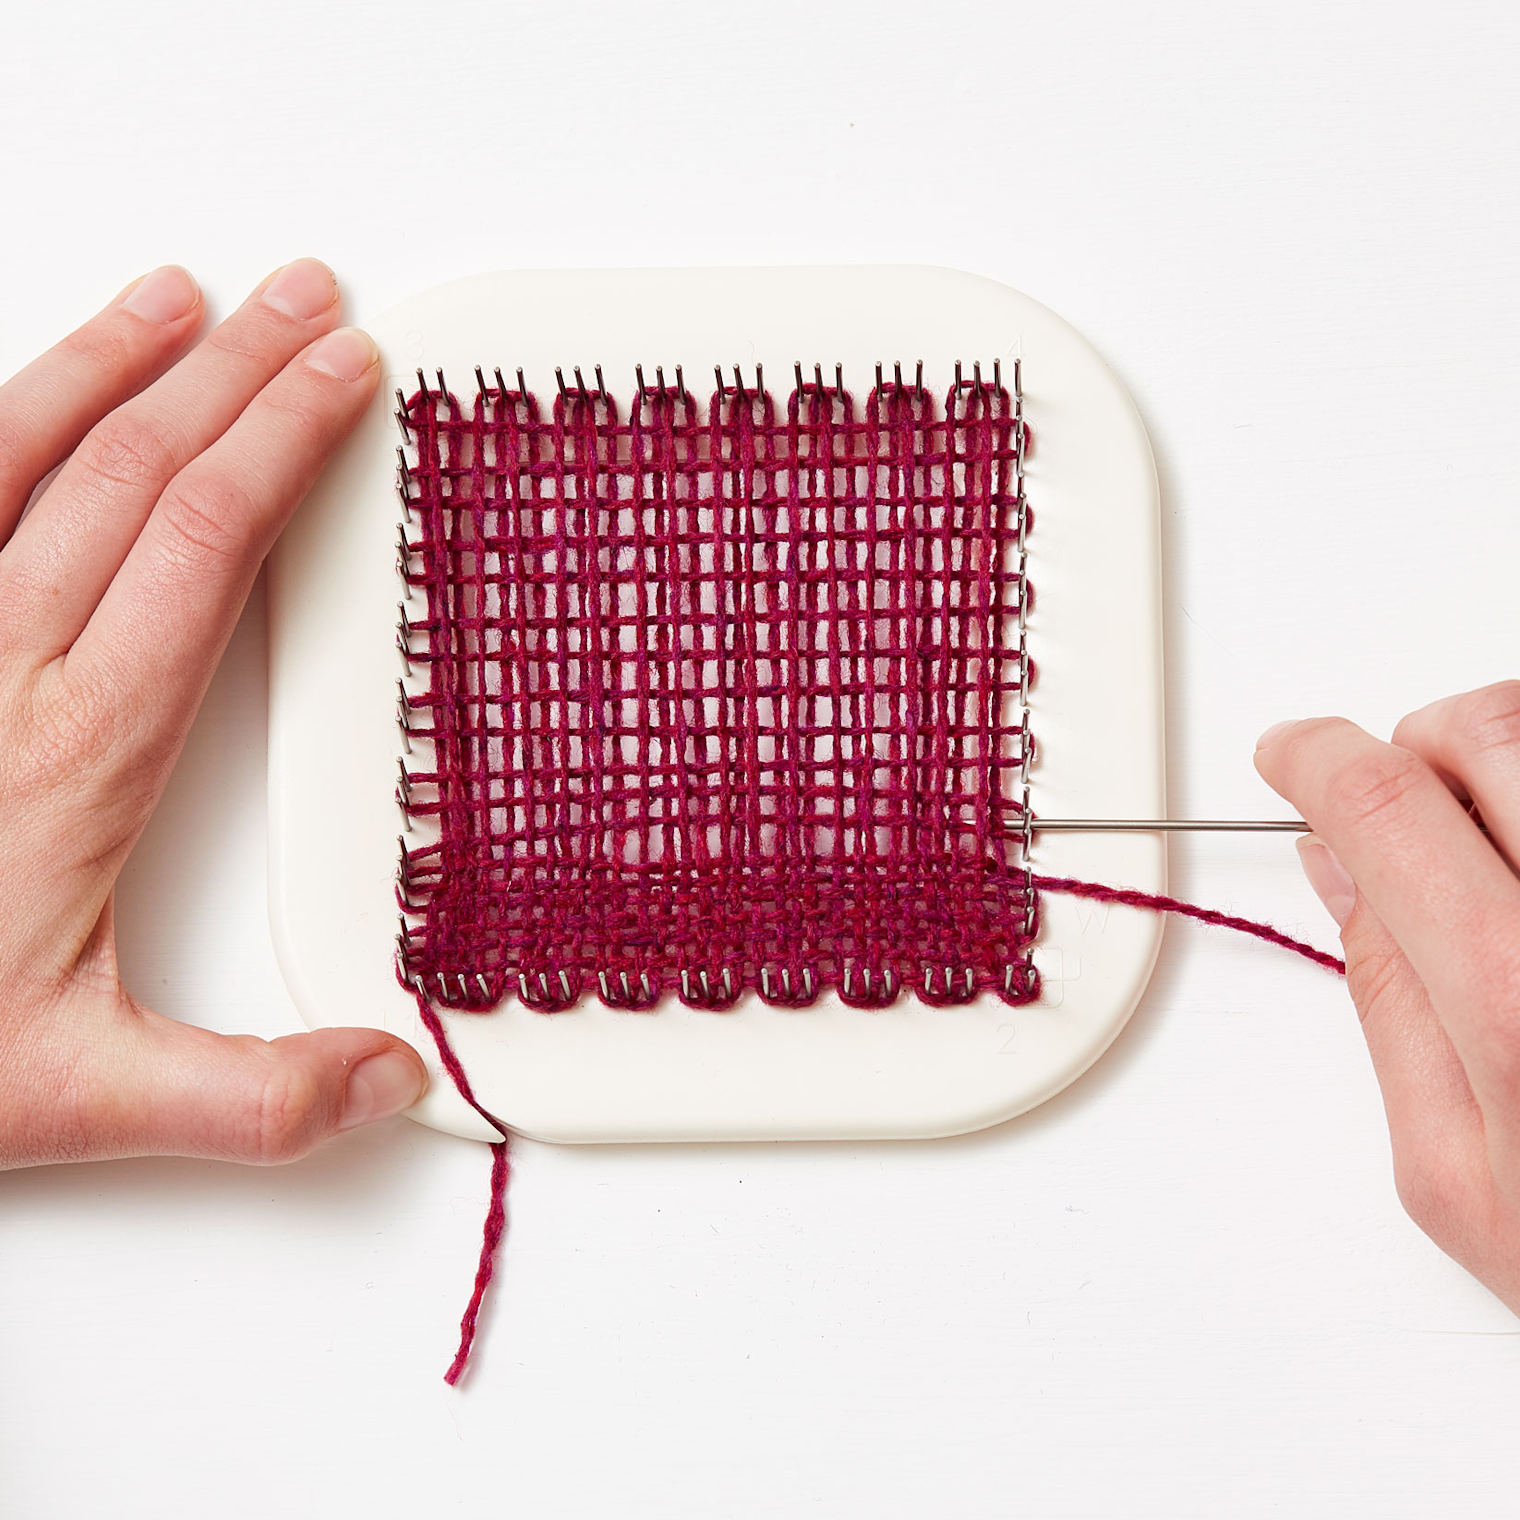
4.) Using a long crochet or locker hook, from the right, weave under the first strand and grab your working yarn (photo 2).
5.) Pull the yarn across and loop it over the nail to the right side of the starting nail.
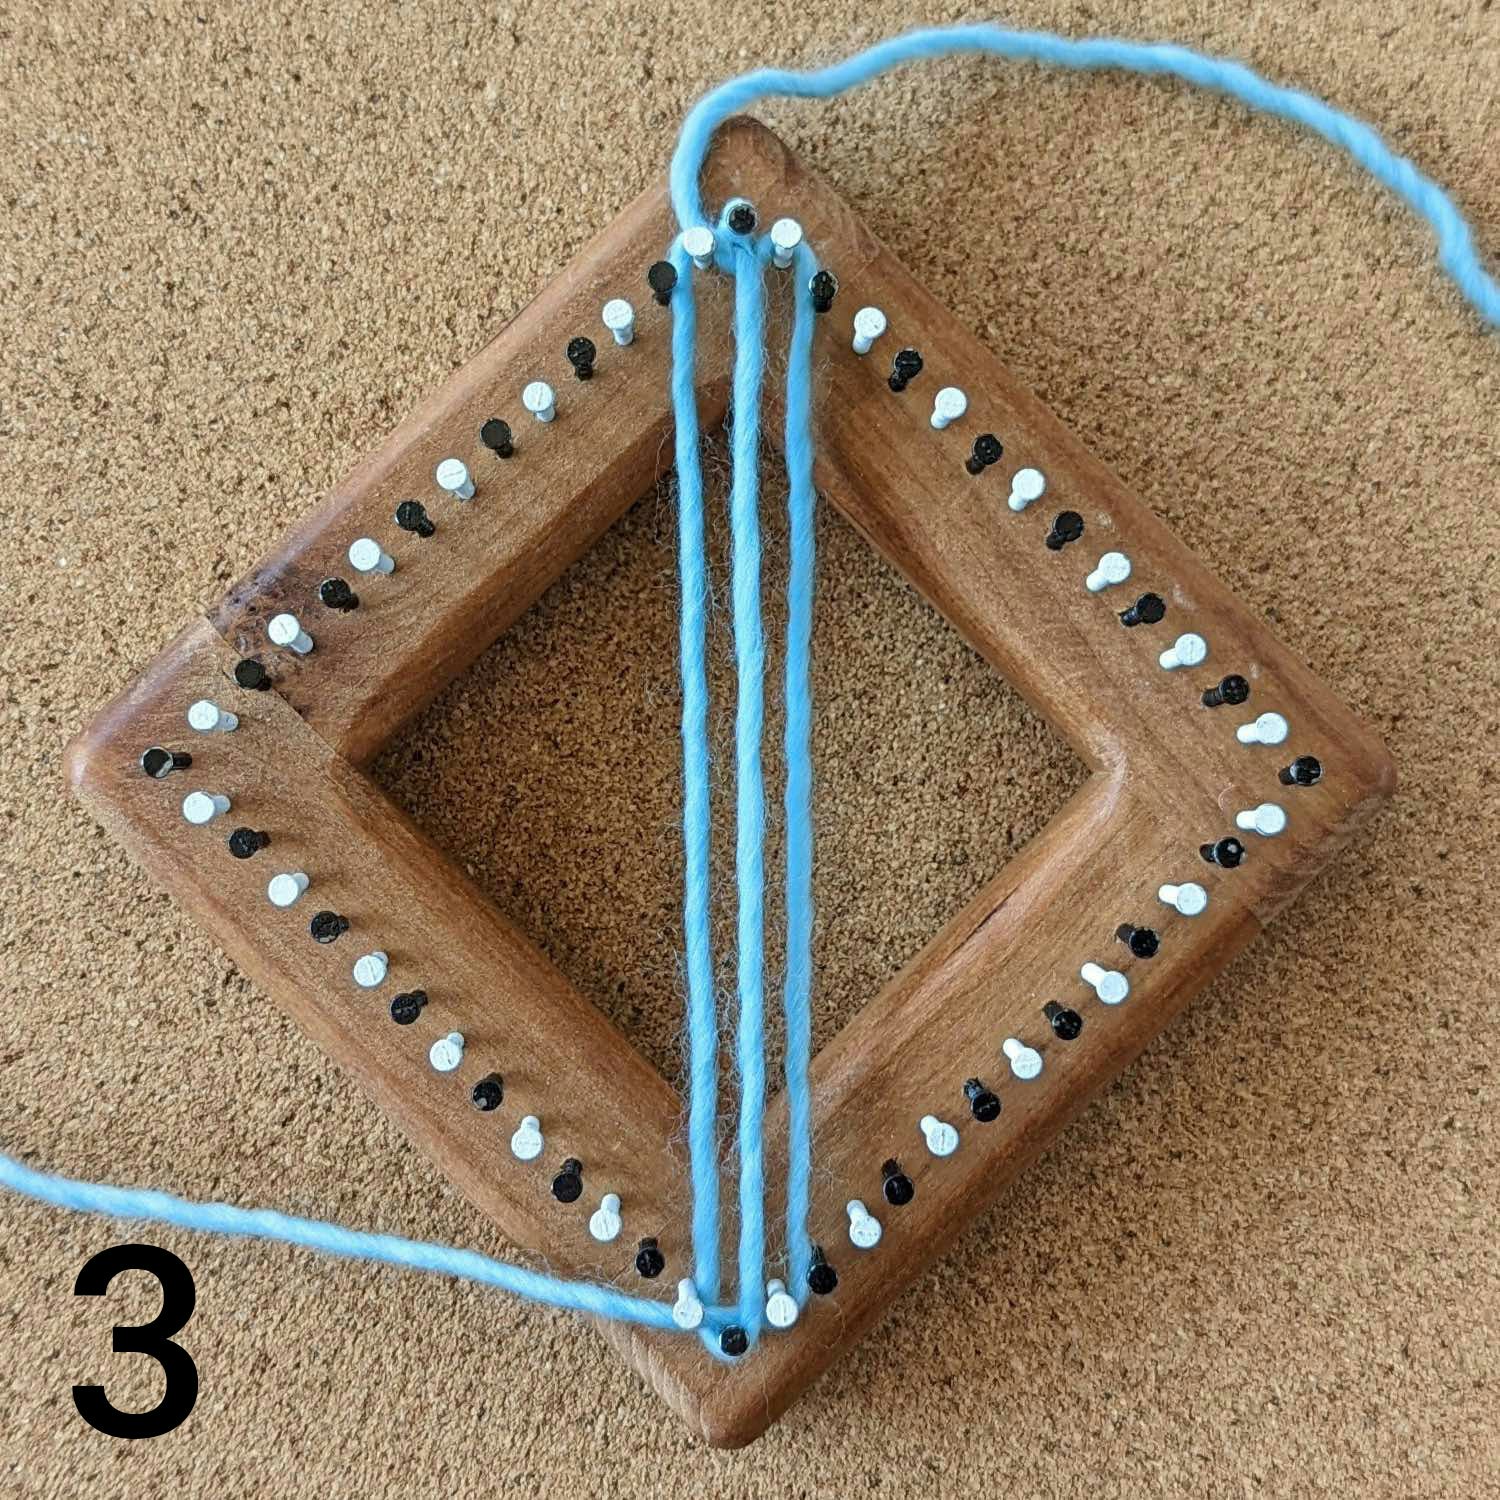
6.) Bring the working yarn down and hook it around the nail to the right of the bottom nail (note that the weaving comes down with you) and across to the nail to the left of the bottom nail (leave a slight arc in the yarn). The first pass is now completed (photo 3).
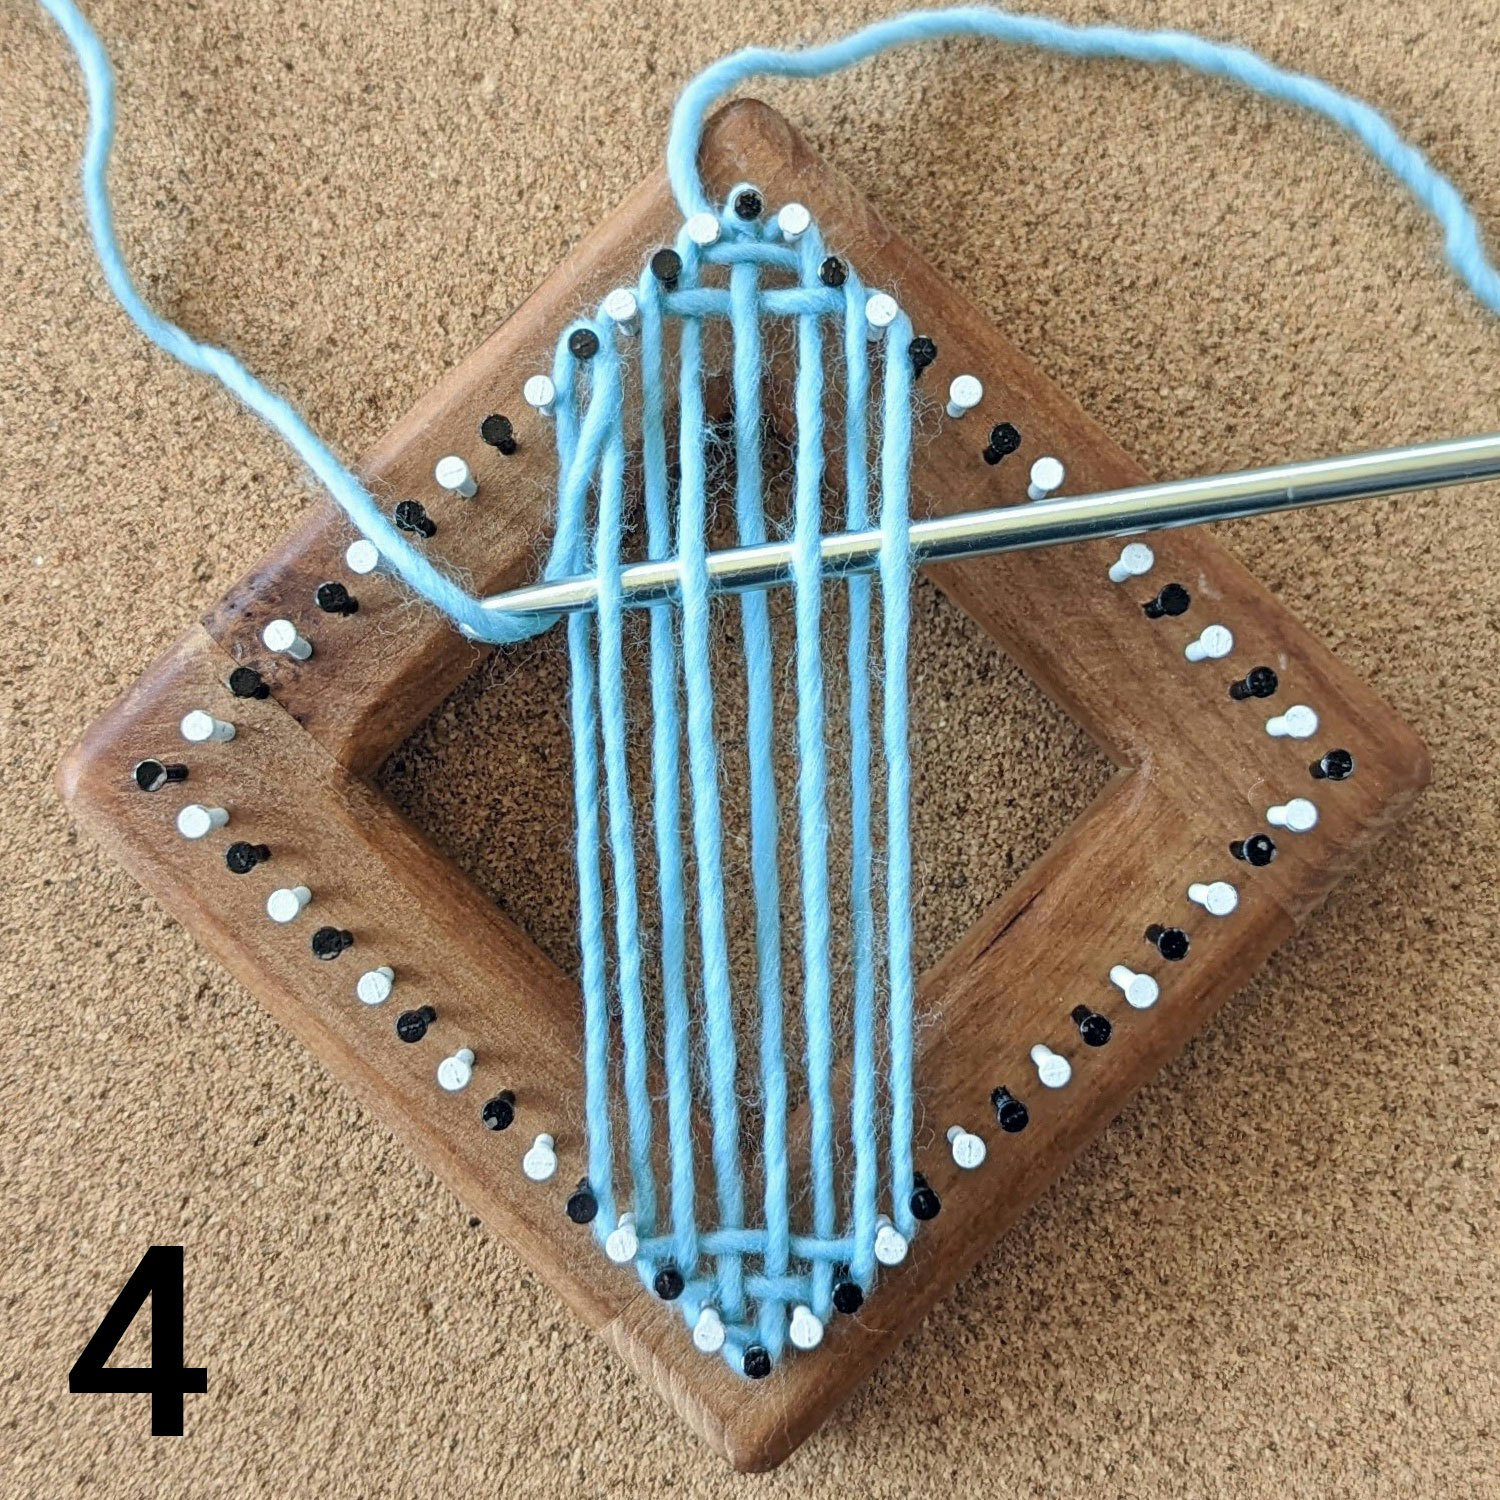
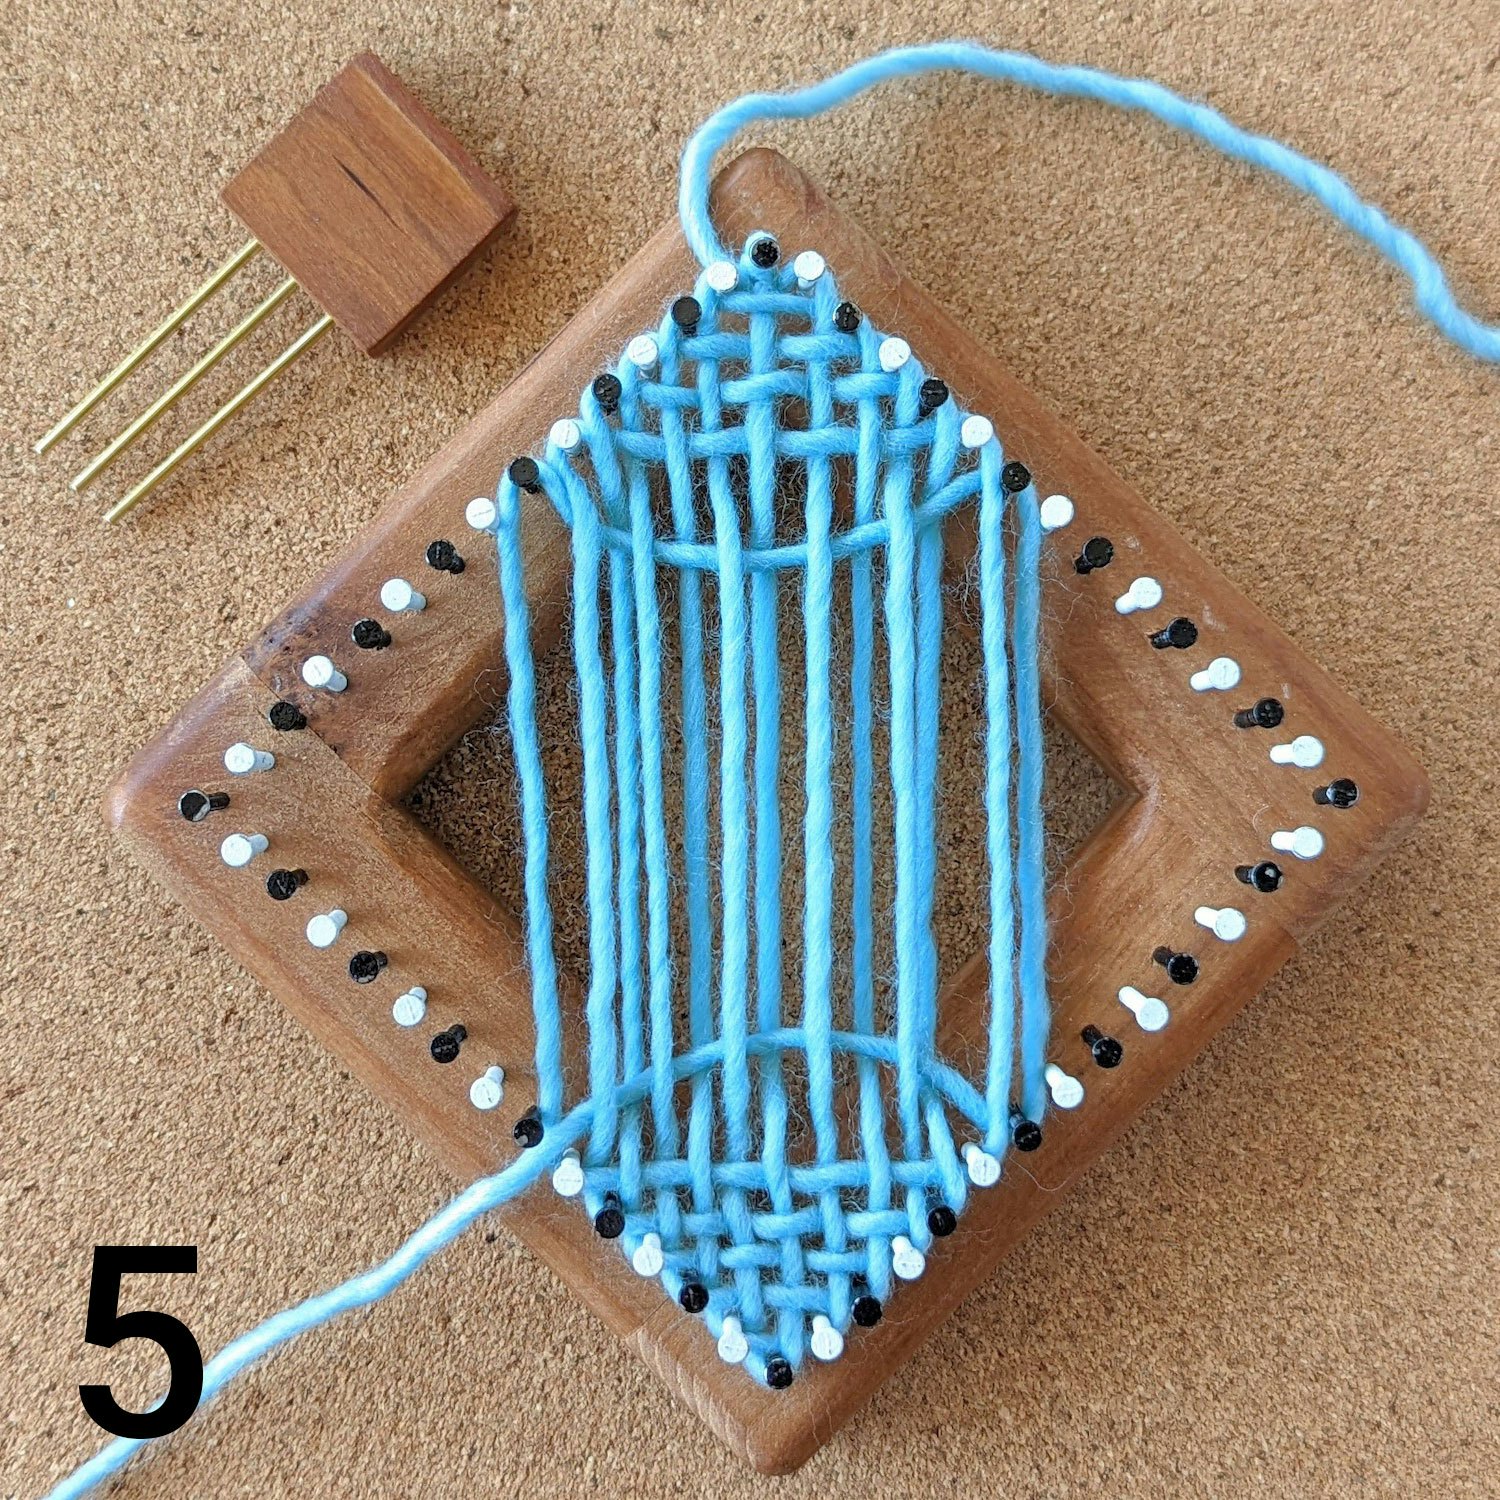
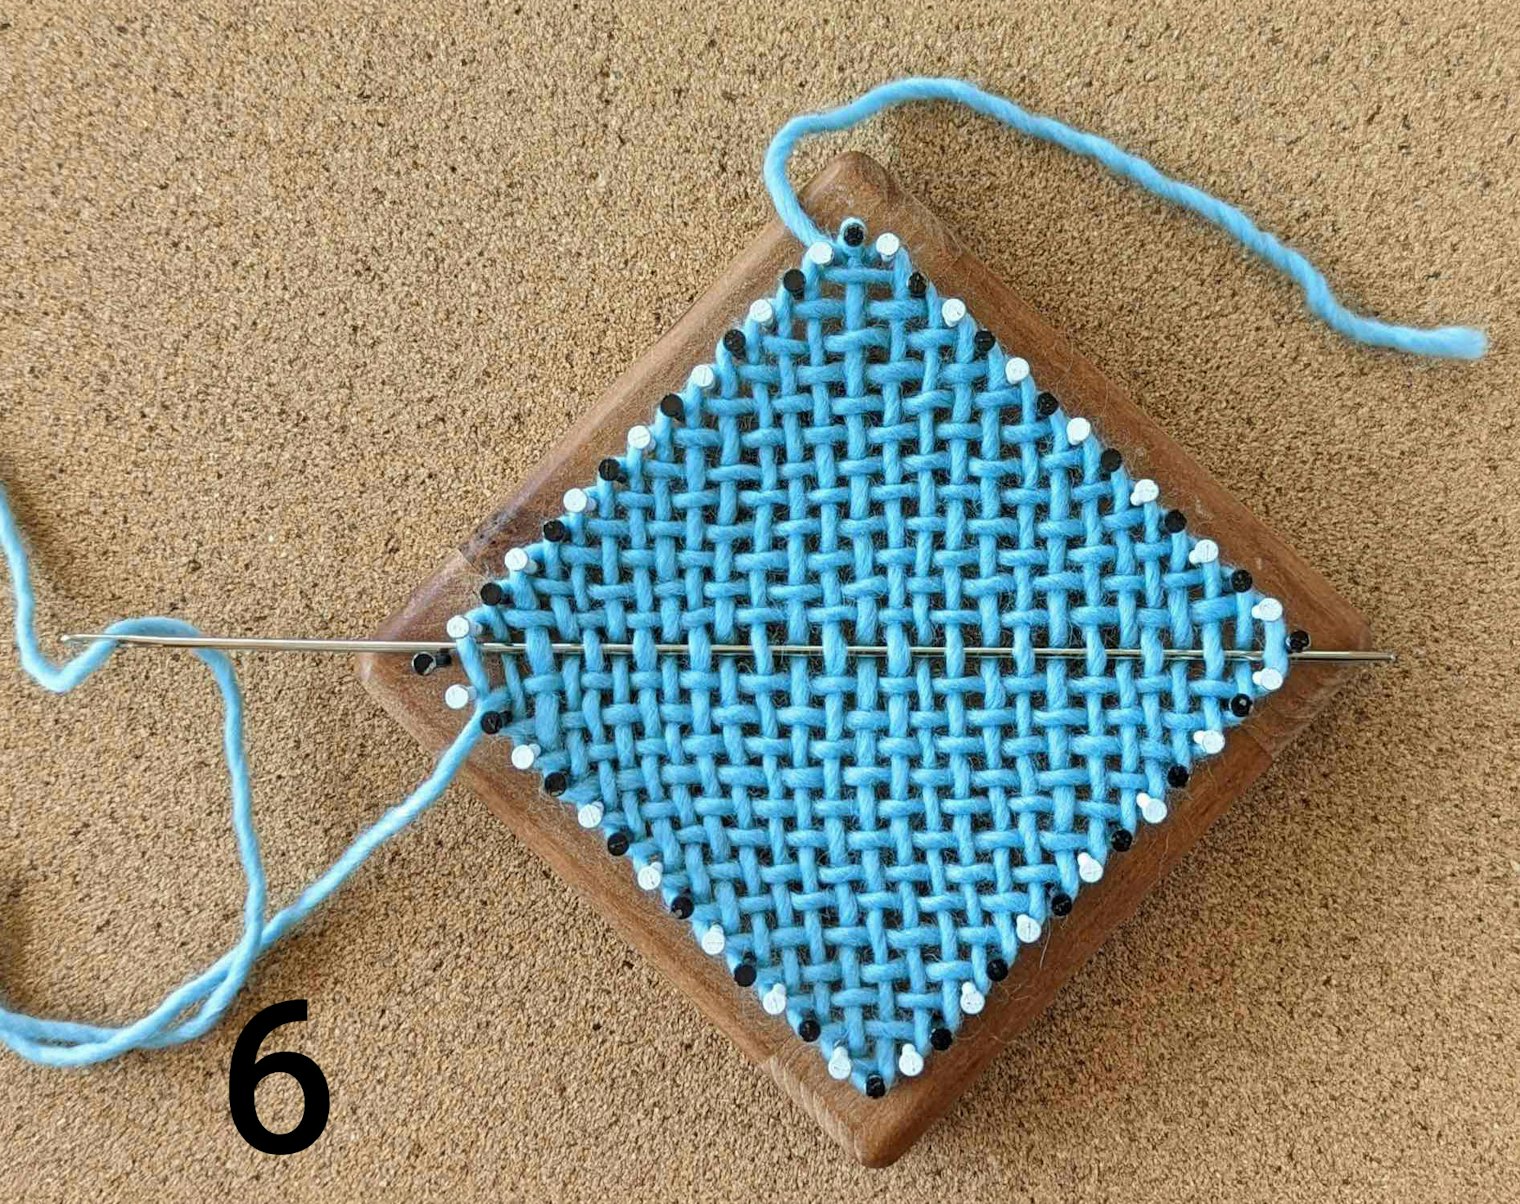
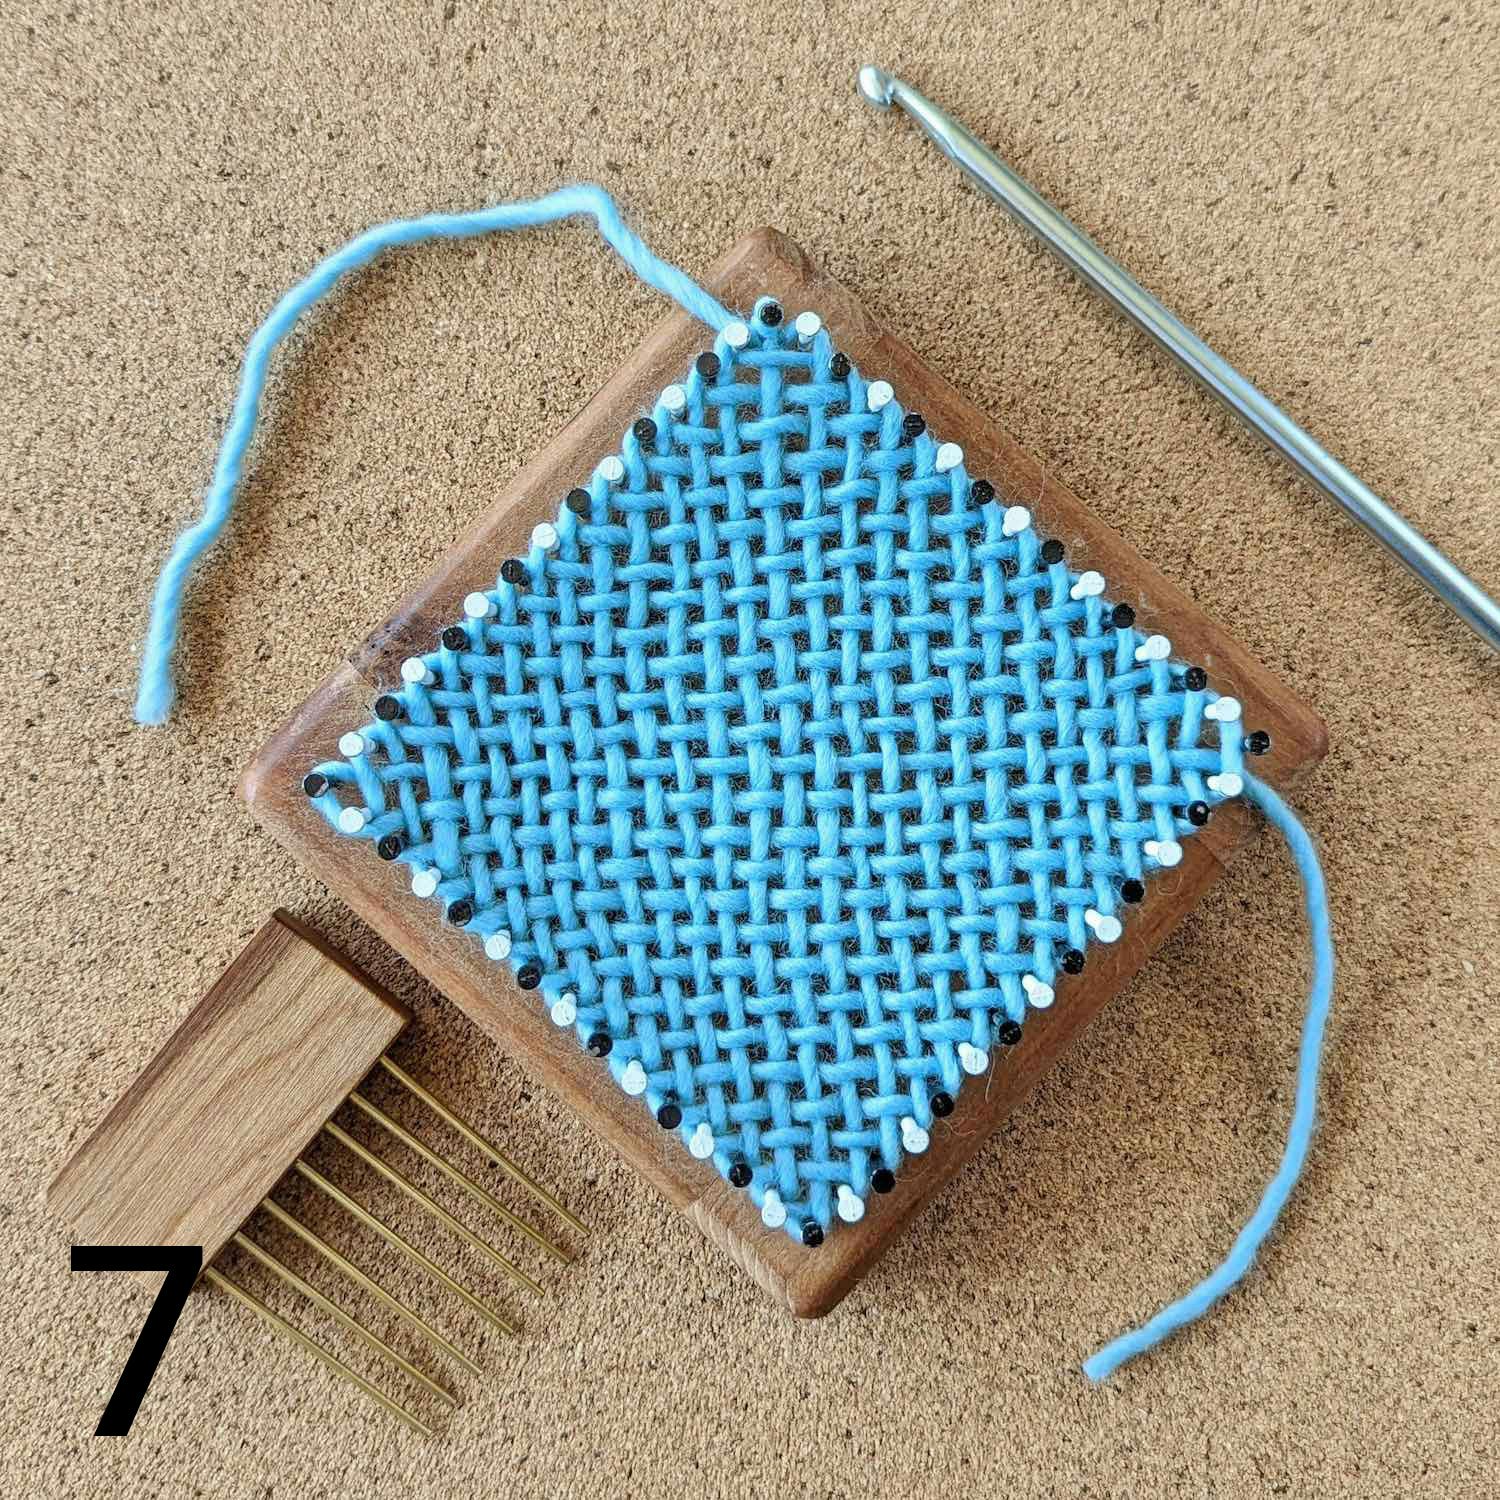
Steps 4-7. Click on each photo in the gallery to see it larger. Process photos by Jennifer Chapman
7.) Bring the yarn back up and hook it around the nail to the left of the previous nail used.
8.) Repeat this process, going around and around the square. Weave under and over the existing rows with the hook to place each new row, and use a packing fork to push down the arc in each row and to make sure the rows stay level and even (photos 4 and 5).
9.) When there is just one row left to weave, cut the yarn, leaving enough to weave the last row. Thread the yarn tail on a long needle or locker hook and weave across (photos 6 and 7).
10.) Carefully remove the completed fabric from the loom.
Now, enjoy testing out your continuous strand–weaving skills with the Ebb and Flow Pillow by Kay Meadors. This gorgeous pillow gets its painterly color changes within each square by weaving with a variegated yarn using the continuous-strand method.
Originally published 6/1/2023; updated 7/30/2026
Give Yourself the Gift of a Weaving Getaway
What’s better than learning to master a new weaving? Doing it among friends, new and old!
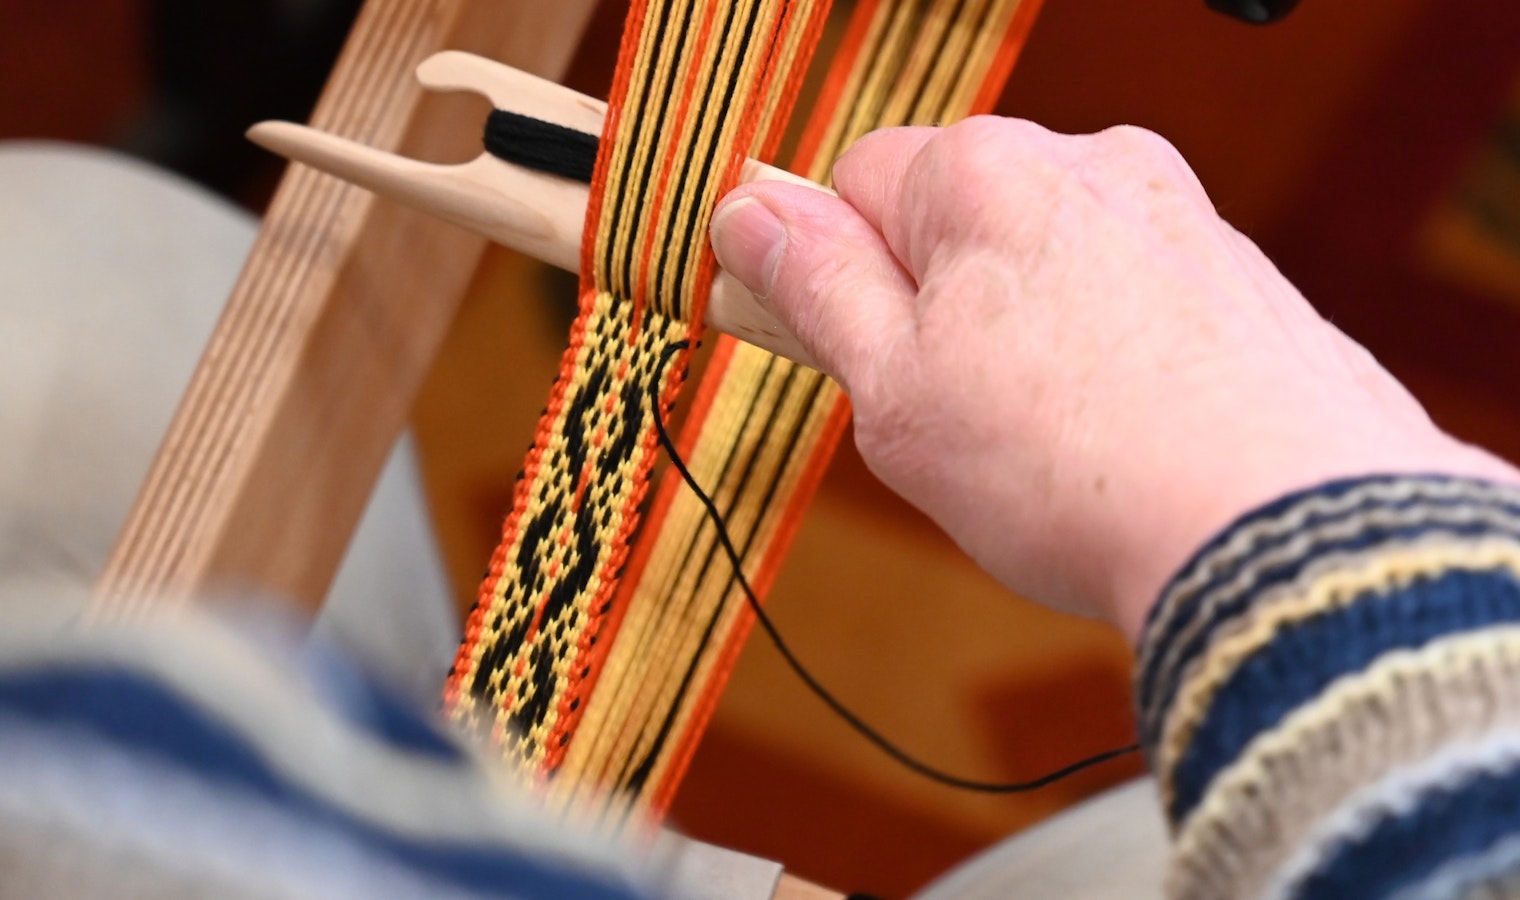
There’s nothing quite like getting compliments and pep talks from fellow weavers who are learning right alongside you. It’s an incredibly uplifting and invigorating experience. But what if you don’t have a community of weavers nearby? Or lugging your loom to your local guild or shop just isn’t an option? That’s where Weave Together with Handwoven comes in. We created this retreat to gather weavers around our shared love of creating cloth.
If you’re not familiar with Weave Together, it’s Long Thread Media’s annual weaving all-inclusive retreat for weavers of all kinds. The four-day event includes:
- Three full days of classes from top-notch teachers
- A bustling marketplace packed with yarn, weaving tools, and other fiber-related goodies
- Fun evening events including some truly fascinating keynote speakers
It’s an opportunity to learn and grow as a weaver with classes for pin-loom, rigid-heddle, inkle, tablet, and multi-shaft weaving. It's also a wonderful chance to build connections and lifelong friendships with fellow loom-lovers!
 Learn new techniques and weaving styles with classes for weavers of all levels. Photos by Long Thread Media
Everyone is welcome at Weave Together—from not-yet-weavers to those who have been at the loom for decades. You can divide your class time between loom types and techniques, or focus your attention on one single area. We designed this event to have it all—and we’d love to have you join us at Weave Together 2027, from March 21–25, 2027, in York, Pennsylvania, for four days of weaving fun!
And I say this not just as somebody who helps run the event, but also as a fellow attendee. I've learned so much from the instructors at Weave Together, both in class and during dinnertime chats. I've made some truly wonderful friends, and I cannot wait to make more at the 2027 event. My only complaint is that by the end of each day my face is usually sore from smiling and laughing so much. You can even see one of my favorite Weave Together memories below, when I got to not just hang out with Tom Knisely, but also see in person the bumper rigid-heddle he wrote about in Little Looms!
 Christina and Tom hold a bumper rigid-heddle at the 2025 Weave Together with Handwoven retreat.
You don’t have to take our word for it. Here’s what past attendees said when we asked them what they loved most about Weave Together:
“The atmosphere of Weave Together seemed so much more relaxed than the regional conferences. It felt cozier and friendly. People seemed to make a larger effort to meet new people—I loved it all!” —Cindy S.
“Being immersed in weaving! Also, I am fan-girling, but meeting all the weavers that write the articles and produce the magazines I love. I tried to play it cool, but that was amazing! I want to continue to grow as a weaver, and it was thrilling to be included in that community.”—Sally L.
“Felt like I have finally found my people!”—Lori Jane N.
We’ve got another amazing lineup of classes for this year’s event, including workshops taught by frequent Easy Weaving with Little Looms designers. You can find all the details about the event, including how to purchase tickets and sign up for classes as well as details about equipment rentals here. Space is limited, so don’t delay.
We hope to see you in Pennsylvania!
6 Easy Ways to Elevate Your Selvedges with Trims
Add extra flair to your selvedges and hems with these terrific trims.
By Christina Garton + Sara C. Bixler + Hazel Spencer + John Mullarkey + Deb Essen
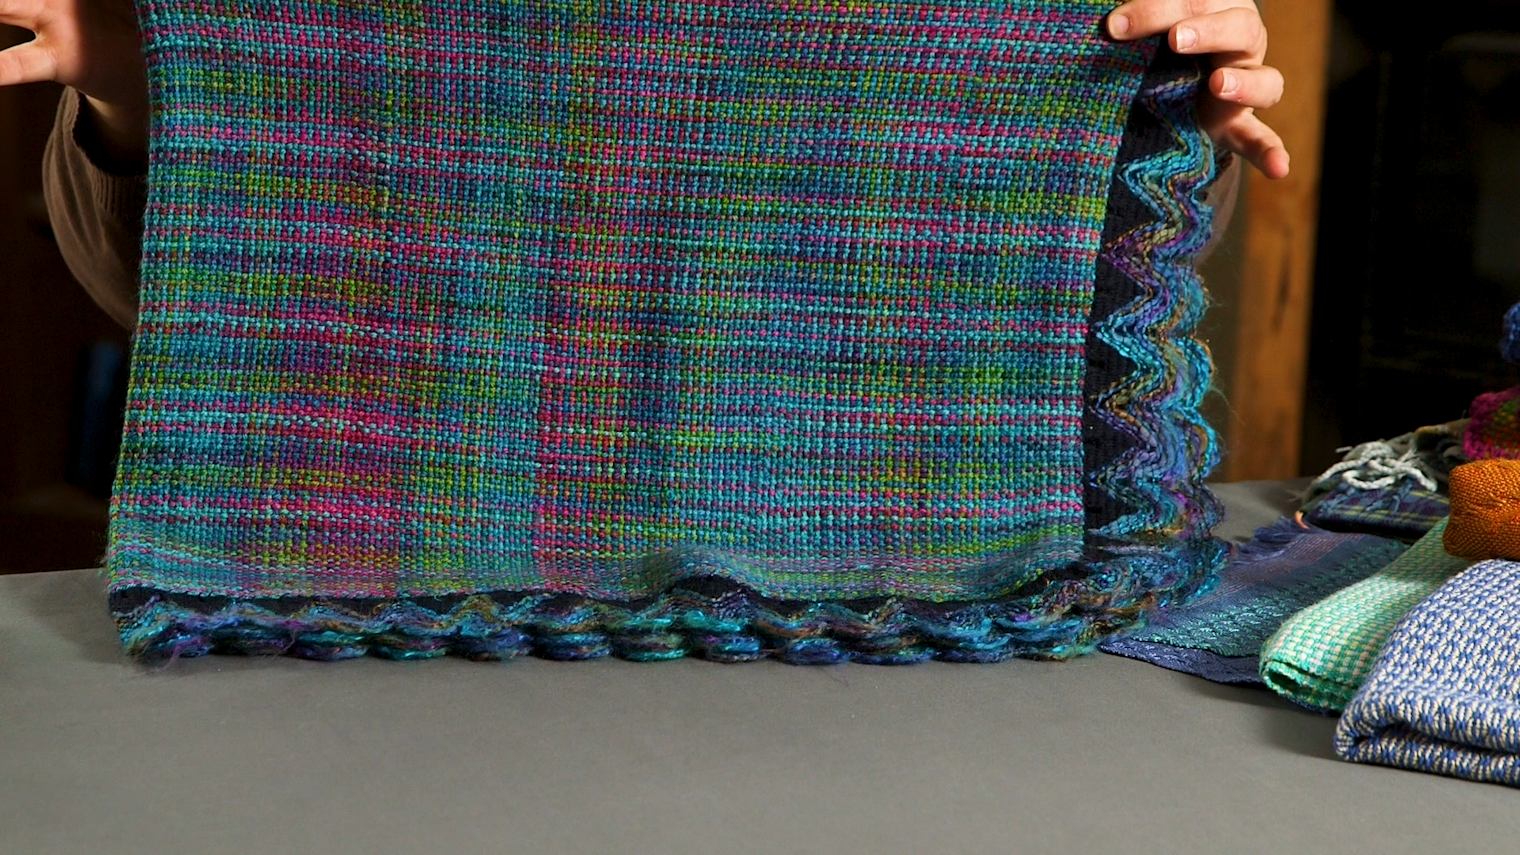
“Wait, you can do that?!” This is a phrase I’ve uttered more than a few times during my 15 years editing weaving magazines as I discover new-to-me tips, tricks, and techniques that go beyond useful and into life-changing territory. While watching the third video in our Spice Up Your Selvedges Series on adding trims and edging to your hems and selvedges, my exclamation was so loud, I scared my dog.
Spice Up Your Selvedges with Trims
I’m sure you’re wondering what it was that got me so excited about trims and edging. I’m sure more of us have seen textiles that use bias tape or satin blanket binding as a trim. In her video, instructor Sara Bixler goes beyond these well-known trims and shows some examples and techniques that take designs to a whole new level. You can see for yourself in the video below!
What I appreciated about Sara’s approach to adding these trims was how much they added to the overall aesthetic of the finished item. Sara’s use of twill tape is a perfect example. The tape is store-bought but looks handwoven, so when it’s added to the hem of a rag rug, it doesn’t stick out and distract from the rest of the weaving. On the other side of the spectrum, both Sara’s handmade braided rug trim and her store-bought trim not only match her weaving perfectly, but they also add just the right touch of flair.
More Ideas
After watching the video, I was reminded of some previous projects in Little Looms and Handwoven where weavers used methods similar Sara’s to finish their hems and selvedges. Here are just three fun examples of what’s out there.
Bespoke Pin-Loom Fringe
 Hazel Spencer wove her own bespoke loopy fringe on a pin loom. Photo by Matt Graves
Did you know you can use pin looms to weave fringed edging? Designer Hazel Spencer did just that in her The Fringe Element pillow from the Fall 2022 issue. She used a rectangular pin loom to make a delightfully loopy fringe attached to a plain-weave base. It’s such a simple weave, and it adds so much to the finished project. She used a 3½" x 14" rectangle loom, but you can use her method on pretty much any size of rectangular loom, and I bet it would work on bias-style square pin looms, too.
Embroider your Edge Treatments
 Deb Essen elevated a simple store-bought bias-tape trim with a bit of embroidery in her Building Blocks Blanket from the Fall 2022 issue. Photo by Matt Graves.
Want to use a store-bought trim, but want to make it feel a bit more homemade? Try adding a simple bit of stitching. In her Building Blocks Blanket, also from Fall 2022, designer Deb Essen trimmed her blanket with a simple bias tape. Instead of leaving it at that, she embroidered the trim with a simple herringbone design. This extra touch really helps take an otherwise simple trim treatment to the next level.
Inkle and Tablet Trims

John Mullarkey trimmed his Controlled Chaos Vest from Handwoven September/October 2011 with a showstopping tablet-woven band. Photo by Joe Coca.
Okay, so this one is probably cheating because it’s something we’ve not had (yet) in Little Looms, but I’ve seen over the years in Handwoven: Using bands as trims. John Mullarkey’s Controlled Chaos vest from Handwoven September/October 2011 is a great example of using handwoven bands as trim. Now, technically he didn’t use it on his selvedges, but he does use it as a way to enhance the edging of the vest. You could easily use inkle- or tablet-woven bands to trim not just wearables, but also rugs, placemats, and anything else your heart desires.
These are just a few of the many possibilities—I didn’t even touch on kumihimo, rope, or passementerie. There’s a whole world of exciting ways to take your trim to the next level, have fun exploring!
Happy Weaving,
Christina
A Celebration of Stripes: Call for Submissions Fall 2027
We're looking for striped projects of all kinds for our Fall 2027 issue—and that includes plaids and checks, too!

“With the exception of space-dyed warps, all warps are either striped or solid.” When I read these words, in an article by Susan E. Horton, I mentally stopped in my tracks. Now while part of my brain immediately trying to think of other exceptions to the rule, the rest was ruminating on the important role stripes play in weaving design.
Stripes on their own, either in the warp or weft are beautiful, but you can also combine them to create checks, plaids, and countless other patterns. As I thought more about stripes, I took the time to look at two past issues of Handwoven, both dedicated to striped patterns, and was blown away by all the variations on this simple pattern. For example, what if we thought about stripes not just in terms of color, but also texture? A solid-colored fabric with ribs has stripes. You can also have stripes of lace or other hand-manipulated weaves.
The more I thought about stripes, the more excited I became. So of course when it came time to think of a theme for the Fall 2027 issue, I knew I only had one choice: Stripes!
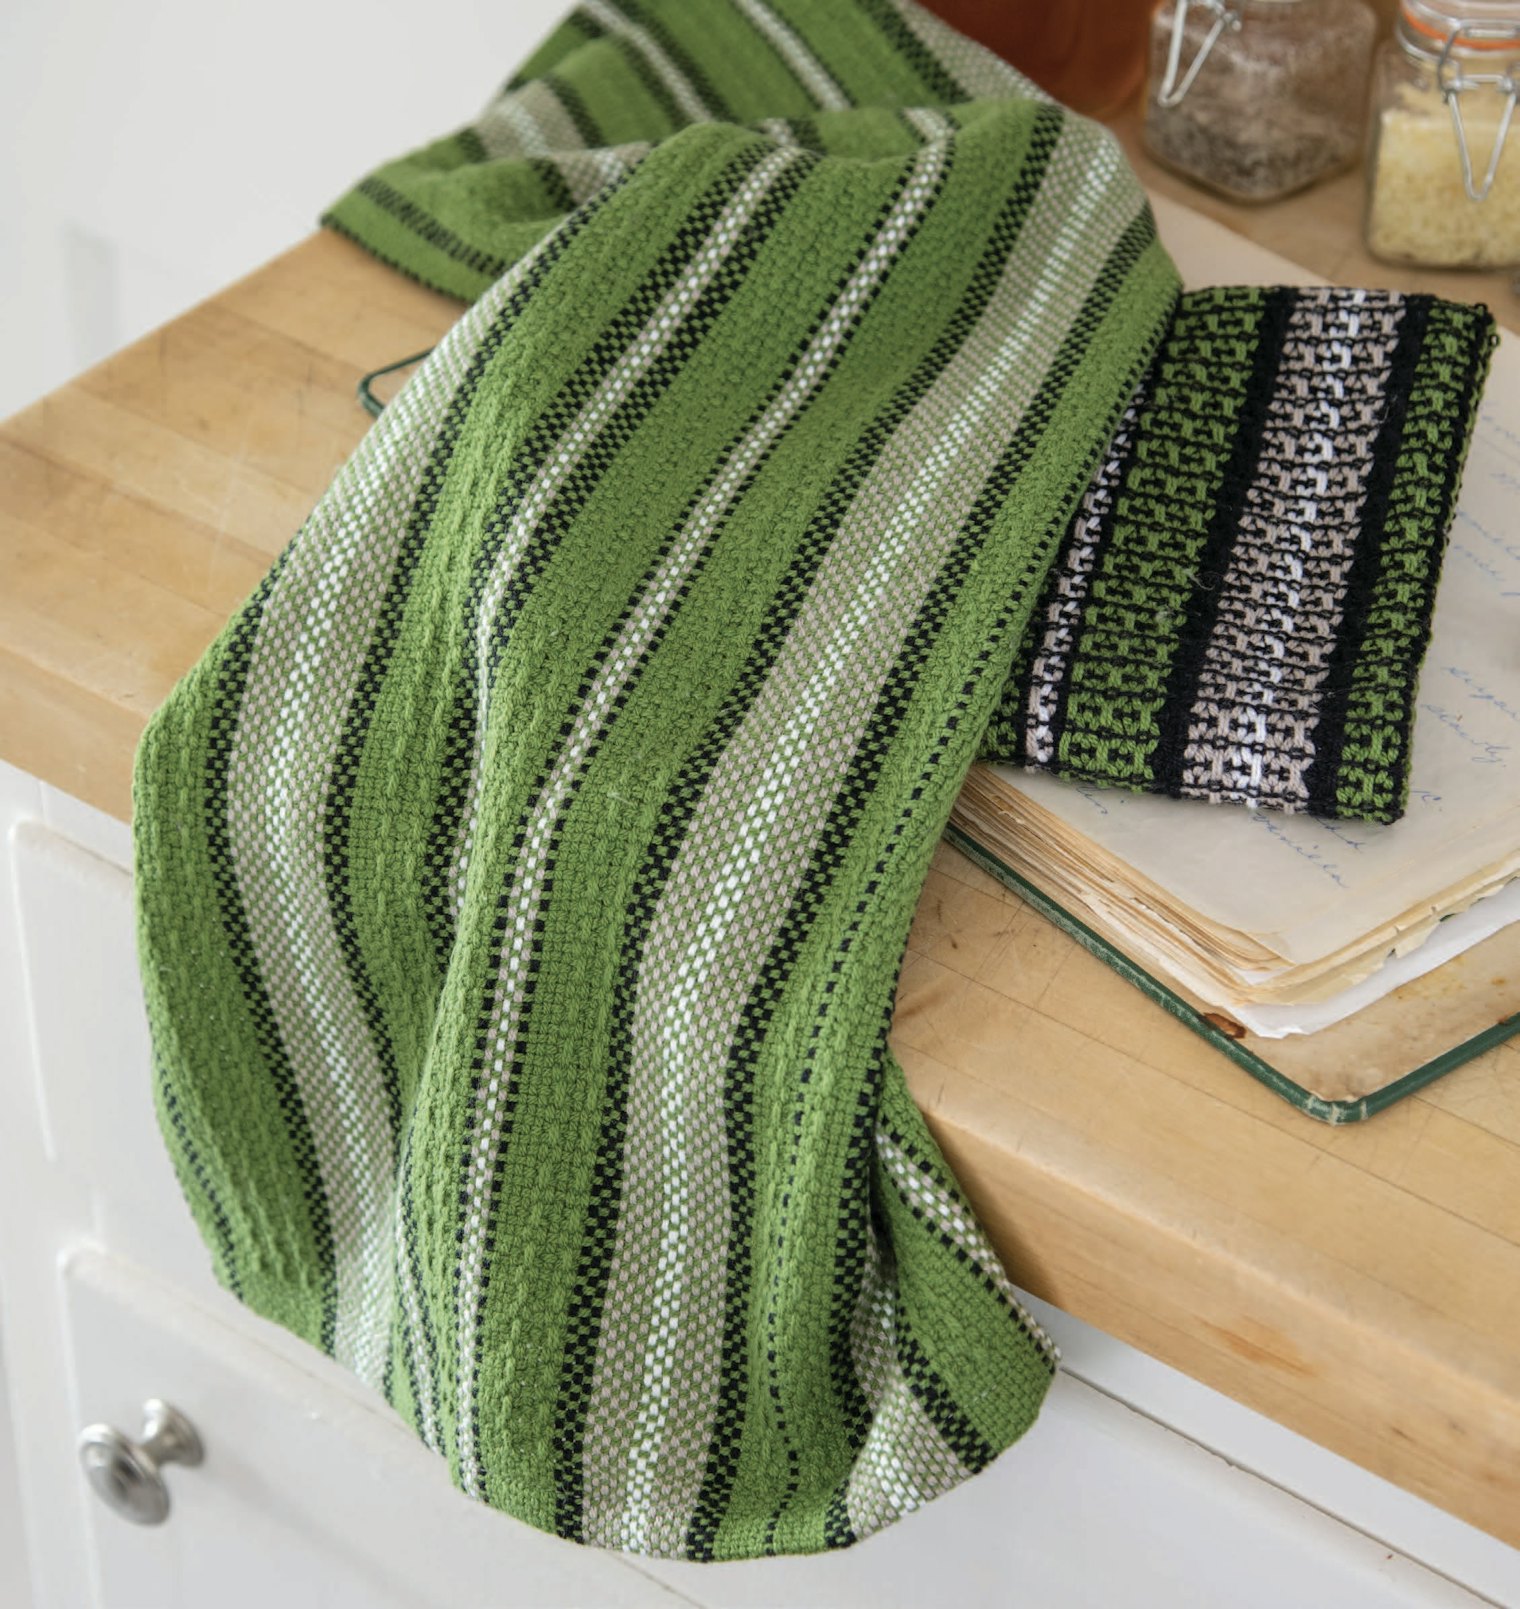 Modern Stripe Tea Towels by Tammy Bast from Holiday 2021. Photo by Matt Graves.
What We’re Looking For
Project Specifications
For this issue, we’re looking for a variety projects that explore the different ways stripes can be used in weaving including all kinds of striped patterns (you can find a glossary of stripes here), checks, and plaids, as well as textural stripes. Stripes can be created using color, texture, and/or hand-semanipulation techniques. Stripes created using color pooling will also be accepted, as well checks and plaids created by using self-striping yarn in the warp and weft.
We value beginner-friendly projects just as much as those with more advanced techniques and try to have projects for all levels of weavers in each issue. If you have an idea for a plain-weave design, we’d love to see it! You also don’t need to be an advanced or previously published weaver to submit a proposal—all you need is a good idea.
All yarns need to be commercially available—projects made from handspun or discontinued yarns will not be accepted, with the exception of wefts made from garden materials. Hand-dyed yarns will be allowed as long as either the yarn is available for sale or instructions are given in the project for dyeing the yarn.
As usual, all projects need to be woven on a rigid-heddle, tapestry, pin, inkle, frame, or band loom—tablet and backstrap weaving count as projects woven on band looms.
 Gathering of Plaids Thros by Kelly Sessions. Photo by Matt Graves.
Types of Projects
For this issue, we’d like to showcase a variety of project types as well as ways in which the theme is interpreted. We want a balance of item types including wearables, home decor, kitchen linens, and bags.
Examples of projects include:
- Projects inspired by traditional striped/checked fabrics such as mattress ticking, seersucker, pinstripes, gingham, and tartans.
- A set of towels or napkins woven on a striped warp where weach item in the set approaches the weft differently (pick-up, weft stripes, etc.).
- Rep-weave coasters or placemats
- Curtains with stripes of lace
- Scarves and shawls woven using variegated or self-striping yarn
- Crammed-and-spaced fabrics of all kinds
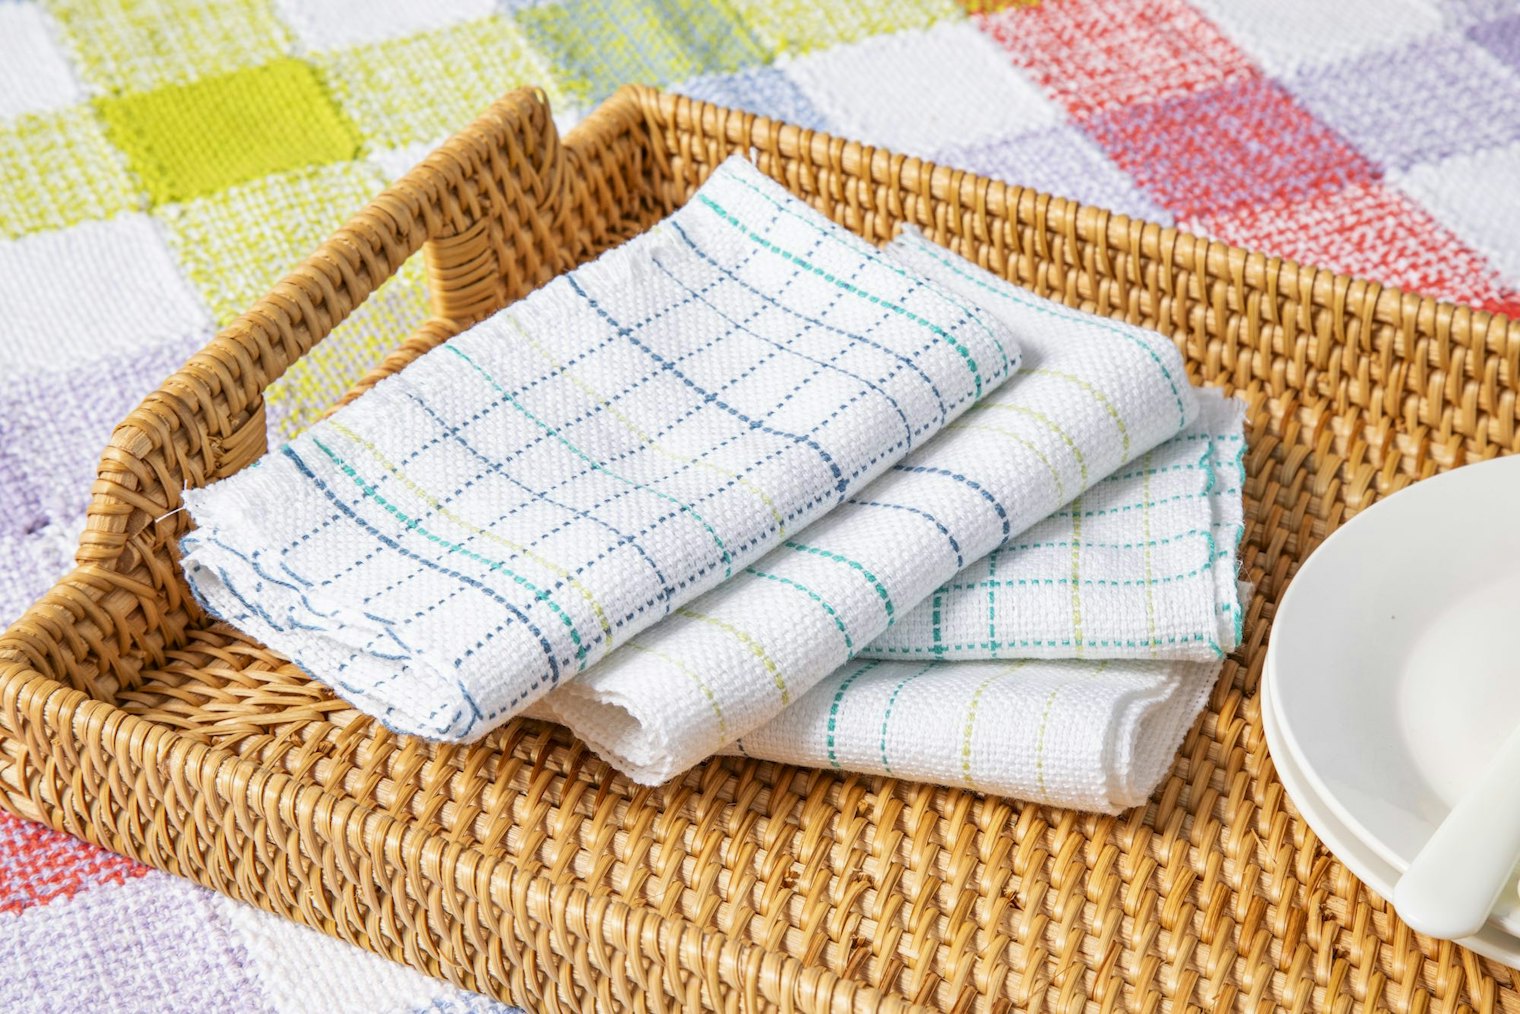
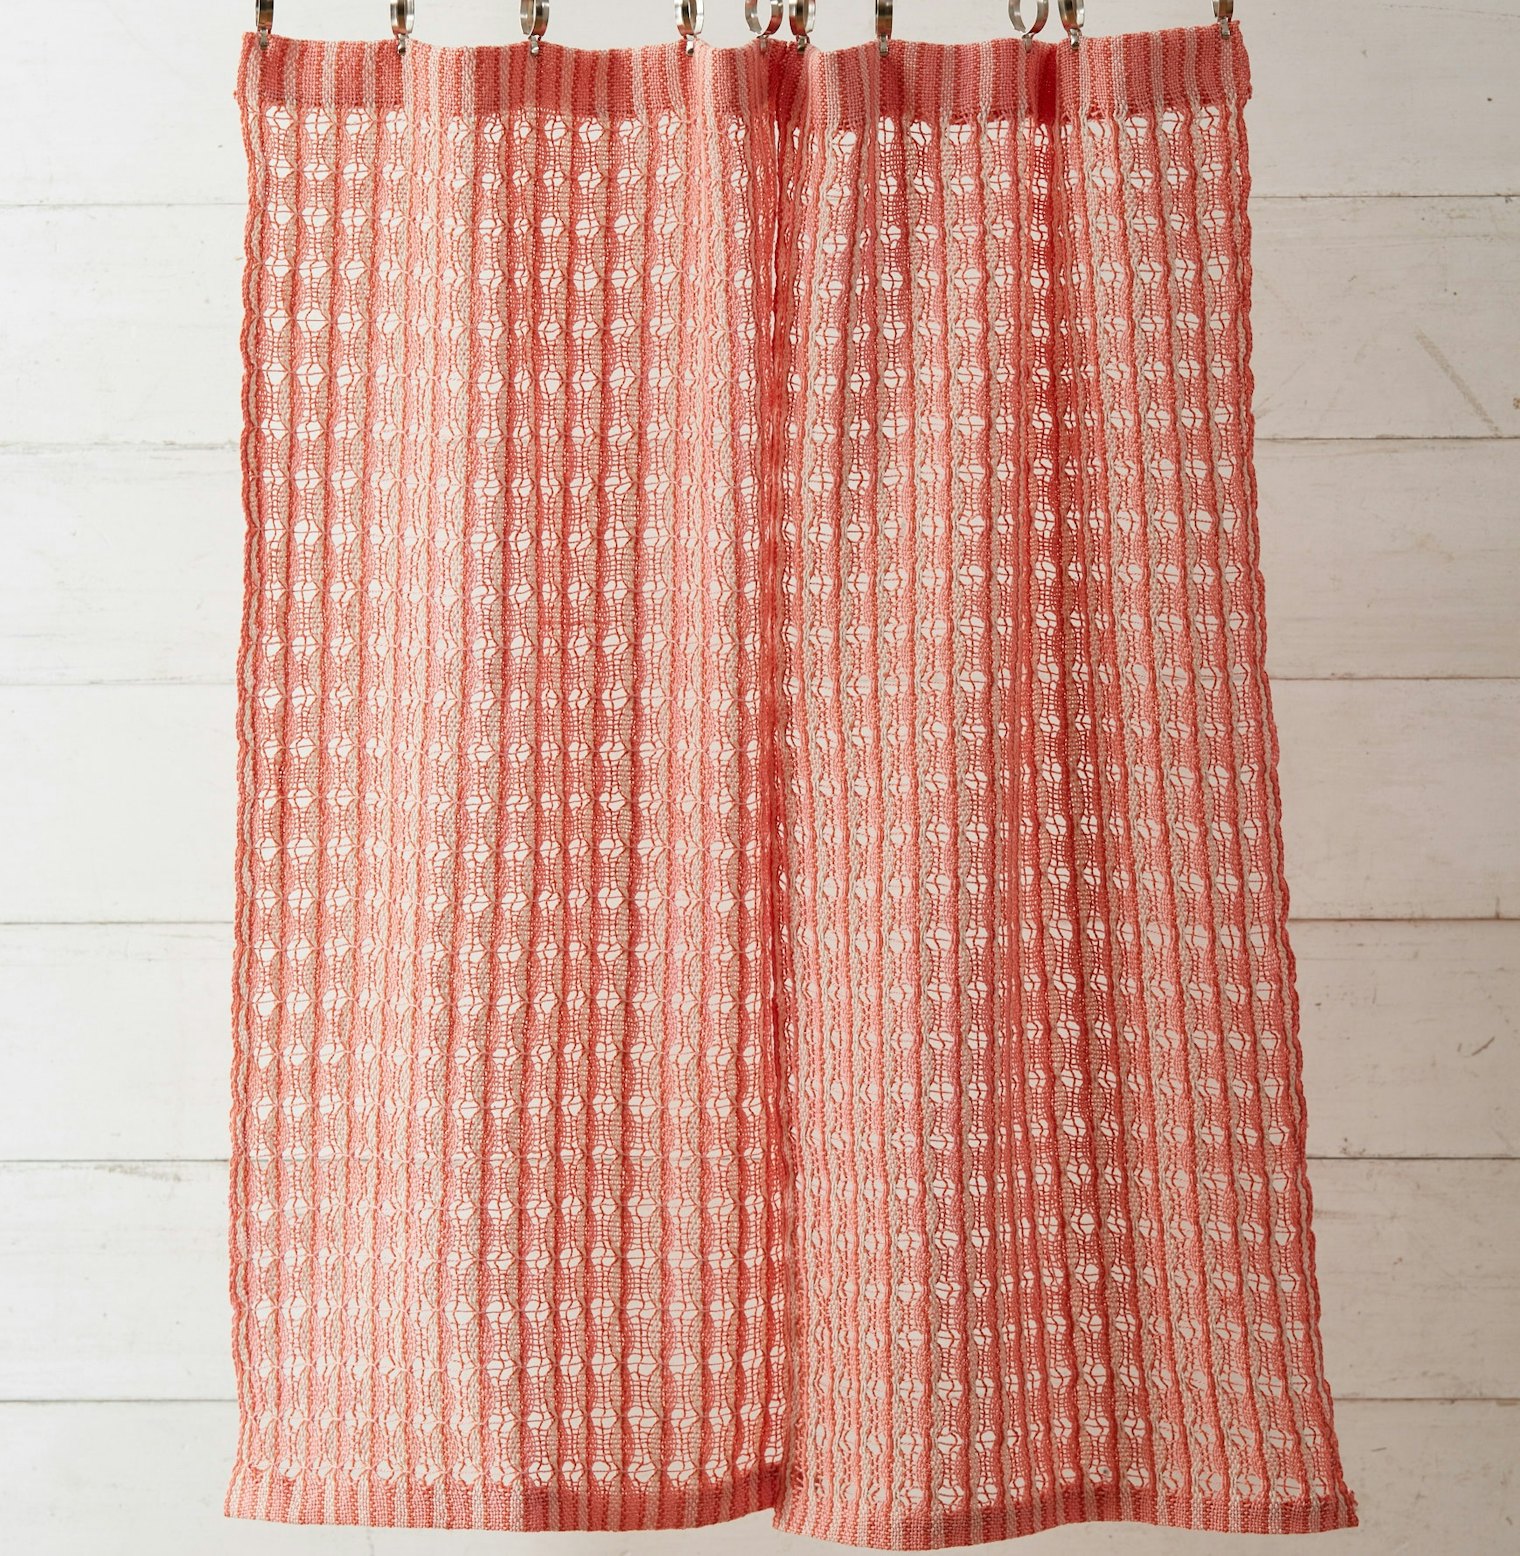
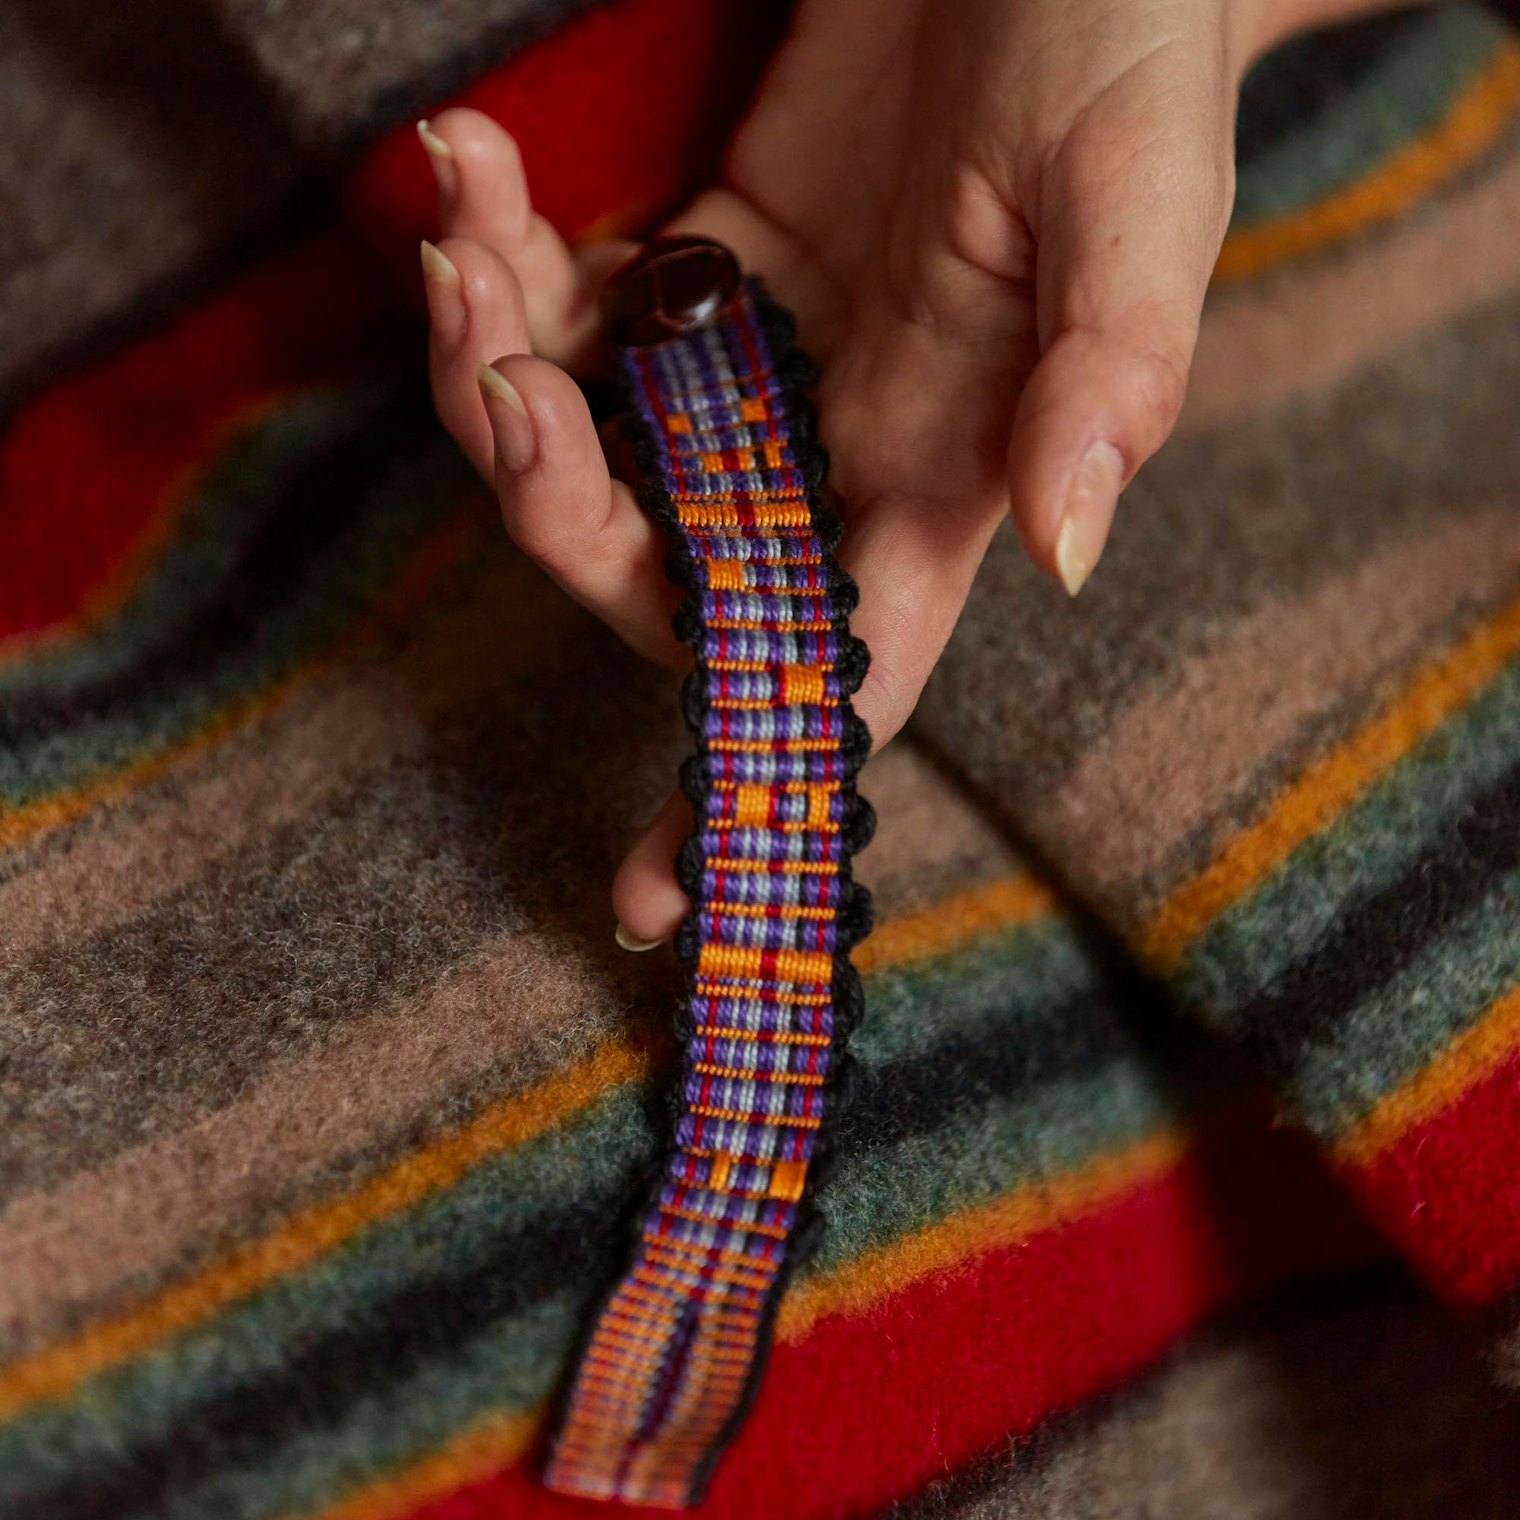
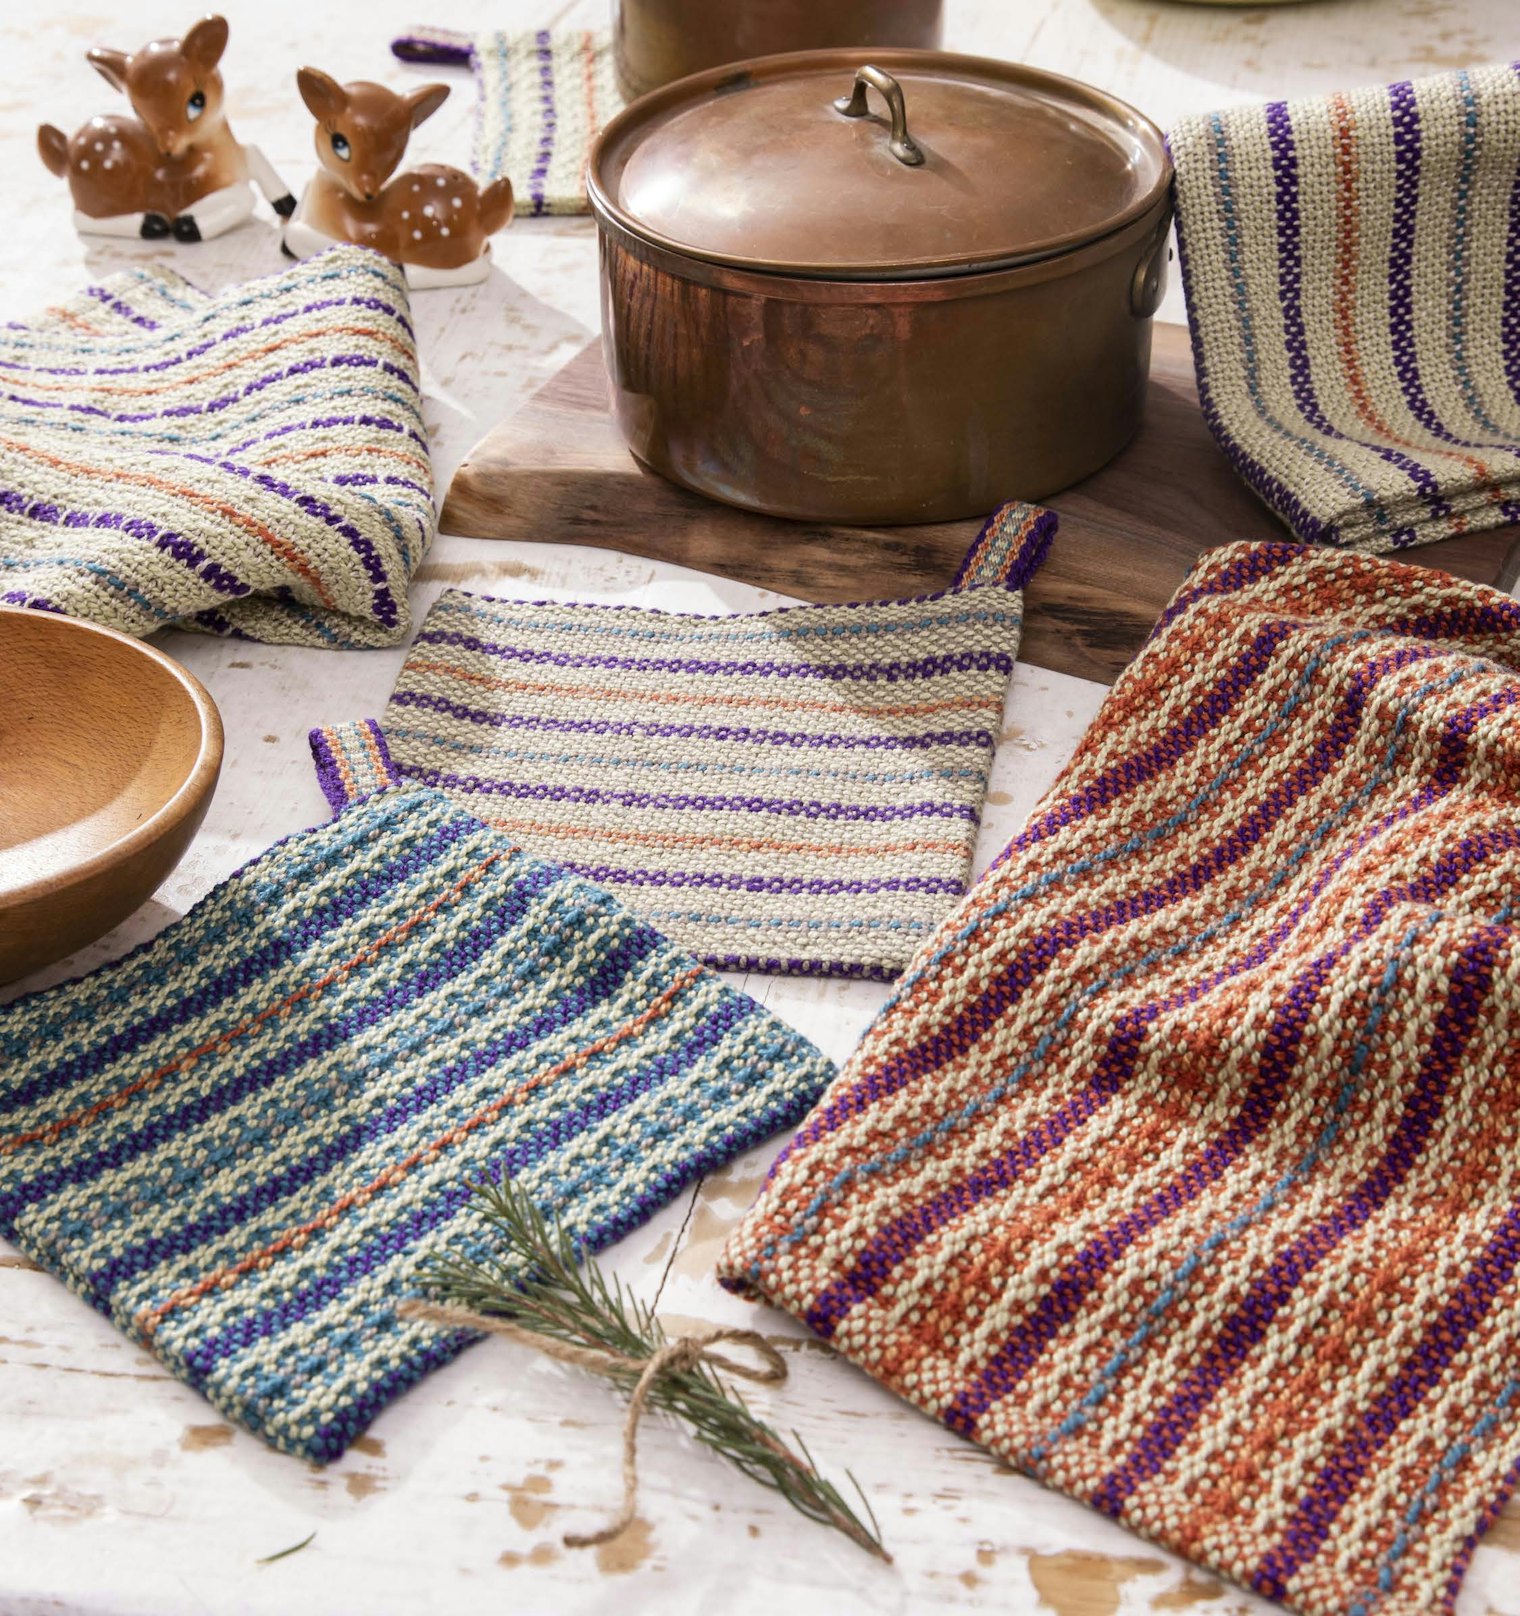

A few examples of past projects from both *Little Looms* and *Handwoven* that showcase different ways to use stripes in weaving. Click each photo in the gallery to get a closer look and more information.
Using the Palette
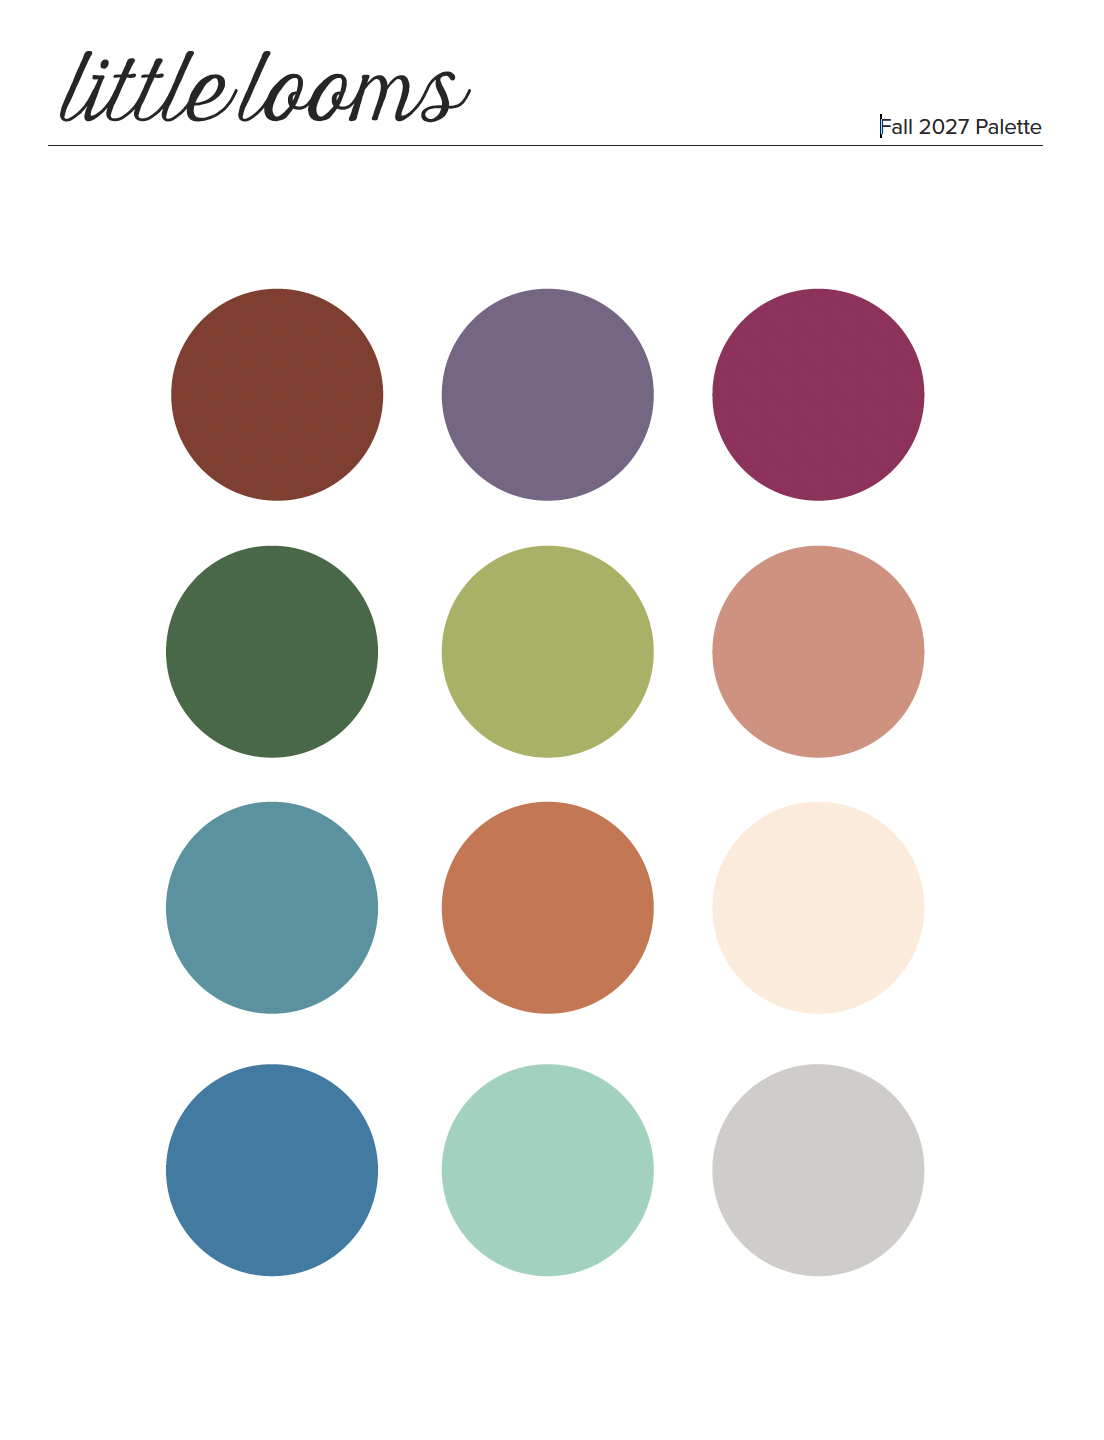
You can find the palette for the issue below or download it here. Please note that black, white, and all natural shades of wool are considered part of the palette, and you are welcome to use yarns that are darker or lighter versions of the colors in the palette as well as heathered yarns.
Articles and Tutorials
For articles and tutorials, only an outline is required for the initial proposal; however, we do encourage you to send any images you might have to better support your proposal. If you would like to both weave a project and write a tutorial for a specific technique used in the project, please submit the proposal for the tutorial and project seperately.
Please note, for this issue we will not be accepting articles on the history of tartans or on using the Fibonacci sequence for design.
Ideas for articles related to this issues theme include:
- A deeper look at the history of well-known striped patterns/cloth such as the history of pinstripes.
- An interview with modern weavers who are making traditional striped fabrics unique to their culture.
- A technical article on designing stripes and plaids.
- A tutorial on how to use a yarn wrap to go from idea to finished cloth.
Submitting Proposals
We base our project selections for each issue on contributor photographs. With each project proposal, please include a photo or photos of the finished item or of items you’ve woven that are most similar to the item you propose to weave for the issue. We will review the proposals and ask for additional photographs if needed. After the project-selection meeting, we will contact everyone whose project is accepted and ask that it be submitted along with the project paperwork.
Articles do not need to be written before proposing. Instead, please include the article’s outline as part of your proposal. Outlines should be submitted as attachments in Word documents, Pages documents, or as PDFs.
Key Dates
• Proposals for projects (including preliminary photos) and articles due: 8/10/2026
• Additional photographs of projects due: 10/5/2026
• Non-project article text and photographs due: 11/16/2026
• Physical projects with paperwork due: 11/16/2026
Submission Forms and Other Resources
Please use our Little Looms submission form for proposals. Note that we’ve recently updated our submission guidelines, and they can now be found here.
Use the email address below for any questions or inquiries that won’t fit into our submission form. Please contact us and ask for a physical address to send any pieces of your proposal that cannot be emailed.
Editorial email: littlelooms@longthreadmedia.com
We are looking forward to seeing your proposals for projects and articles!
Happy weaving!
Christina
A Trio of Table Toppers
Go beyond rectangular runners with table toppers.
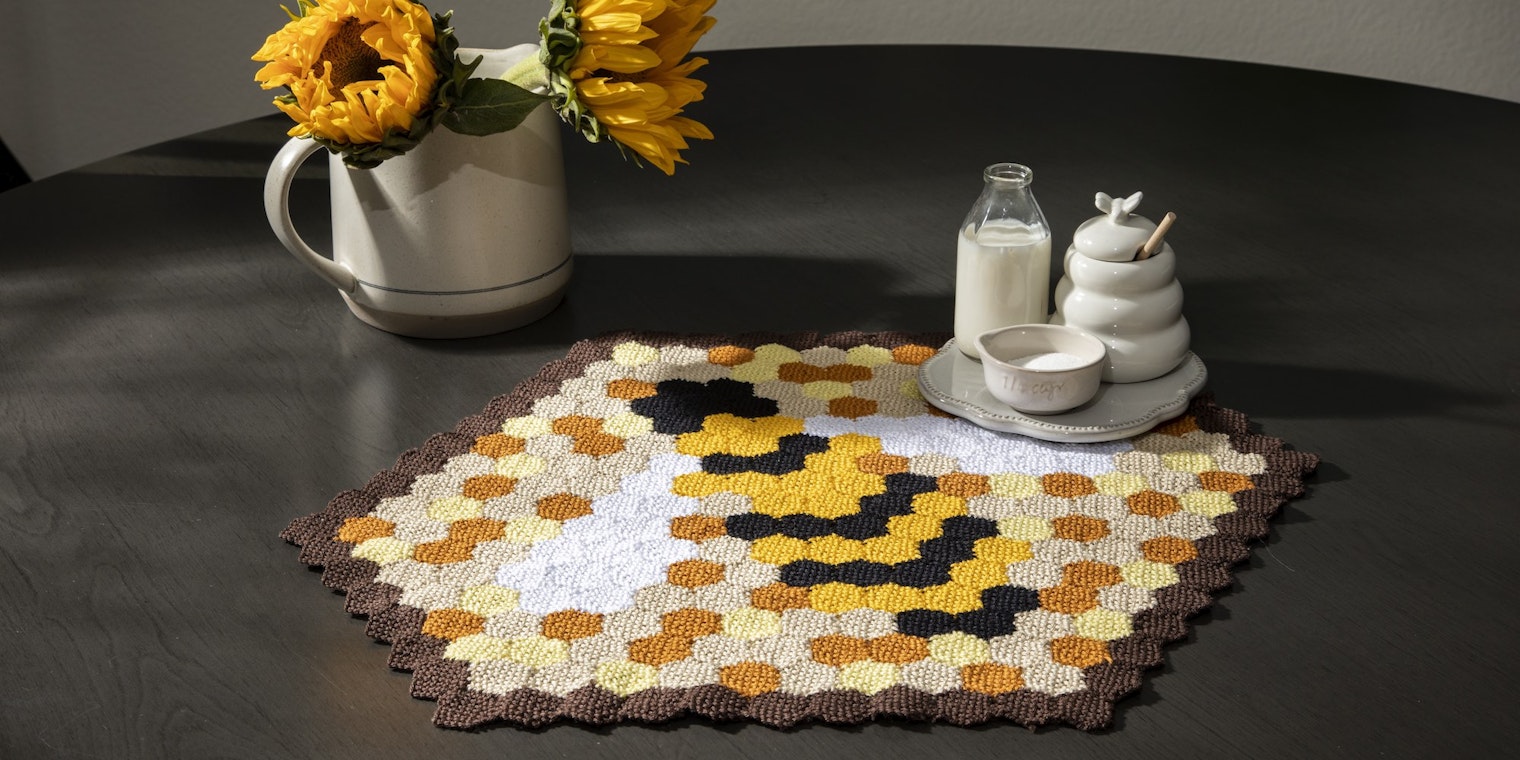
I’d like to take some time to talk about table toppers. (Try saying that five times fast!) When I say table toppers, I’m not talking about runners. What’s the difference? Runners are typically rectangles and they’re designed to be placed along the center of the table—table toppers come in a wide variety of shapes and look beautiful anywhere on the table. If you’ve ever felt like you want to design a runner, but feel hemmed in (no pun intended) by your table shape or size, you might actually want to make a table topper instead.
Creative Concepts
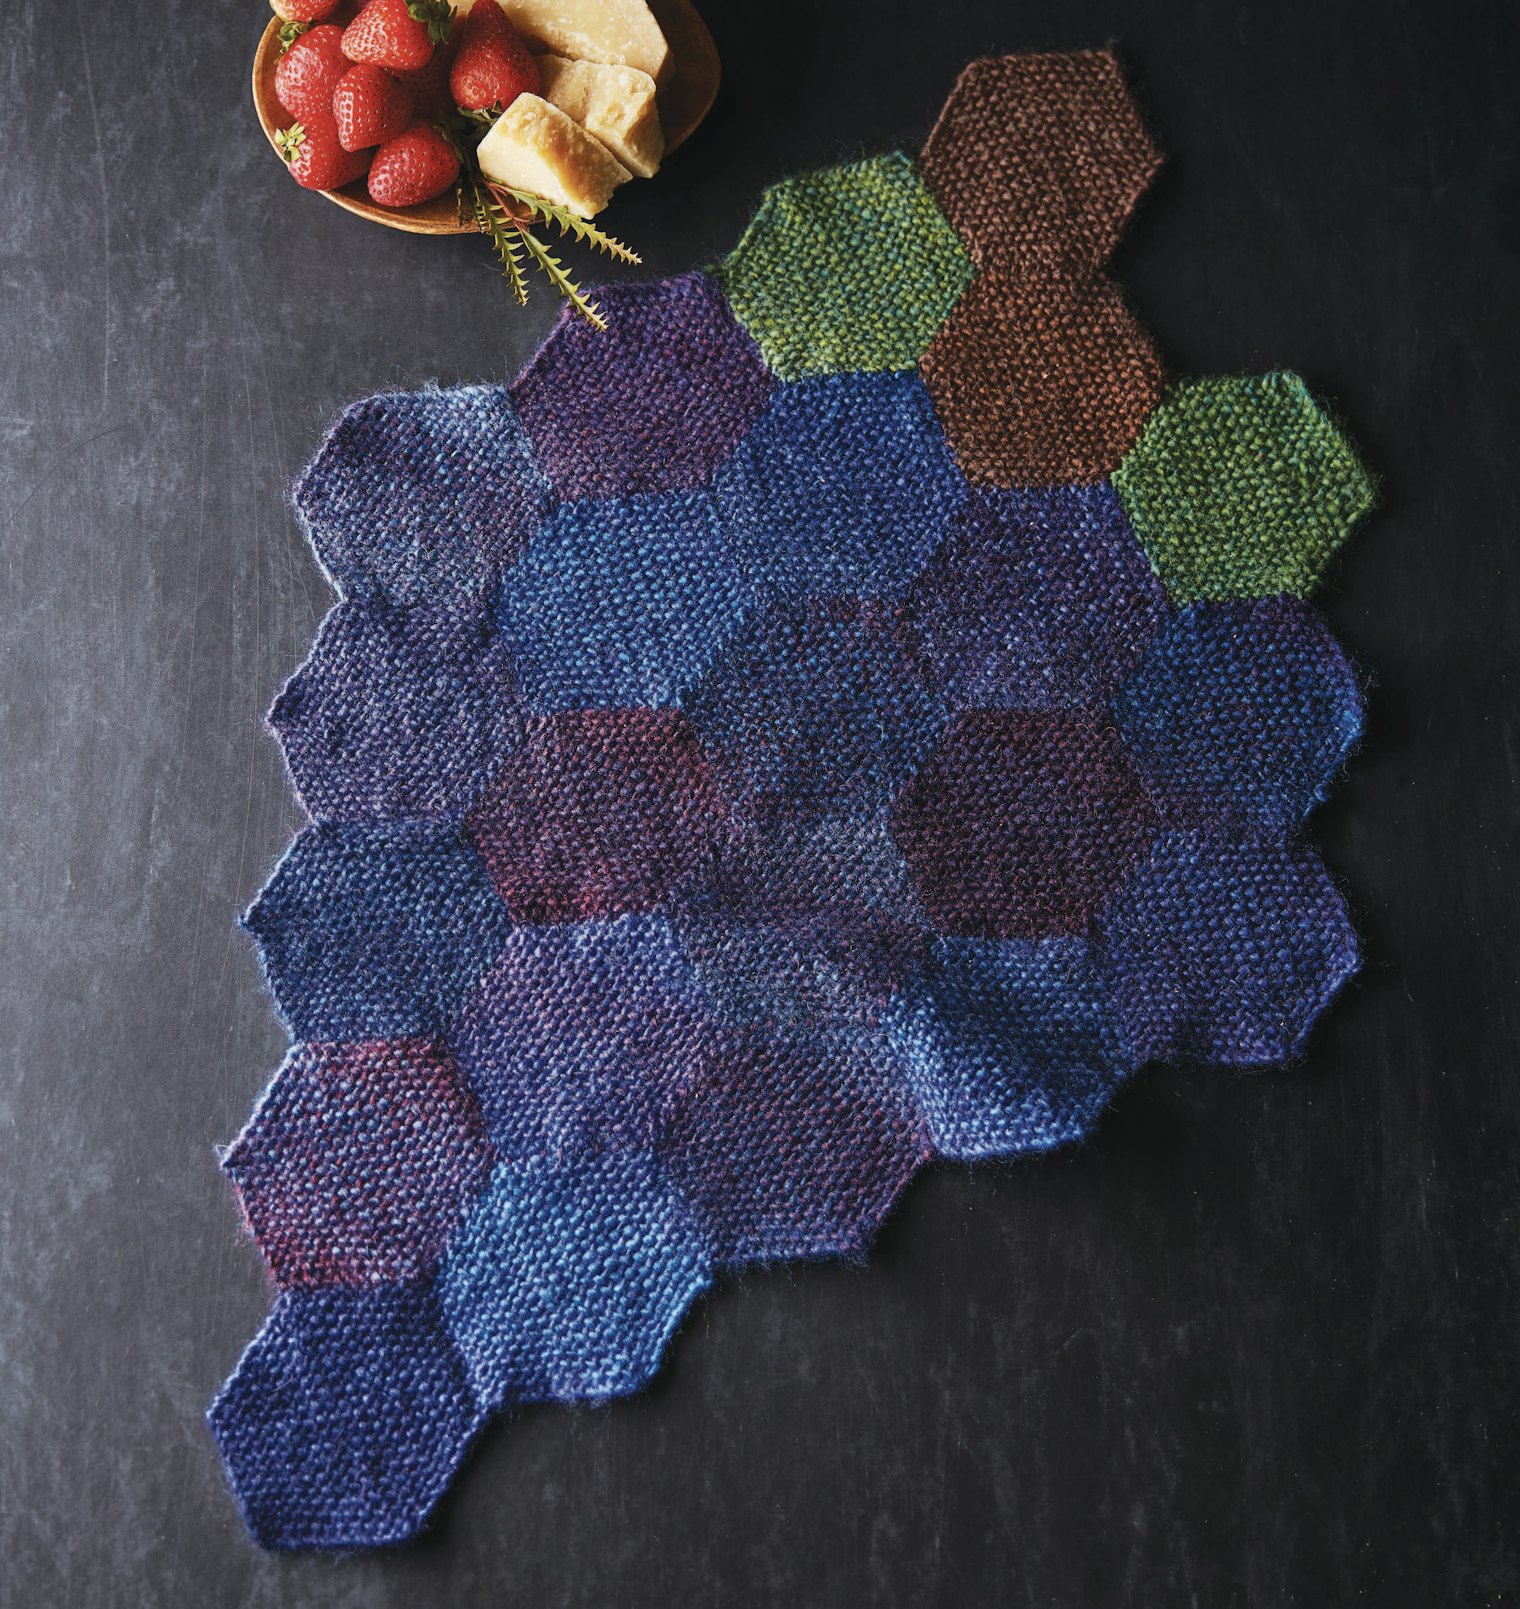 Grape Tablet Topper by Gabi van Tassell from the 2018 issue. Photo by George Boe
Because table toppers aren’t limited to a specific shape or table placement, you can have a lot of fun with the design. One of the first table topper projects we featured in Little Looms, Gabi van Tassell’s Grape Table Topper from Little Looms 2018, is a prime example.
For her project, Gabi used hexagon pin-loom pieces to create a grape-shaped centerpiece with beautiful texture and depth. I love that Gabi chose to use a purple yarn with subtle shifts in color and value, so you end up with grapes that feel sophisticated—just imagine how amazing this piece would look next to a cheese board at your next party!
 Queen Bee Table Topper by Gabi van Tassell from Sumemr 2023. Photo by Matt Graves
Another favorite tablet topper of mine also happens to be another Gabi van Tassel original, her Queen Bee Table Topper from the Summer 2023 issue. While the shape is slightly more traditional, the mosaic-style bee design elevates this table topper to a work of art. If you told me this was based on an Ancient Roman tile design, I’d believe you. I would happily sip a mug of chamomile tea—sweetened with a generous dollop of honey, of course—in front of this table topper.
Falling Leaves Table Runner and Trivets by Brittany Wells from Fall 2023. Photo by Matt Graves
While most of the table topper projects we’ve featured in Little Looms have been pin loom, I do have a great example of a rigid-heddle trivet that doubles as a decorative table topper—and it uses a really fun technique that can open up a whole world of rigid-heddle table topper options.
For her Falling Leaves Table Runner and Trivet Set from the Fall 2023 issue, designer Brittany Wells used wools natural ability to full to her advantage (her full advantage you might say). After fulling her woven cloth until solid, Brittany cut the fabric into four leaf-shaped trivets which she finished with a simple blanket stitch. These little trivets are adorable table decorations that will also hold up to heat. If leaves aren’t your thing, you can use Brittany’s technique to cut fulled cloth into any shape you like!
Final Thoughts
Now I’m just barely scratching the surface of table topper design with these examples. While I could go on and on about table toppers that I love and why, I’d rather encourage you to go out and weave some of your own! Use these examples as jumping off points, or design something completely original. Whatever you do, I hope you have fun!
Happy Weaving,
Christina
Crochet for Your Selvedges? Your Edges Will Thank You
Find out why Sara Bixler finishes some of her woven pieces with crochet. Watch her free video clip, and then dive into several stitch options to try on your next project.
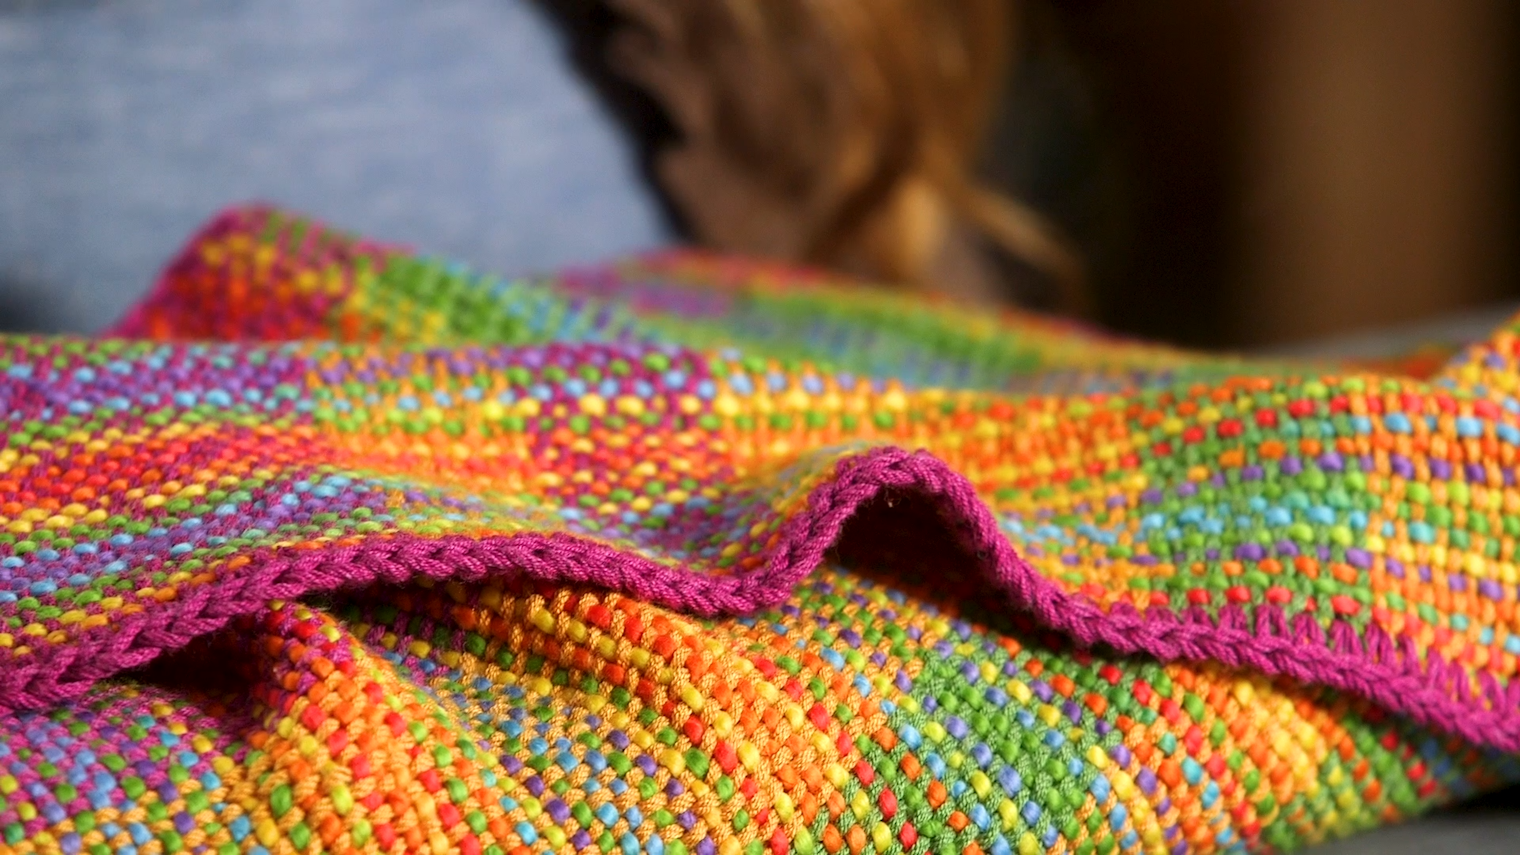
In Part 2 of her Spice Up Your Selvedges series, popular weaving teacher Sara Bixler suggests that you consider crochet when you’re finishing your piece. Along with this article, LTM All Access subscribers can enjoy browsing Handwoven’s project ideas for crochet borders. If you missed Part 1, which covered ways to deal with lace and weft floats, you can find it here.
—Little Looms editors
Free Lesson: Spice Up Your Selvedges with Crochet
Getting neat and tidy selvedges is a constant struggle for pretty much all weavers—but what if I told you there was a way to get spectacular selvedges without fiddling with each pick? No—I’m not talking about using a temple, either. Instead of fussing with your selvedges during weaving, you can trim them after weaving with some simple crochet. In this second part of our Summer Selvedge Series, we’re going to show you just how easy it is to spiff up your selvedges with some extra stitching. Even better? This technique works equally well on rigid-heddle and pin-loom projects!
When you add crochet trim after weaving, you can add it to every edge—not just the selvedges. Giving your piece a crochet border literally frames your weaving. Just like the right frame can enhance your favorite painting, picking the right trim (color and style) for your cloth can enhance the texture and patterns. Simple trims, such as a single crochet border, will make your weaving stand out even more. More elaborate designs, such as a shell stitch, can help elevate already spectacular cloth to a new level.
Beyond aesthetics, a border can also be a practical choice. If you’re weaving a baby blanket or another project where fringe isn’t desirable, and maybe hemming isn’t a good option for whatever reason, adding a border lets you achieve a beautiful finish without the fringe.
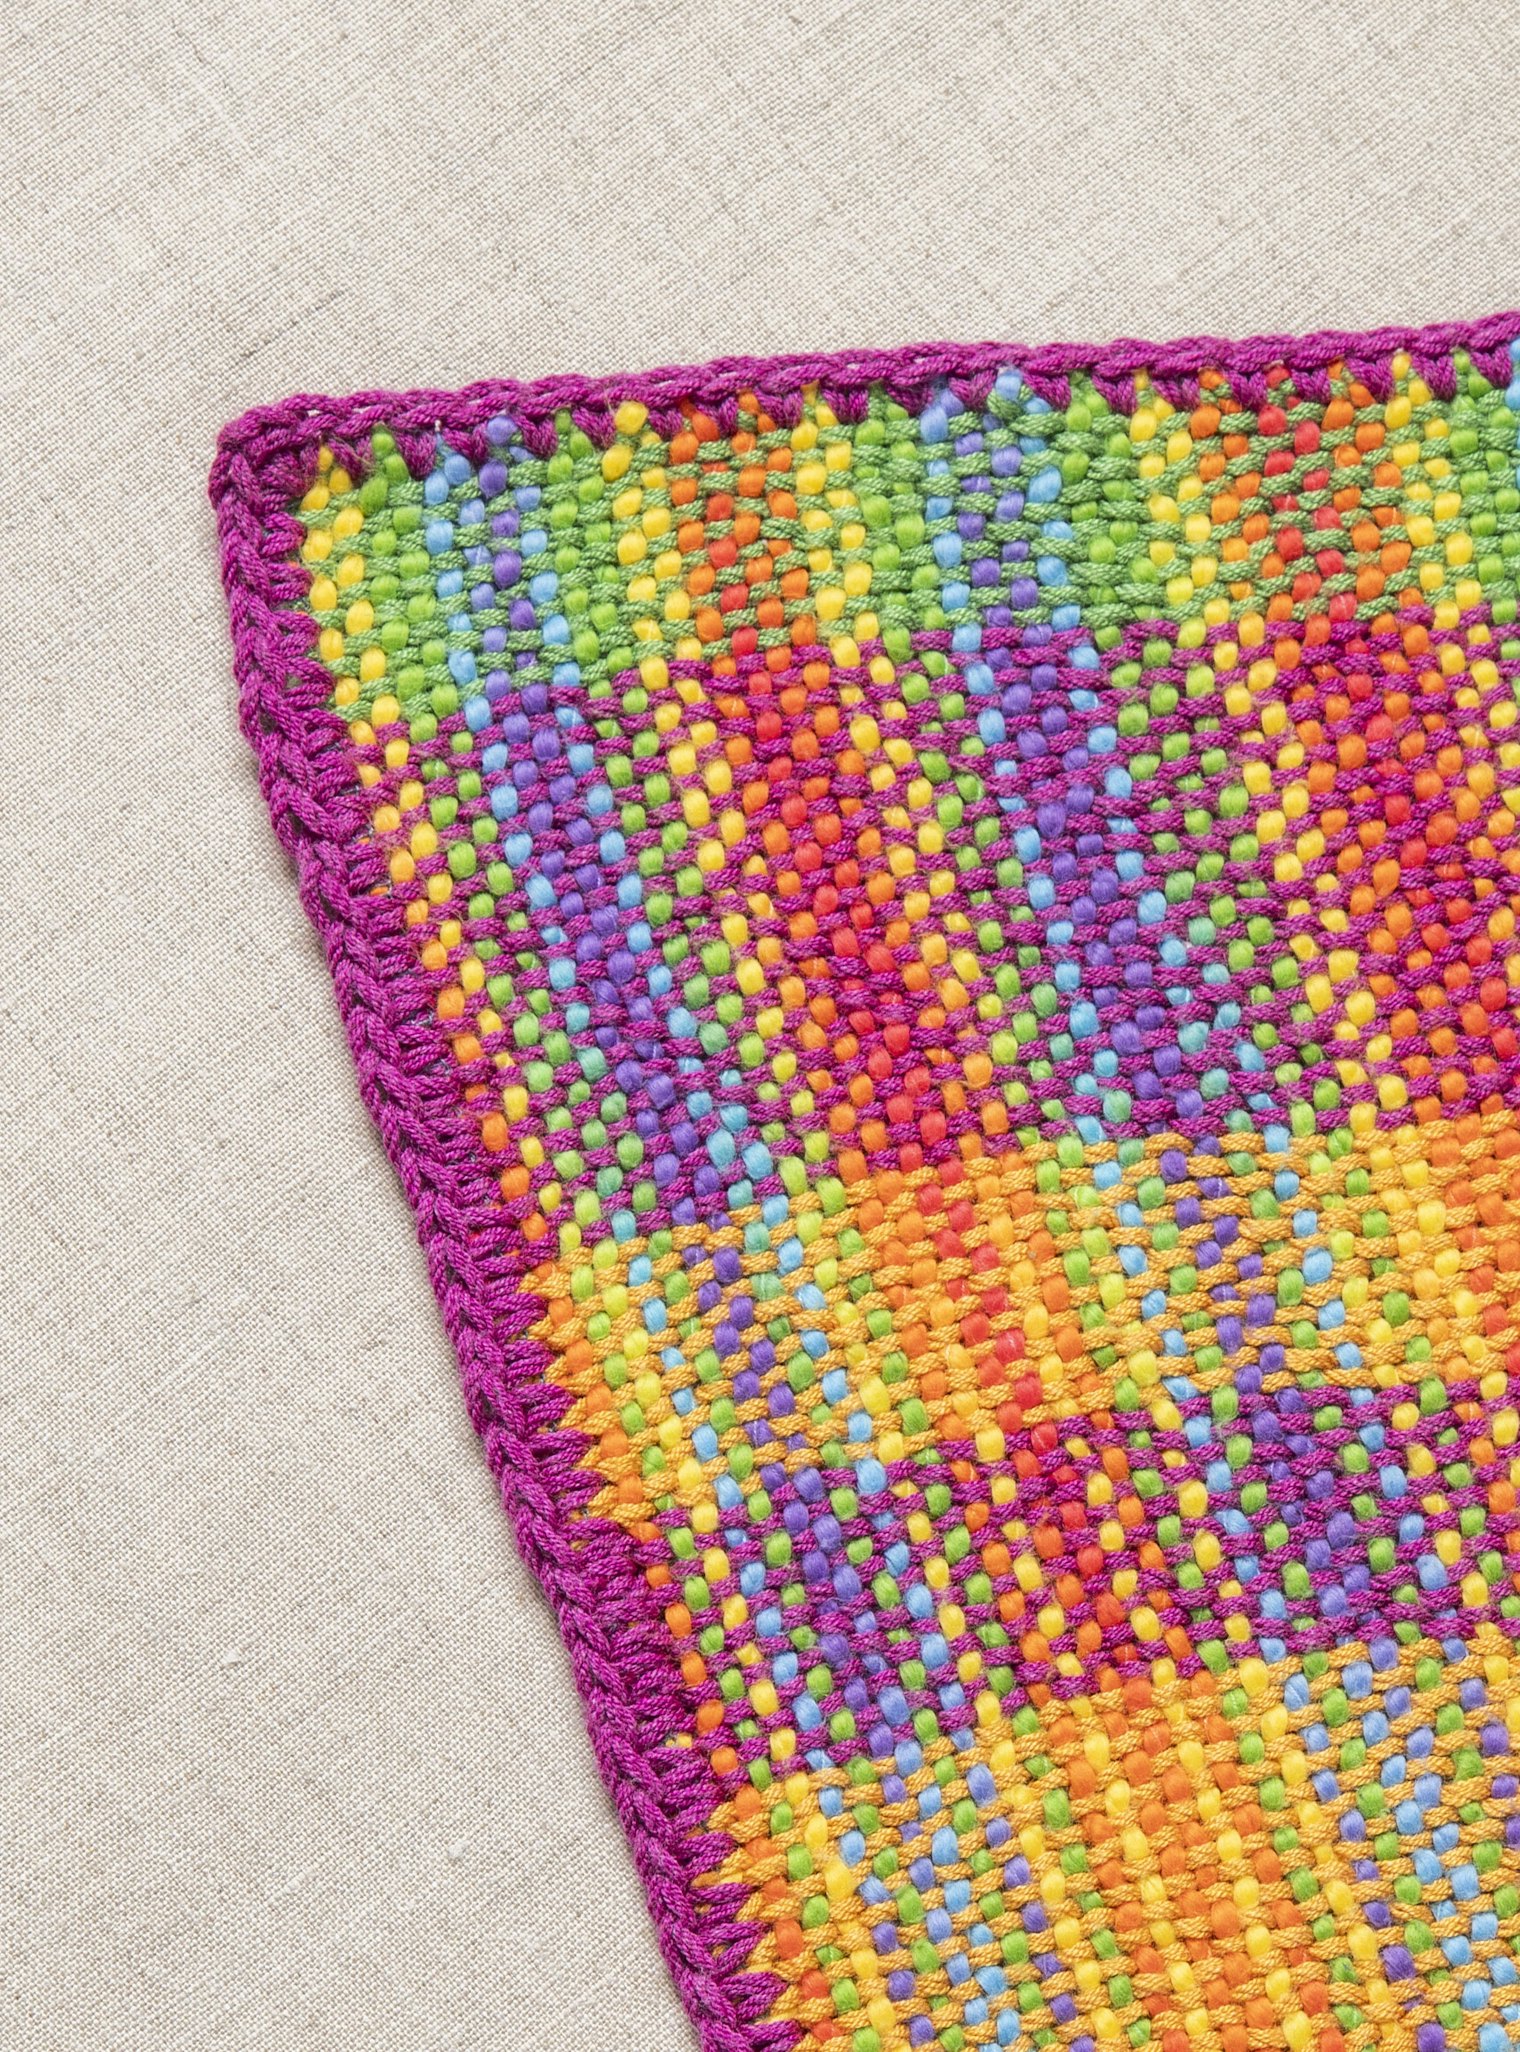
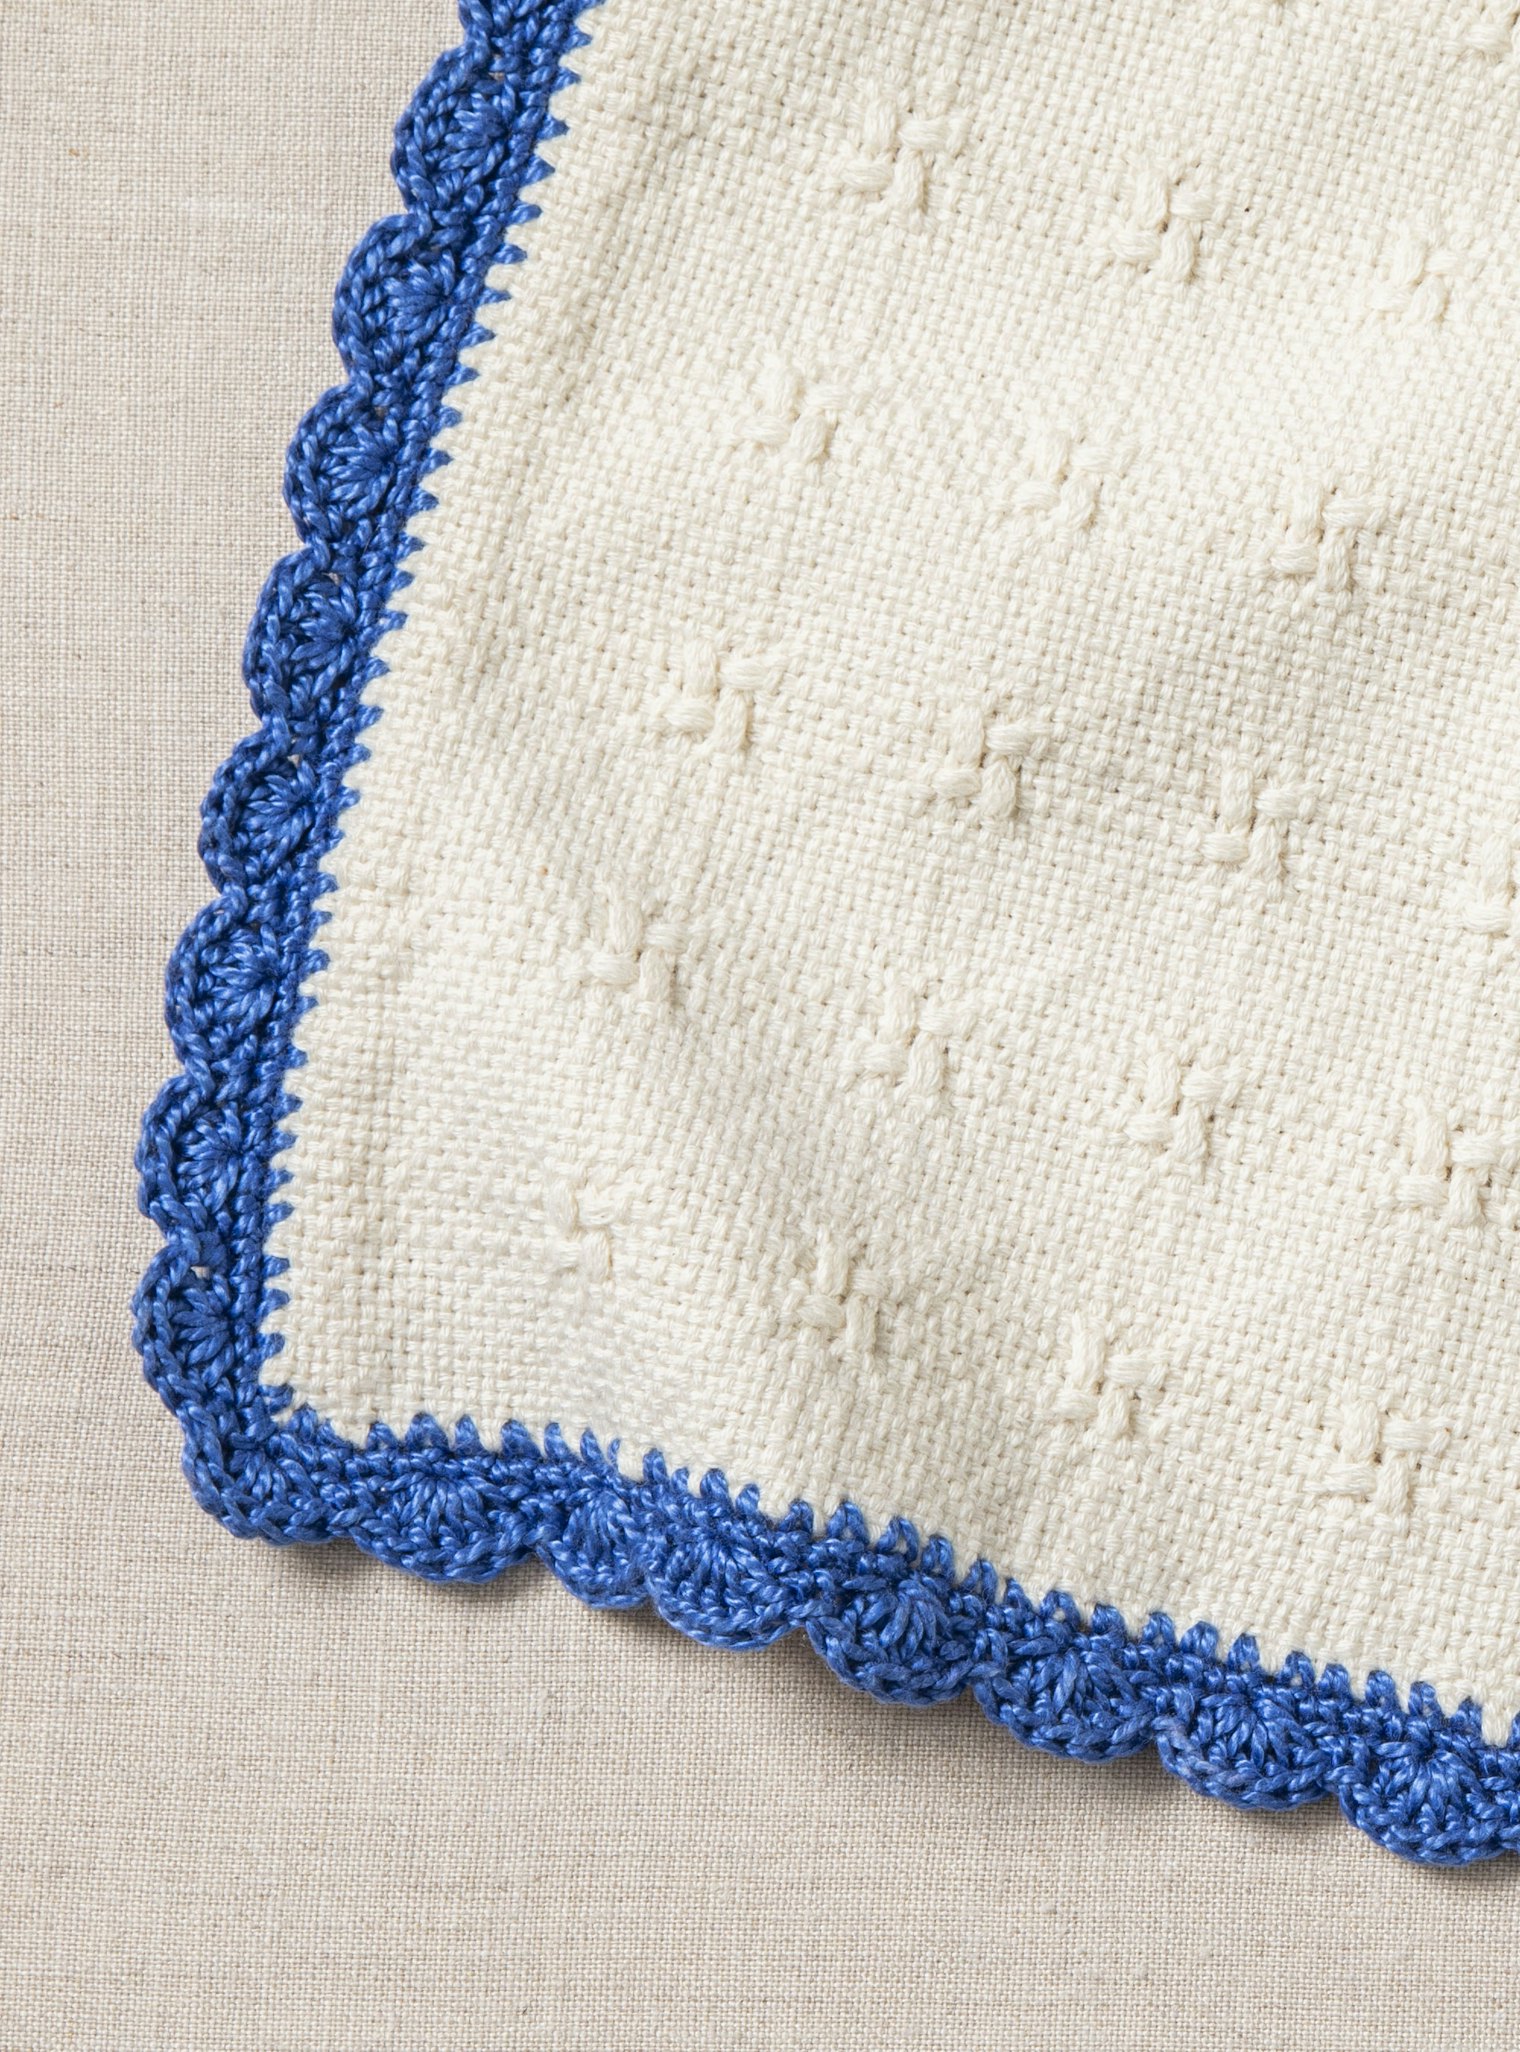
Time to Crochet!
Not sure how to crochet directly onto handwoven fabric? Don’t worry—we’ve got you covered! We’ve got step-by-step instructions that will walk you through several ways to give your cloth a beautiful border.
Prep Your Edges
Adapted from this free article by Heather Winslow
Start with these preparatory steps before adding in or attaching crochet trims to your flat handwoven fabrics.
Secure the raw edges. Serge or machine stitch 2 rows of straight stitching ¼" apart and ¼" from the raw edge of the fabric. If the yarns in the fabric are particularly heavy or very slick and prone to raveling, encase the edges with Seam Finish from Farmhouse Fabrics or a similar bias edging.
Crochet a sample swatch. Experiment with different yarns, hook sizes, and stitches to get the look that you want. To achieve a firmer edging, use a hook at least one size smaller than the one recommended on the yarn label. In your woven piece, count the number of stitches per inch to determine the gauge and the number of stitches you will need to work. If you have a woven sample of the fabric, you can even add trim to the sample before wet-finishing it to get even more information about how the yarn will work.
Mark the edge of the cloth in inches. Use small safety pins to mark the length of the fabric in inches. Use these marks as a guide to crochet the exact number of stitches per inch as determined by your test swatch.
Next, you can choose to add a foundation slip-stitch row, or go straight to single crochet (or another stitch of your choice).
Foundation Slip-Stitch Row
Compose a Masterpiece on Your Loom
After all, a loom is just another type of stringed instrument.

In my youth, I dreamed of being a great musician. The kind of musician didn’t really matter—I just wanted to learn to make beautiful music. First, I tried my hand at singing, memorizing pop songs and show tunes, and performing them for anyone who would listen. Unfortunately, while I had plenty of enthusiasm, I lacked what others might call a “good singing voice.” I took guitar lessons in high school, with similar success (or lack thereof).
While I gave up on my dream of being a professional musician, I did end up finding my way to weaving and a different sort of stringed instrument.
After all, weaving and music have a lot in common. Weaving drafts are much like sheet music in appearance and purpose. When creating an original work, musicians and weavers can build their designs around tried-and-true groupings—specific scales or color families—or take a freestyle, improvisational approach. Whether you’re playing the drums or your loom, maintaining a consistent beat is important. And just as you need to tune your guitar before playing, you need to tension your warp before weaving.
So, for this Musical Weaving issue of Little Looms, we’re celebrating all the ways music can inspire us at the loom.
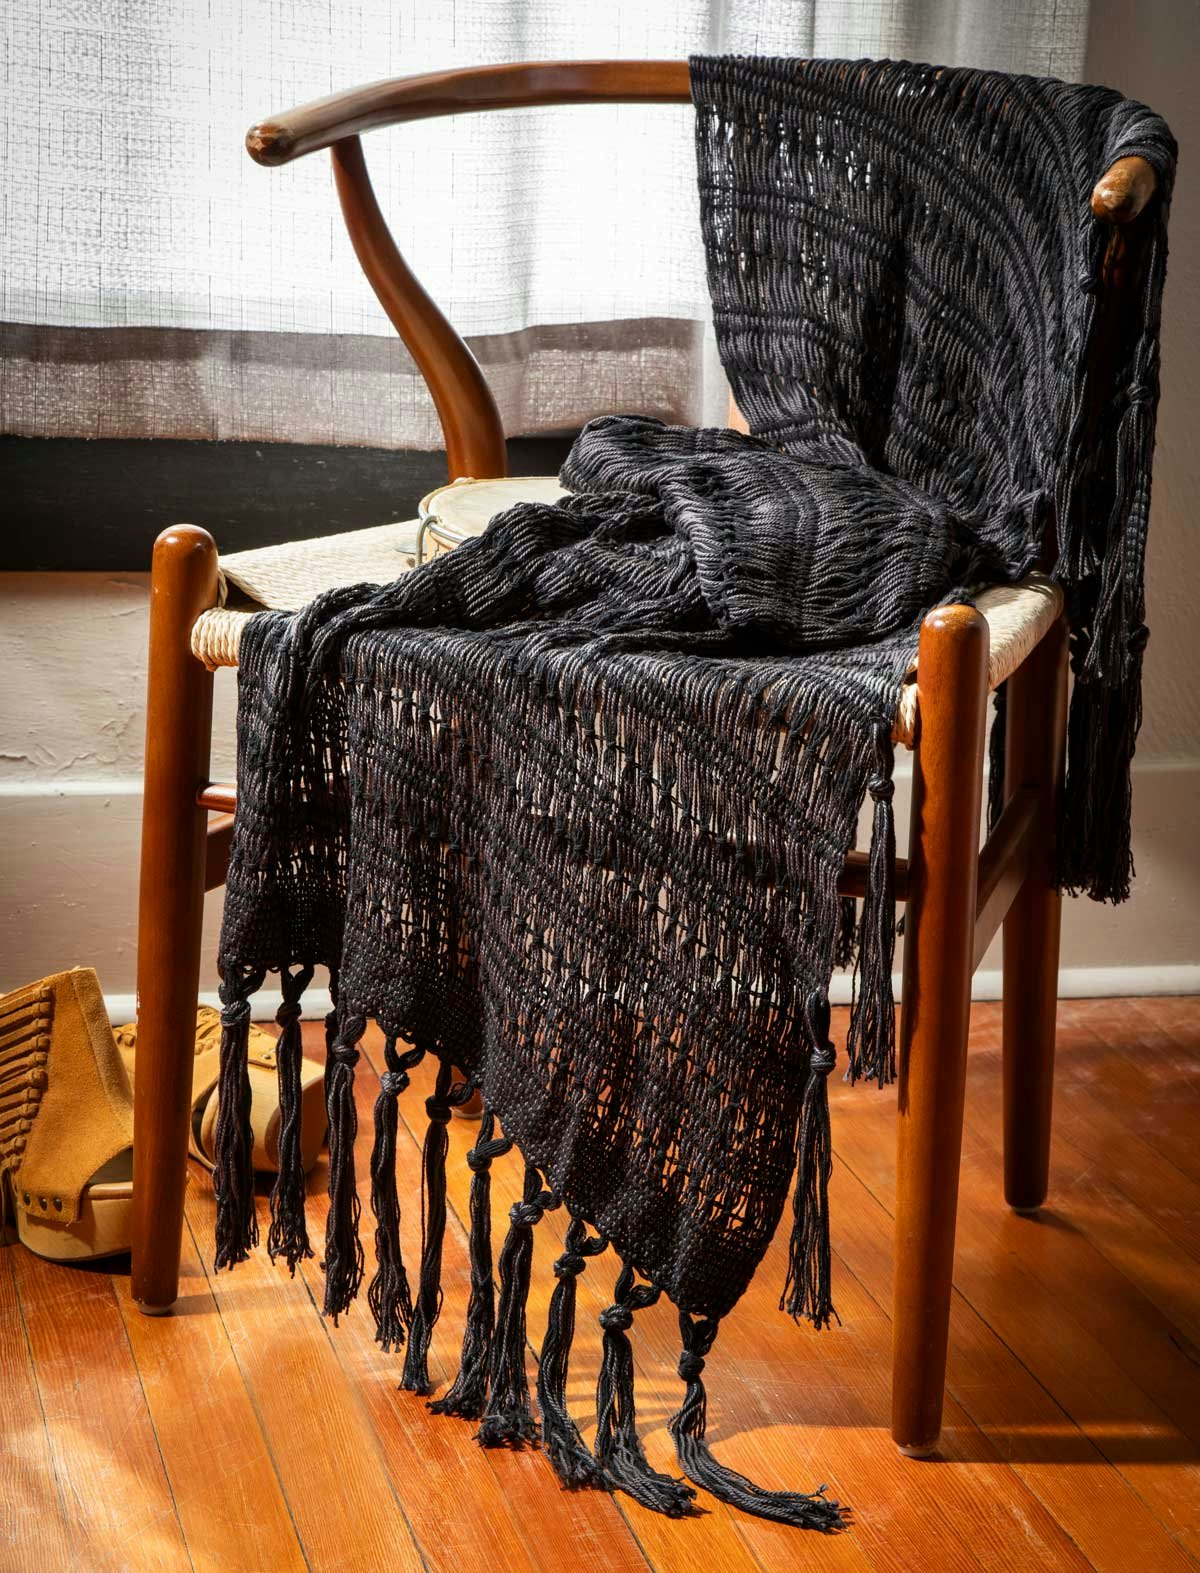
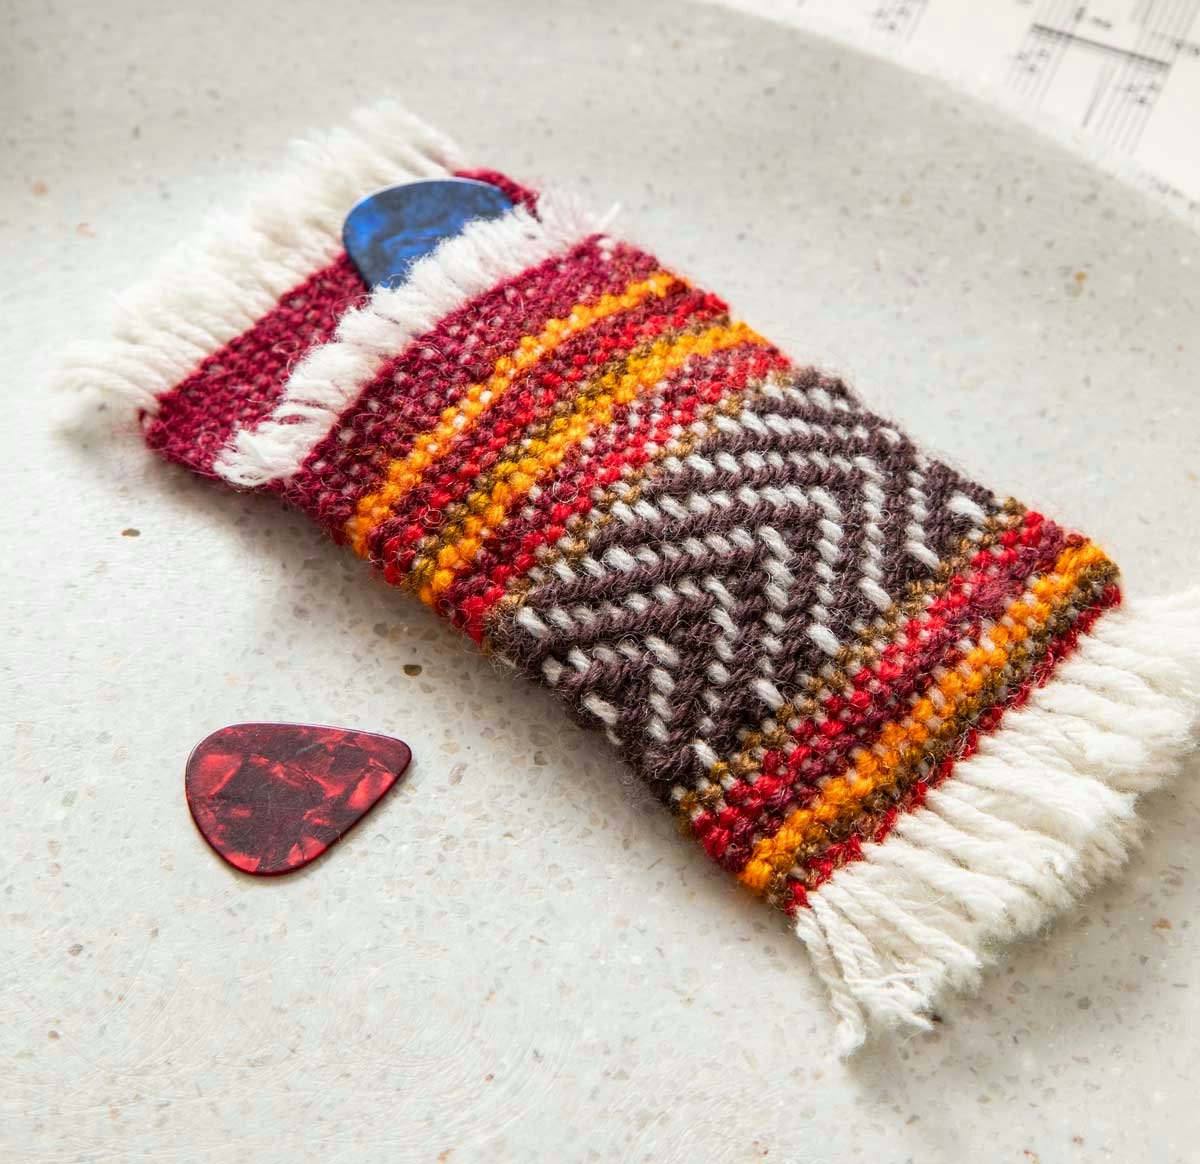
From left to right: Silver Springs Shawl by Sedona Rigsby and No-Sew Pick Pocket by Inci Koker. Click on each image in the gallery to enlarge it and take a closer look.
We have projects sparked by particular songs and musicians—including a black lace, Stevie Nicks–style shawl and a cheerful, golden-hued pin-loom submarine. You’ll also find items designed for musicians but useful for anyone, such as a no-sew pouch perfect for storing guitar picks or other tiny treasures.
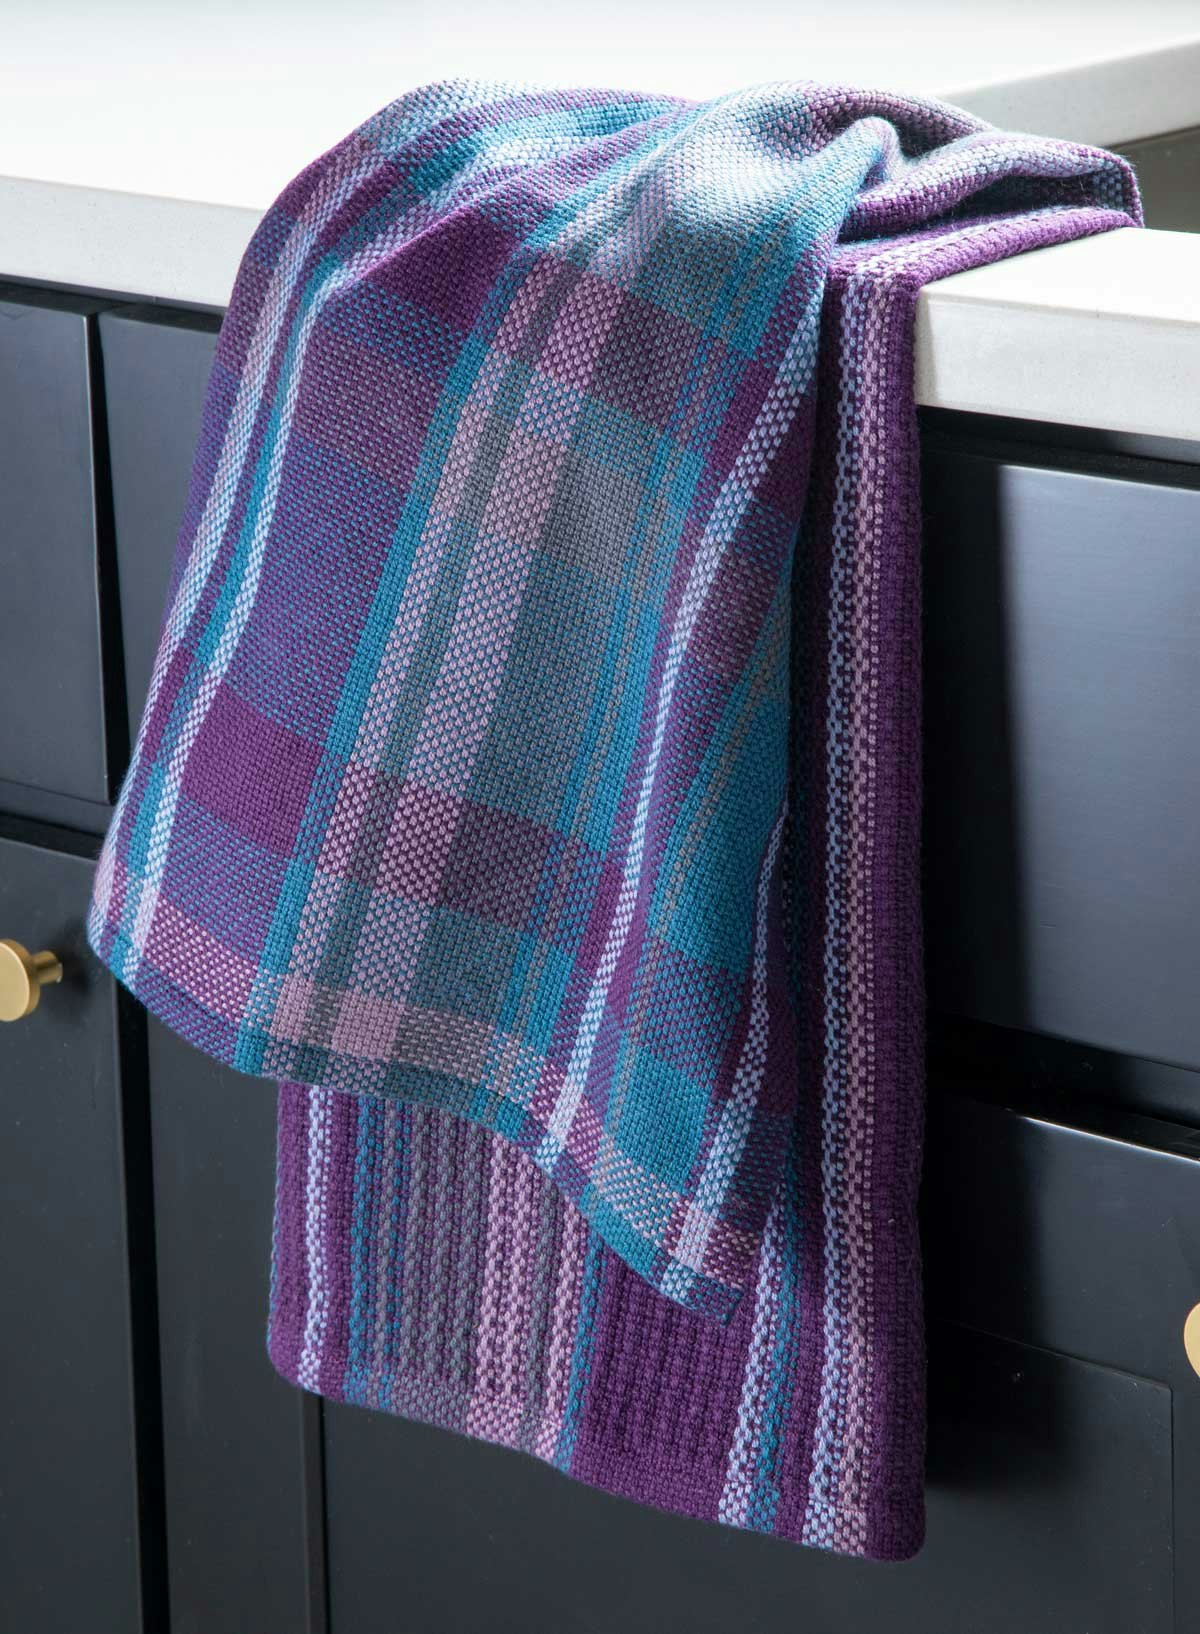
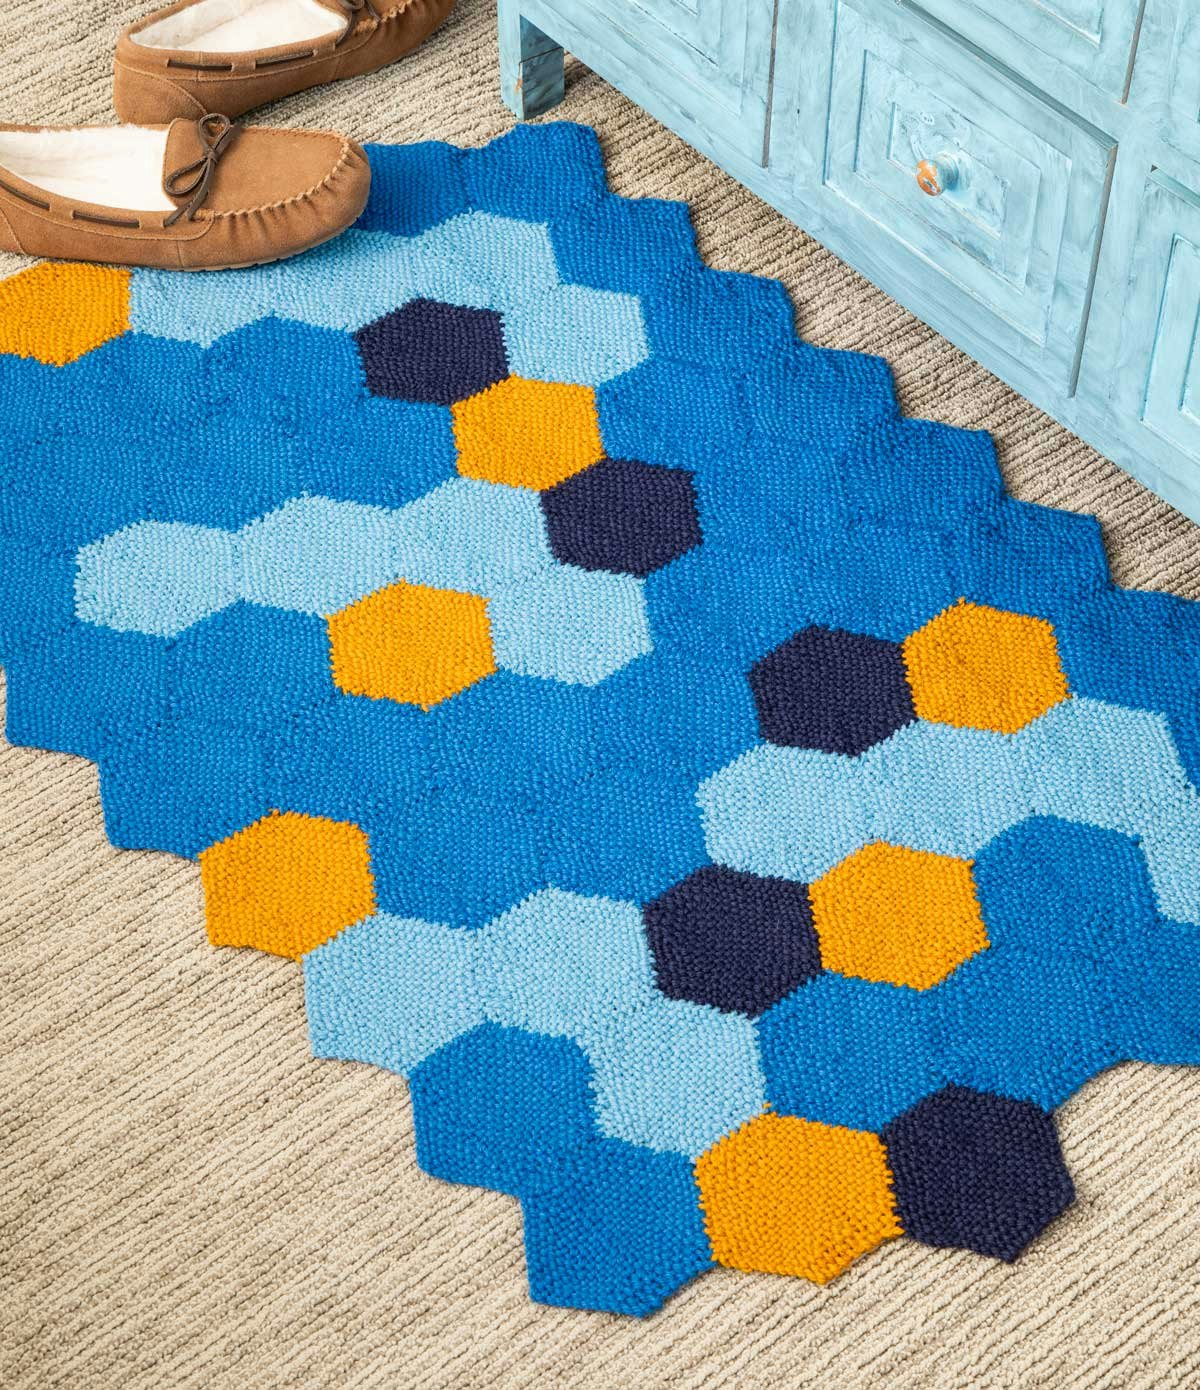
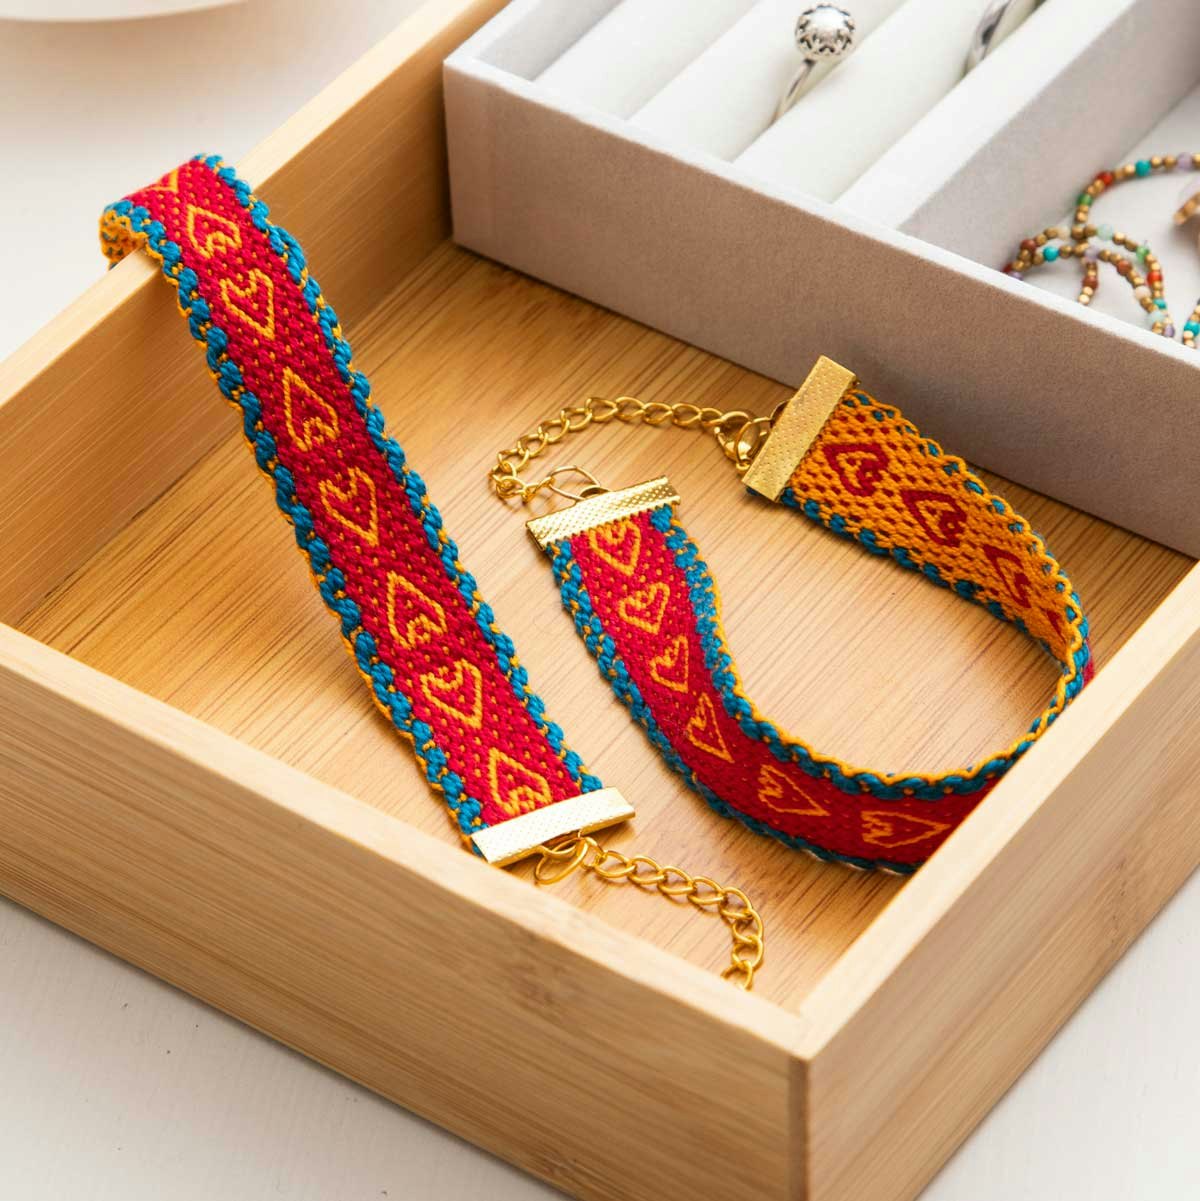
From left to right: Ain’t No Sunshine Towels by Carolyn Heacock, Rhapsody in Blue Rug by Gabi van Tassell, and the I’m with the Band Bracelets by Julie Beers. Click on each image in the gallery to enlarge it and take a closer look.
Some project weavers took a more literal approach, using musical notes to guide their designs.
A couple of the inspired projects include a set of towels inspired by Bill Withers’ classic “Ain’t No Sunshine” and a rug with motifs designed using notes from “Rhapsody in Blue.”
If that sounds intriguing, you’ll enjoy the article by Yvonne Ellsworth on using name drafting—a design technique for turning letters into patterns.
Also in this issue, you’ll learn how to weave pebble weave with a beginner-friendly tutorial and project for some sweet heart bracelets from Julie Beers. Plus, you’ll get the details about using frame looms to make no-sew pouches from small bits of yarn.
Whether you’re musically inclined or not, I think you’ll find a lot to love in this issue of Easy Weaving with Little Looms.
Happy weaving!
Christina