
Loading the latest stories…



Learn about loom waste and take-up and how they play a vital role in determining warp length.
Christina Garton3 min read
Has this ever happened to you: You’re happily weaving an original project on your rigid-heddle or inkle loom when suddenly you realize you’re coming to the end of your warp a lot sooner than you expected—and it’s not because you lost track of time. Your warp is too short.
If your warp is short by an inch or two, it’s probably not such a big deal—but if it’s short by 6 inches or more, it will impact the finished project. Sure, you can turn a scarf into a cowl or a belt into some key fobs, but it will still probably leave you frustrated. Often in these cases the problem can be traced back to miscalculating loom waste and take-up.
Loom waste refers to the parts of the warp you cannot weave at the front and back of the warp. It includes any warp used to tie-on to the loom (including the amount needed to tie any knots), the start of a weaving where the warp is spread, and the end of the warp that physically cannot be woven. To accurately figure out how much loom waste your loom requires, put a warp on your loom and measure how much warp you use to tie knots, how long you need to weave with scrap/warp spreaders yarn before the warp is fully spread, and, at the end, the distance between the pick you can comfortably weave and the end of the warp. Add those three measurements together and you’ll have your loom waste.
If you use a backstrap method for your bandweaving, the same method applies: Find out how much you need to tie-on to your backstrap, how much you need to spread your warp, and how far from the end of the warp you can comfortably weave.
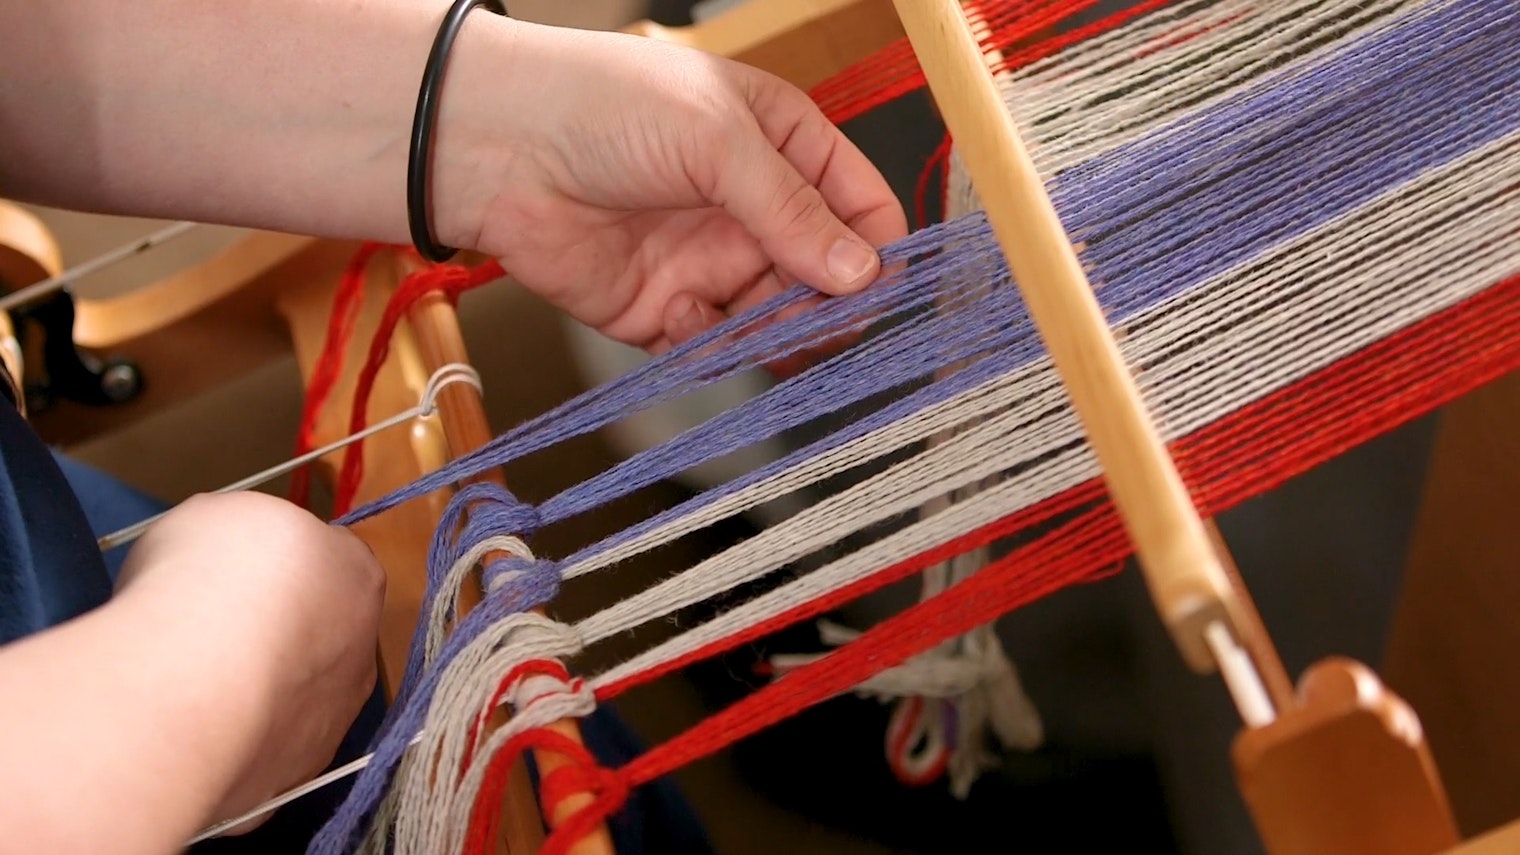
 Loom waste includes the length of warp needed to properly spread your warp before weaving whether you use scrap yarn (as shown here), warp setters, or other warp-spreading materials.
The amount of loom waste should be about the same from project to project on the same loom, so once you know how much loom waste you need for your rigid-heddle or inkle loom, you can confidently use that number in any future warp calculations. Take-up, however, is a different story.
To understand take-up, it helps to think about the relationship between warp and weft in a three-dimensional sense. Each weft pick creates hills and valleys the warp has to travel over and under—and as a result, each pick takes up some of the warp length (hence the name). Take-up also includes the amount lost when you take a project off the loom and let it relax before wet-finishing. The amount of take-up depends on a variety of factors including weave structure, yarn size, and sett.
 A textured weave will have more take-up than a plain weave.
The best way to figure out the take-up required for any given project is to sample. The next best way to figure out take-up is to figure out the total woven length you need for a given project and then to add at least 10 percent to that amount. If there are factors that you know will increase take-up—using a thicker yarn in your weft than in your warp, as you might in rep weave—you’ll want to add on even more. (The same goes for weft, too, although we call this “draw-in,” and typically you need to add only about 5 percent more to your total weft amount to account for it.)
If you’d rather not refer to this article every time you need to calculate your warp length, don’t worry—I’ve got you covered! This handy PDF download, originally written for Handwoven, has all the information you need. Download it or print it out and keep it handy in your weaving studio for a quick and easy reference. While it references a floor loom, the methods for figuring out loom waste and take-up on a floor loom apply to rigid-heddle looms and inkle looms. Also, just remember, it’s easier to deal with having too much warp rather than not enough, so when in doubt, add on a bit extra.
Happy Weaving!
Christina
More from Little Looms
 Skill Guide: A Weaver’s Guide to FiberNo matter what loom(s) you love to weave on, understanding the different characteristics of a fiber can help you make better choices when picking yarns for projects.Christina Garton · July 31, 2026
 Give Yourself the Gift of a Weaving GetawayWhat’s better than learning to master a new weaving? Doing it among friends, new and old! Little Looms Editors · July 21, 2026
 6 Easy Ways to Elevate Your Selvedges with TrimsAdd extra flair to your selvedges and hems with these terrific trims. Christina Garton · July 16, 2026
 A Celebration of Stripes: Call for Submissions Fall 2027We're looking for striped projects of all kinds for our Fall 2027 issue—and that includes plaids and checks, too!Christina Garton · July 9, 2026
 Designing Borders for Pick-Up BandsLearn tips and tricks for designing borders for your pick-up bands, from simple stripes to more complex color-and-weave designs. Christina Garton · July 2, 2026
 Compose a Masterpiece on Your LoomAfter all, a loom is just another type of stringed instrument. Christina Garton · June 23, 2026
 Two Ways to Make Terrific TasselsTurn loom waste or small bits of extra-special yarns into beautiful, custom-made tassels perfect for trimming handwoven projects and so much more!Christina Garton · June 18, 2026
 An Invitation to SparkleLearn three approaches for using metallic threads to weave fabric that literally shines bright! Christina Garton · June 16, 2026
 Roll the Dice on Your Next DesignFind out how easy it is to kick-start your creativity when you leave your design choices up to chance. Tommye McClure Scanlin · June 9, 2026
 My New Obsession: Three-Color Pick-up on the Inke LoomFind out how this niche Lithuanian technique found its way to America, and why it’s Christina’s new favorite way to create patterns on her inkle loom.Christina Garton · May 5, 2026
From the Library


Comments
No comments yet — be the first to share your thoughts.
Sign in to join the conversation — commenting is for signed-in members.