
Loading the latest stories…





Turn loom waste or small bits of extra-special yarns into beautiful, custom-made tassels perfect for trimming handwoven projects and so much more!
Christina Garton6 min read

Looking for an easy way to embellish your handwoven project, but don’t want to buy any new tools or spend a lot of time picking up a new skill? Want a way to use thrums instead of throwing them away? Consider making tassels!
Tassels are fun and easy to make, and you can use them on handwoven pillows, blankets, scarves, bags, and so much more. Add a clip to your tassel base to make a simple key chain or purse charm. You can even use them to trim non-handmade items—spruce up a boring throw pillow or lampshade with tassels made from scrap yarn. You don’t need much yarn to make a tassel, so it’s perfect for using up small bits of yarn you can’t bear to throw away (but don’t know what to do with otherwise) and post-project loom waste.
 Rebecca Fox used yarn leftover from her Go for Baroque Pillow from Fall 2026 to make coordinating tassels for the pillow corners. Photo by Matt Graves

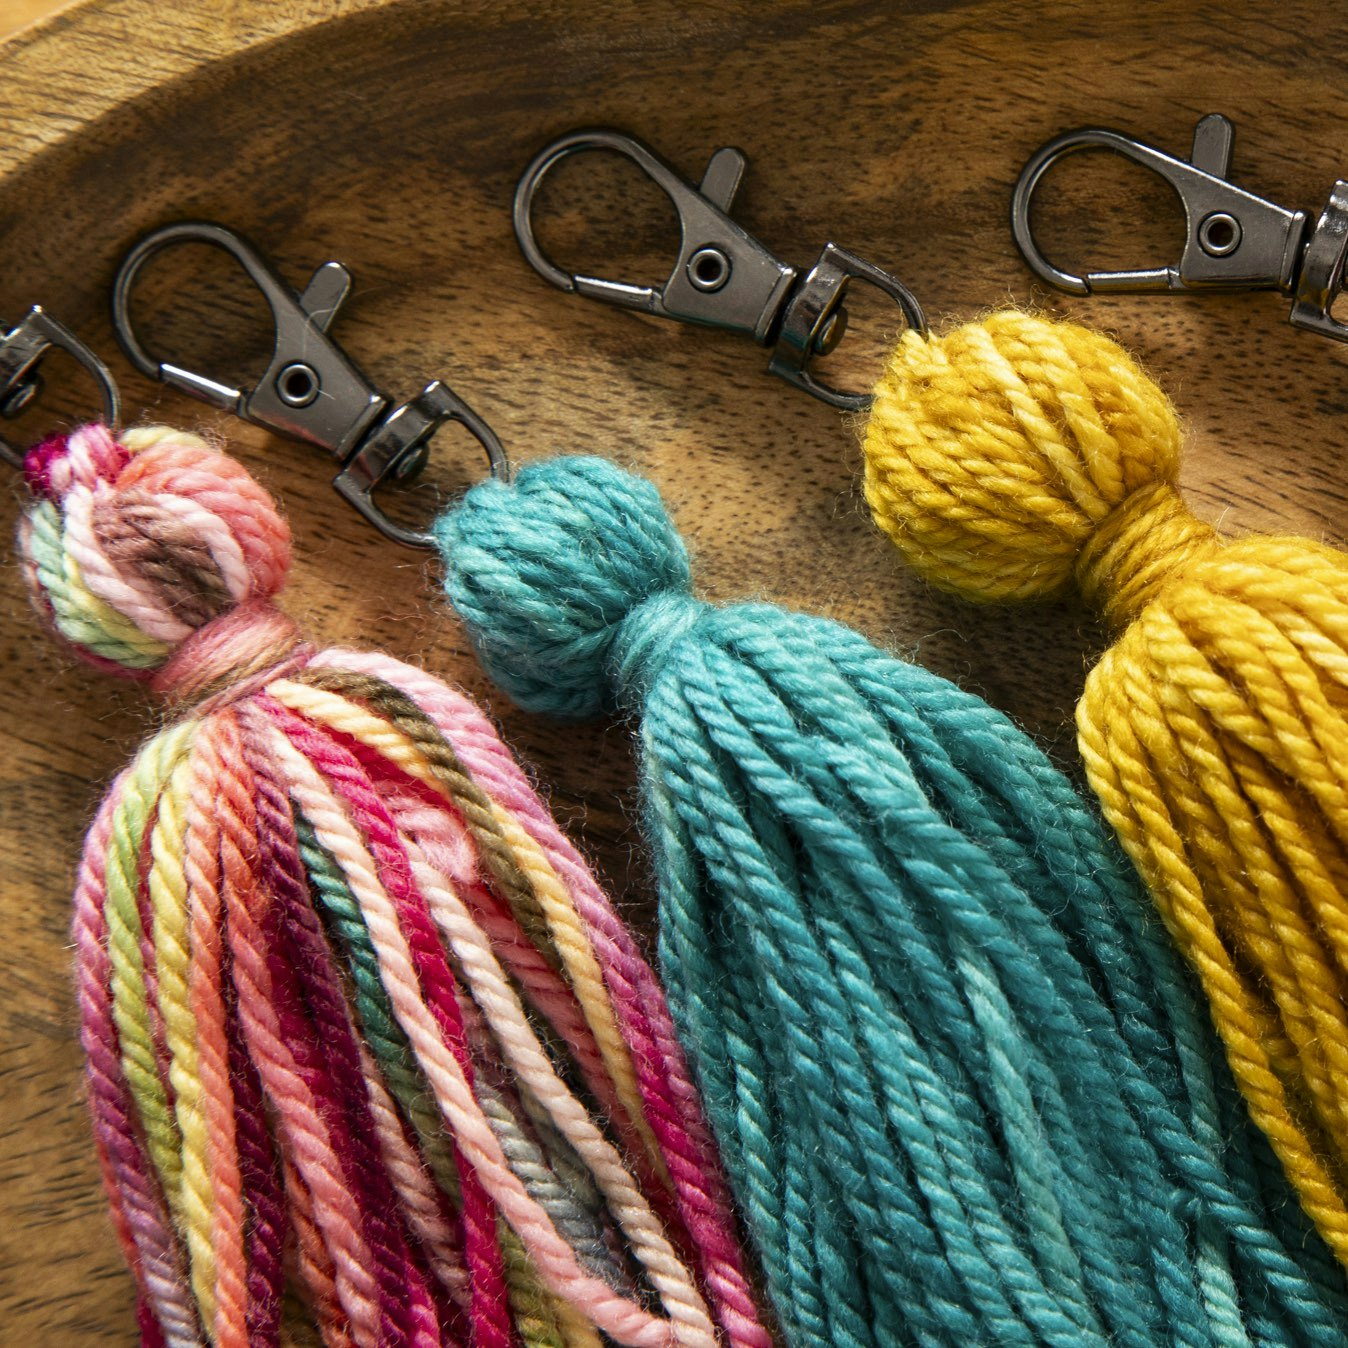
Gabi van Tassell wove her Decatonic Scarf, shown at left, using a set of ten miniskeins. After she finished the scarf, she had enough of each colorway left over to make one tassel each out of the leftover put-ups. Click on the photos in the gallery to see them enlarged. Photos by Matt Graves
There are different methods for making tassels. The two I cover in this article are ones done without specialized tools. Both methods will yield beautiful, functional tassels. Which technique you choose depends on your personal preference and whether you’re using yarn from put-ups or thrums cut from your loom.
The most common method you’ll see for making tassels involves winding the yarn onto a template. While you can purchase premade templates, you can also easily make your own out of sturdy cardboard. Use this method if you’re making tassels from yarn(s) on put-ups. This method was adapted from instructions written by Gabi van Tassell for making optional tassels for her Decatonic Scarf in Little Looms Fall 2026.
Step 1: Make a cardboard template. Using sturdy cardboard and sharp scissors or a craft knife, cut two cardboard rectangles. The templates should be slightly longer than your desired finished tassel length (I’d add at least an inch) and at least 3" wide. You want the template to be wide enough to hold the fully wound tassel with some extra on either side to keep it from slipping off; you also want it to be narrow enough to easily hold during winding.
 Before making your tassels, you'll need to cut two cardboard rectangles to use as templates. Process photos by Christina Garton
Step 2: Wind your yarn. Sandwich the cardboard rectangles together so all edges align. Place the tail of your tassel yarn between the pieces of cardboard. Holding the template pieces together firmly, begin winding your yarn around the template. How many times you wrap the yarn will depend on the thickness of the yarn and the desired tassel fullness. Err on the side of winding too much as it’s easier to remove yarn than to add more. As you wind, keep your tension even. You want it tight enough so the yarn doesn’t sag, but not so tight that it will bend the template.
 Secure the tail of your tassel yarn between the templates before winding.
Step 3: Secure the tassel. Once you’ve wound your desired amount of yarn, but before cutting your working yarn, use a small piece of tape (Scotch-style is fine) to secure one end of the tassel. This will become the bottom or cut end of the tassel. Cut your working yarn and then cut a length of yarn about 18" long. Thread this piece on a tapestry or weaving needle, run the needle under the loops at the top (untaped) end, and use the yarn to firmly tie the loops together. Do not trim the yarn tails.
 After winding, tape the bottom of the tassel and then tie a length of yarn around the tassels top loops.
Step 4: Cut and tie your tassel. Using sharp scissors and working with the scissors between the layers of cardboard, cut the bottom loops of your tassel. Remove the tape and remove the tassel from the template. (At this point, if your tassel is too full, you can carefully remove strands of yarn from the tassel.) Cut a length of yarn about 10" long and use it to wrap and secure the neck of the tassel and secure it with a knot. Alternatively, you can use one the tails from the length used to secure the top end of the tassel in Step 3. Trim the tails from the knot and use a tapestry needle to push the tails into the wrapping.
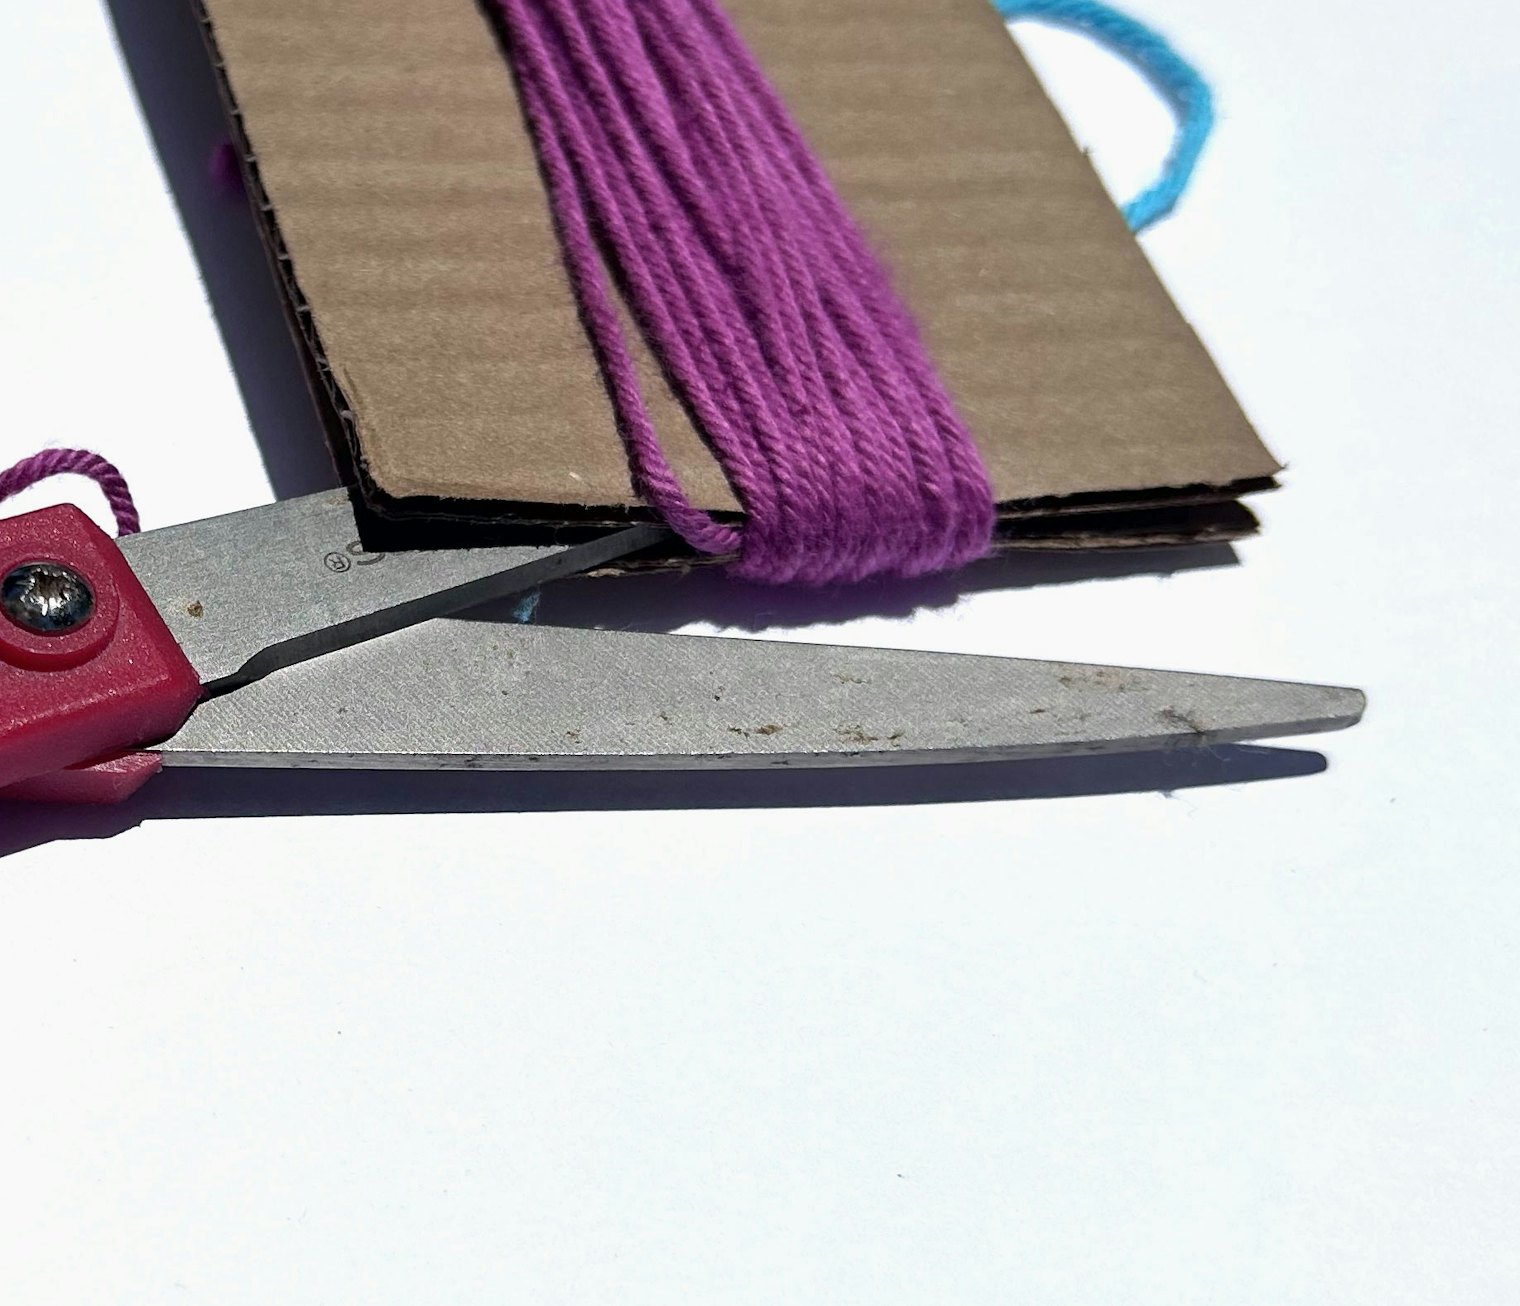
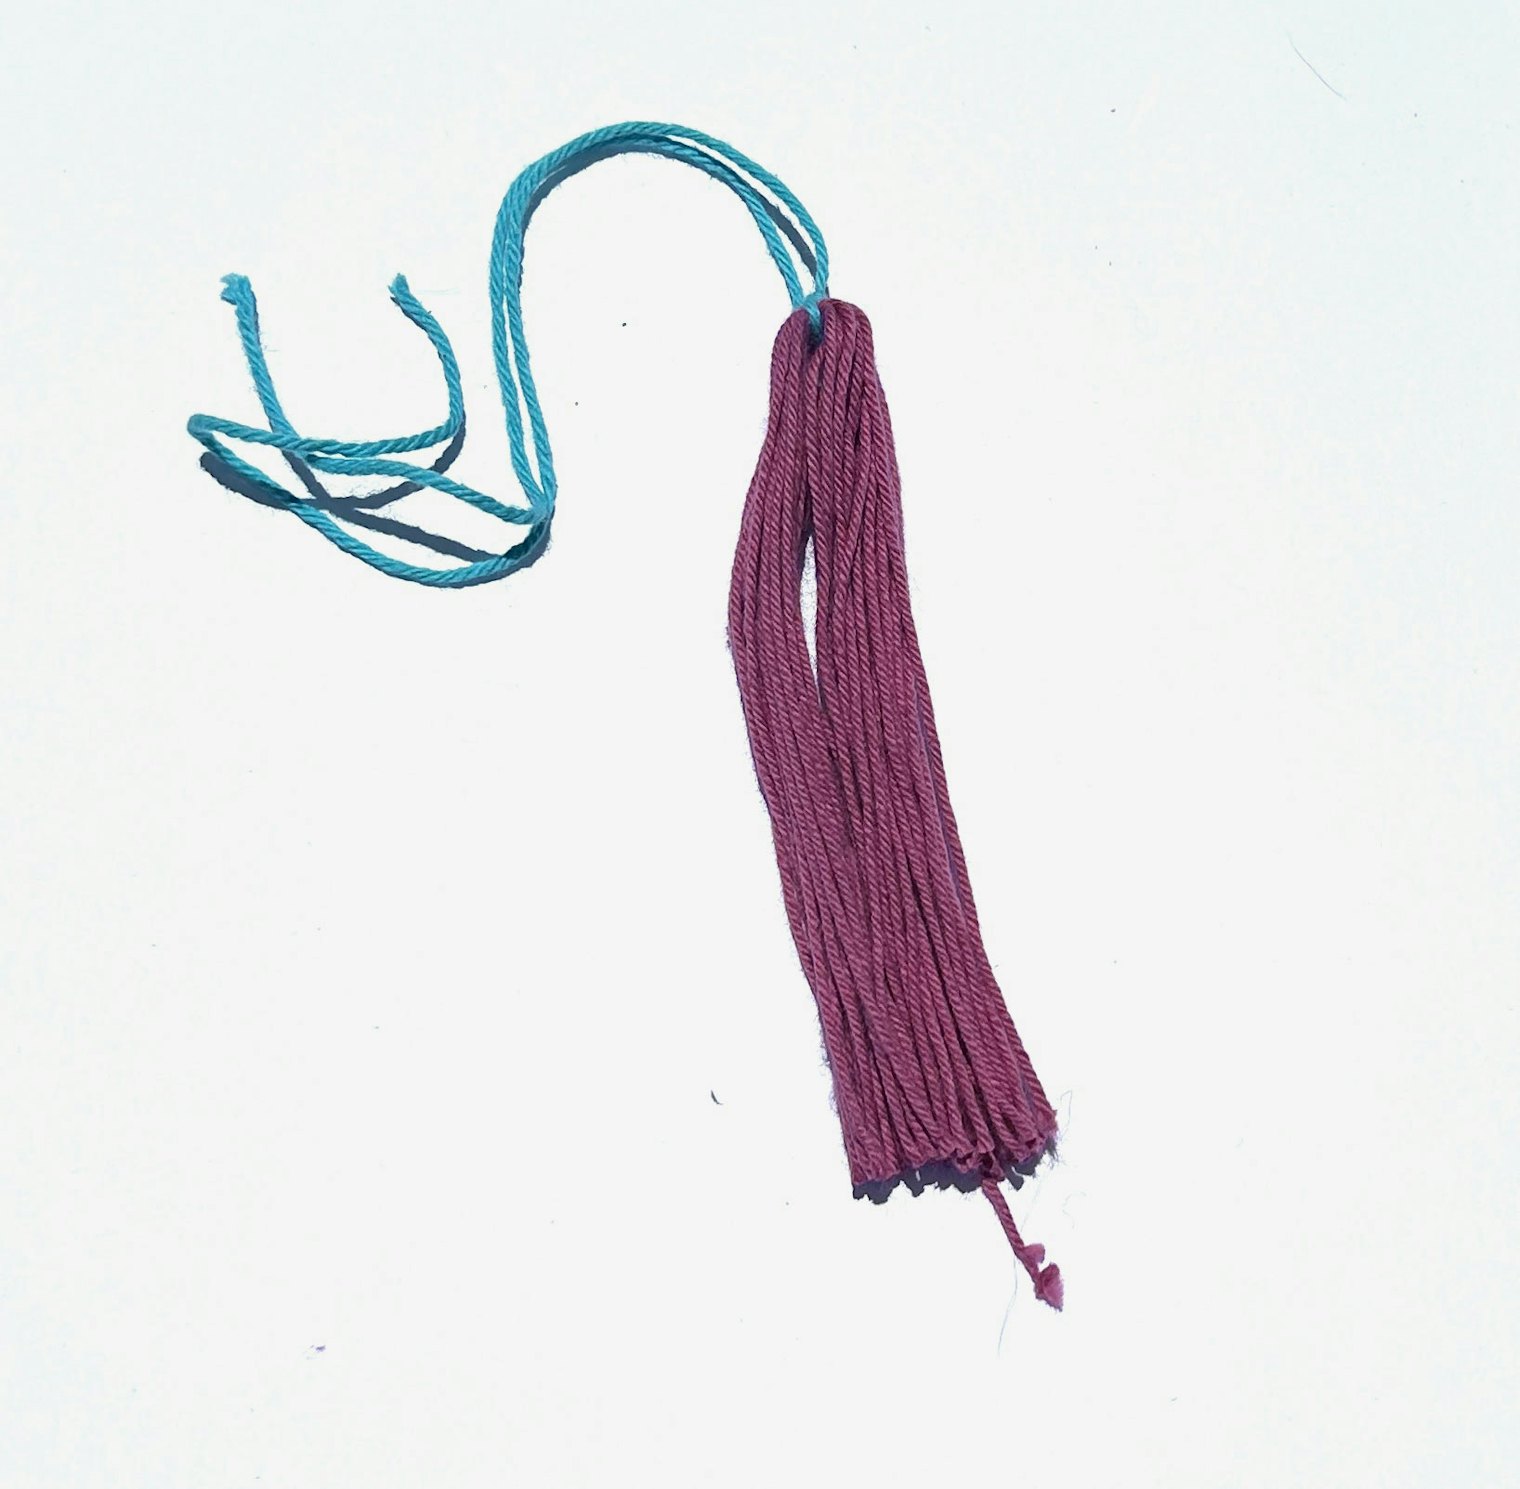
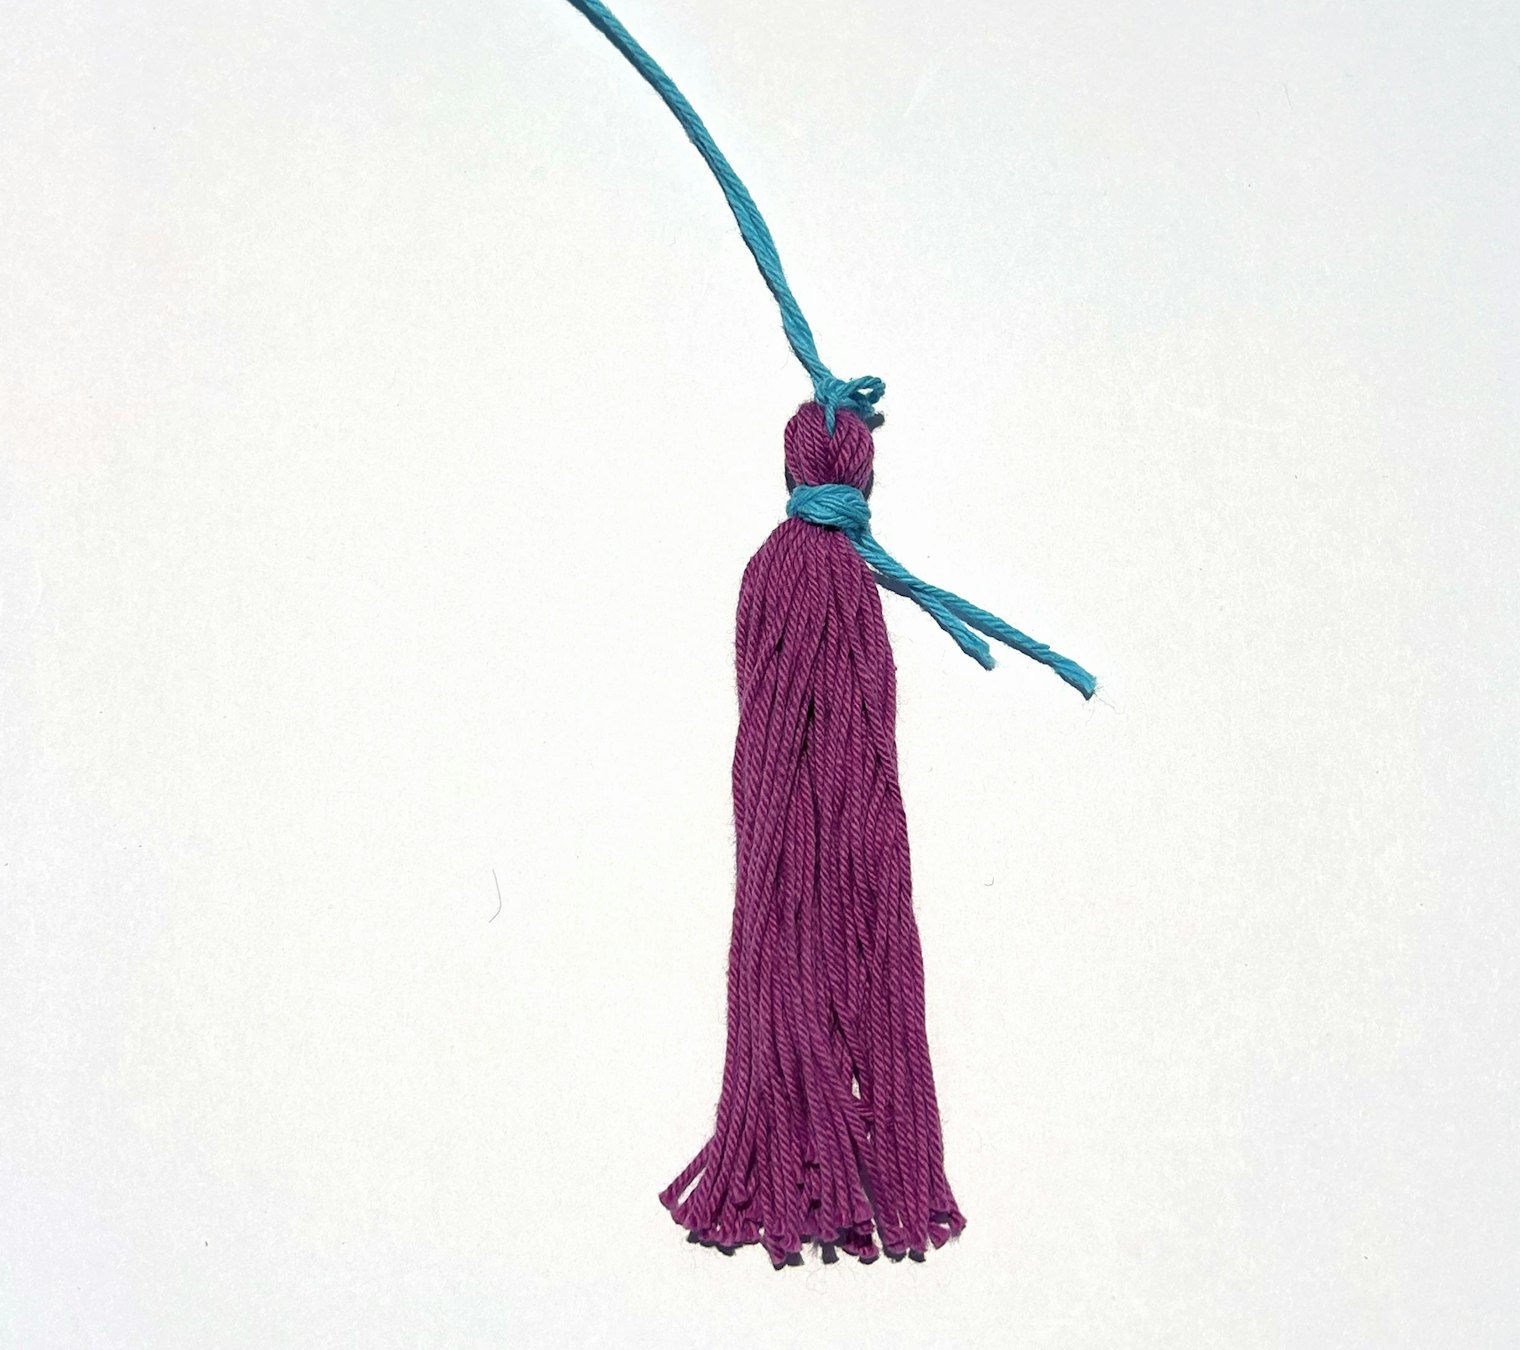
Left: Use the space between the templates as a scissor guide when you cut the tassels bottom loops. Middle: The tassel after being removed from the template. Right: A short length of yarn is wrapped around the neck of the tassel and secured with a knot. Click on each image in the gallery to enlarge the image and get a closer look.
Step 5: Trim the tassel (optional). Using sharp scissors, trim the bottom ends of the tassel evenly to your desired length.
 Rebecca Fox made this tassel for her Go for Baroque Pillow from the Fall 2026 issue using the no-template method. Photo by Matt Graves
The second method for making tassels doesn’t require a template. If you’re using short lengths of precut yarn, such as you’d get from loom waste, this is the method for you. It’s also good if you want to mix and match a lot of different yarns in one tassel.
Step 1: Cut your tassel yarn. Determine how long you’d like your finished tassel to be and multiply that number by two and then add one more inch. Cut your desired number of tassel strands to that length and carefully pile them together so the cut ends are aligned as closely as possible. How many pieces you cut depends on the thickness of your yarn(s) and the desired fullness of your finished tassel. To see whether you have enough, carefully hold the lengths together at the center and fold them in half. That will be the fullness of your finished tassel.
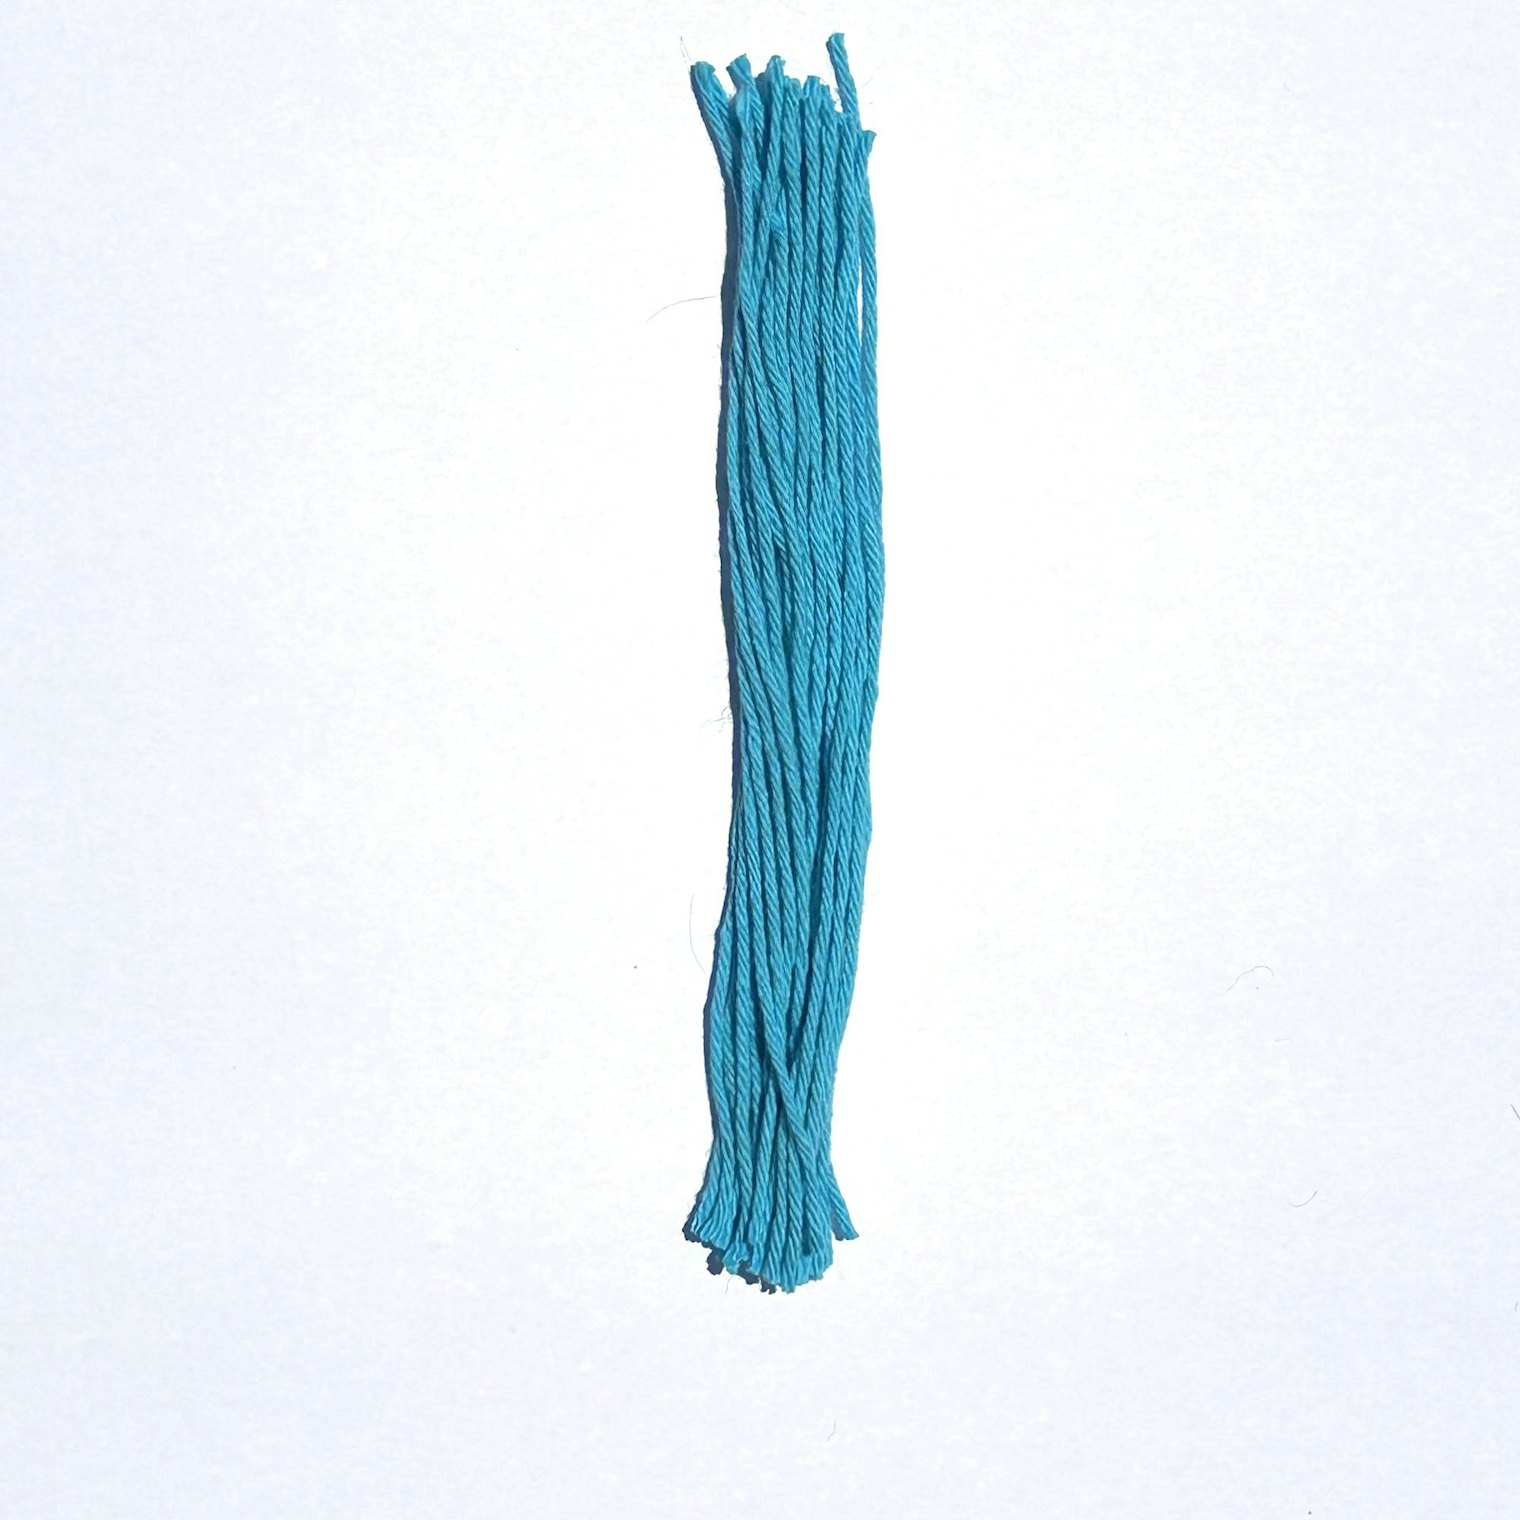
Orient your tassel lengths horizontally with the ends as close to even as you can get. Don't fuss too much—you'll be trimming the ends later.
Step 2: Prepare to tie. Cut one piece of yarn at least 5" long to use as a tying strand; you can use the same yarn as the tassel strands or use a different coordinating yarn or embroidery thread. Place the tying strand on your workspace so it lies horizontally. Center the cut tassel yarns perpendicular to the tying strand. You should have a cross where the cut tassel yarns are oriented vertically on top of the horizontal tying strand.
 The tying strand placed underneath the tassel bundles before tying.
Step 3: Tie and fold your tassel. Tie the tying strand in a knot around the tassel yarns. Carefully fold the tassel yarns in half. The tying strand knot should be at the top of the tassel, and the cut ends of the tassel yarns should be at the bottom.
 Once the tassel bundle is tied, fold it in half keeping the tie on the top middle of the tassel.
Step 4: Wrap the tassel. Cut a length of yarn at least 10" long; you can use the same yarn as the tassel strands if desired. Leaving a short tail, use this piece to wrap around the top of the tassel several times, about ½" or desired distance from the fold at top. When finished wrapping, tie the ends together in a knot. Trim the tails from the knot and use a tapestry needle to push the tails into the wrapping.
 A short length of yarn is wrapped around the neck of the tassel and secured with a knot.
Step 5: Trim your tassel. Using a pair of sharp scissors, trim your tassel ends evenly to your desired length.
Don’t be afraid to play with your tassels! Try mixing and matching not only different colors of yarn in your tassels, but also yarns of different textures and/or thicknesses. You can add a few strands of a metallic for an extra pop of bling. The options are endless!
Happy Weaving!
Chrsitina
More from Little Looms
 Skill Guide: A Weaver’s Guide to FiberNo matter what loom(s) you love to weave on, understanding the different characteristics of a fiber can help you make better choices when picking yarns for projects.Christina Garton · July 31, 2026
 From WIF to Woven ClothLearn how to use WIFs and weaving software to create and edit patterns—before you put a single thread on the loom. Christina Garton · July 23, 2026
 Give Yourself the Gift of a Weaving GetawayWhat’s better than learning to master a new weaving? Doing it among friends, new and old! Little Looms Editors · July 21, 2026
 6 Easy Ways to Elevate Your Selvedges with TrimsAdd extra flair to your selvedges and hems with these terrific trims. Christina Garton · July 16, 2026
 Twill for the Rigid-Heddle Loom: It’s Easier Than You Think!Learn why weavers love twill—and what makes it a great weave for the rigid-heddle loom.Christina Garton · July 14, 2026
 A Celebration of Stripes: Call for Submissions Fall 2027We're looking for striped projects of all kinds for our Fall 2027 issue—and that includes plaids and checks, too!Christina Garton · July 9, 2026
 Make Your Own Cardboard Mini-ShuttlesButterflies are beautiful, but they’re not always the best choice when you’re weaving. Try winding small bits of weft on these simple, DIY cardboard shuttles instead!Christina Garton · July 7, 2026
 A Trio of Table ToppersGo beyond rectangular runners with table toppers. Christina Garton · June 30, 2026
 Crochet for Your Selvedges? Your Edges Will Thank YouFind out why Sara Bixler finishes some of her woven pieces with crochet. Watch her free video clip, and then dive into several stitch options to try on your next project. Little Looms Editors · June 25, 2026
 Compose a Masterpiece on Your LoomAfter all, a loom is just another type of stringed instrument. Christina Garton · June 23, 2026
From the Library


Comments
No comments yet — be the first to share your thoughts.
Sign in to join the conversation — commenting is for signed-in members.