
Loading the latest stories…




Who loves a party? I know I do, especially if it is a dye party. I have hosted and participated in dozens of dye parties over the years, and I am here to tell you how it’s done.
Yvonne Ellsworth7 min read
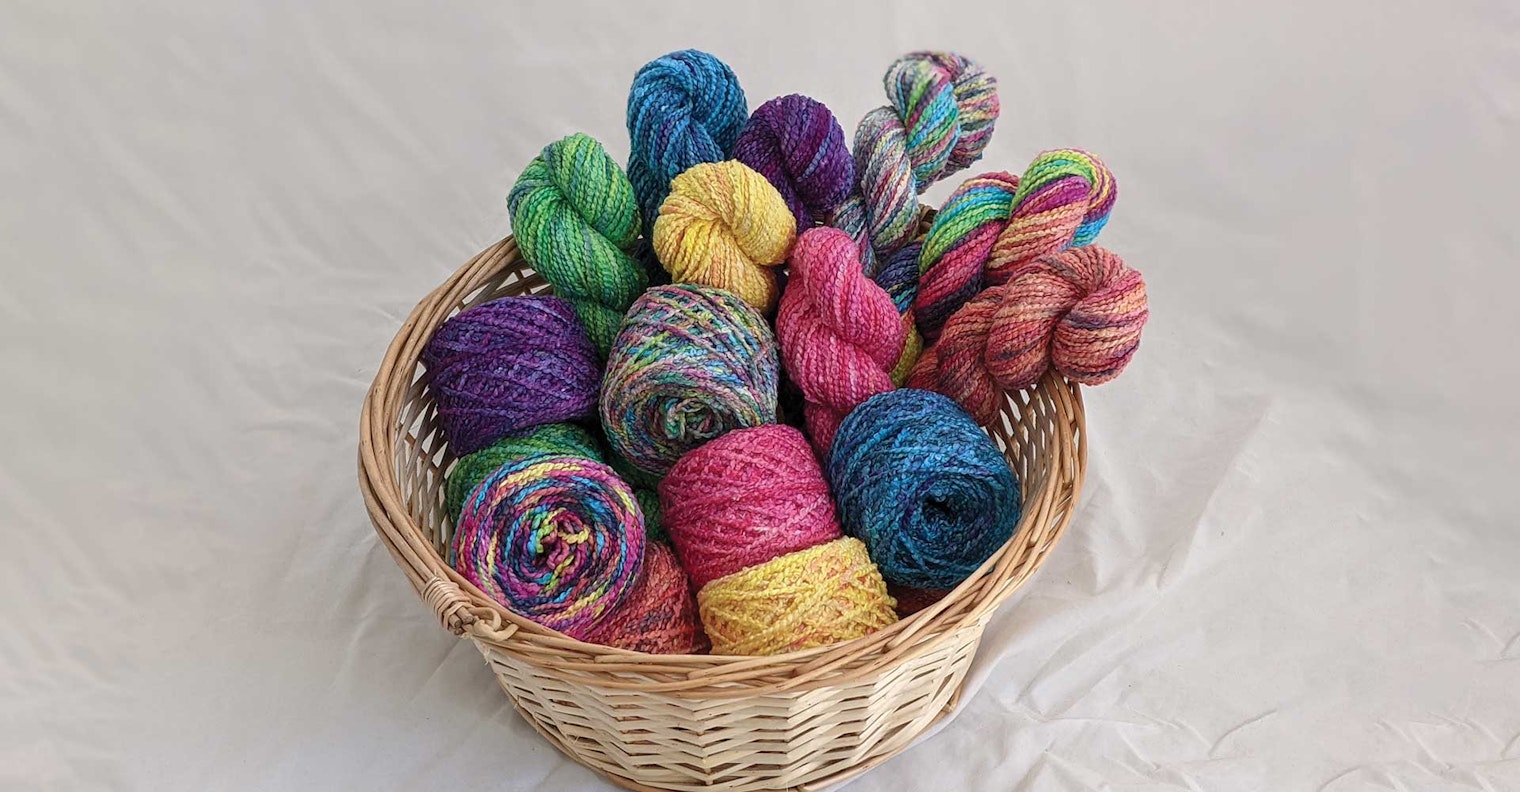
Start by inviting your best color- and fiber-loving friends. Decide on a location that can handle getting wet and messy. Outside is best, although garages also work well. If one of you has a dye studio, all the better! I suggest avoiding kitchens, because food areas or food-preparation tools could become contaminated with dye chemicals. Never use the same tools for dyeing and food.
Set up tables that can get dye on them. I use heavy-duty plastic folding tables that are easy to move around and wash. If you don’t have access to a table that can get dirty, use a plastic or vinyl tablecloth on top of your work surface. Two people to a 6-foot table is ideal, but if you don’t have enough tables for everyone, create a separate crafting circle. People can take turns dyeing and still have somewhere to sit, chat, and be creative when they aren’t dyeing yarn. Make sure to remind your guests to wear clothes suitable for dyeing. Dyes for cotton in particular love getting all over your favorite outfit.
One of my favorite yarns to dye is Monte Cristo, which I get from Cotton Clouds. It’s 100% cotton with great fluffy texture, making it ideal for hand towels, baby blankets, and scarves. You can see its texture in my photos.
Whatever yarn you choose, before dyeing, make sure it is in a skein or chained warp. The dye needs to soak into the yarn to get good clear colors. The easiest way to skein your yarn is with a skein winder or niddy-noddy. If you don’t have either of those, you can wind yarn around two pegs on a warping board separated by about a yard, use the back of a chair, or wind the yarn around from your hand to your elbow to make a skein. Tie each end of the yarn loosely to the skein. Add additional ties to the yarn to keep it from tangling. There is a balance to the tying: Tie too loosely, and the yarns will tangle. Tie too tightly, and you'll end up with white marks on the yarn, an accidental ikat.
As your guests arrive for the party, have them begin by soaking their yarn in buckets of water. The longer the yarn soaks, the better. If the yarn is particularly dirty, use a few drops of a yarn-friendly detergent such as Synthrapol or Soak. A little hand soap will work in a pinch. Rinse and repeat until the water is clear. Dirt or oils can keep the yarn from taking dye, which will make the yarn look spotted or faded. Even worse, it can look beautifully dyed and then have all the color wash out when it is rinsed!
I recommend using cotton, which is considered tricky to dye and requires mordants or other dye fixers. Well, I have discovered a much easier way that requires only water. I use the handy-dandy tie-dye party kits, such as the ones from Tulip available at craft supply, major retail, or online stores. I had a moment of inspiration when, after my kids’ yearly tie-dye T-shirt party, there was leftover dye, perfect for a couple of small skeins.
Follow the instructions given for mixing the dye. Wait to do this as close to dye time as possible because the dyes lose their potency pretty quickly. Tulip recommends using the dye within 72 hours, but I have found that even after a couple of hours, they can be weaker than when first mixed. The directions say simply to add water to the dye bottles, which already have a premeasured amount of dye in them. I modify this by starting with about 1 tablespoon of water and then shaking the bottle to dissolve the dye. Then I add the rest of the water. If you add the water all at once, sometimes the dye won’t mix, and you end up with little dye flecks on the yarn.
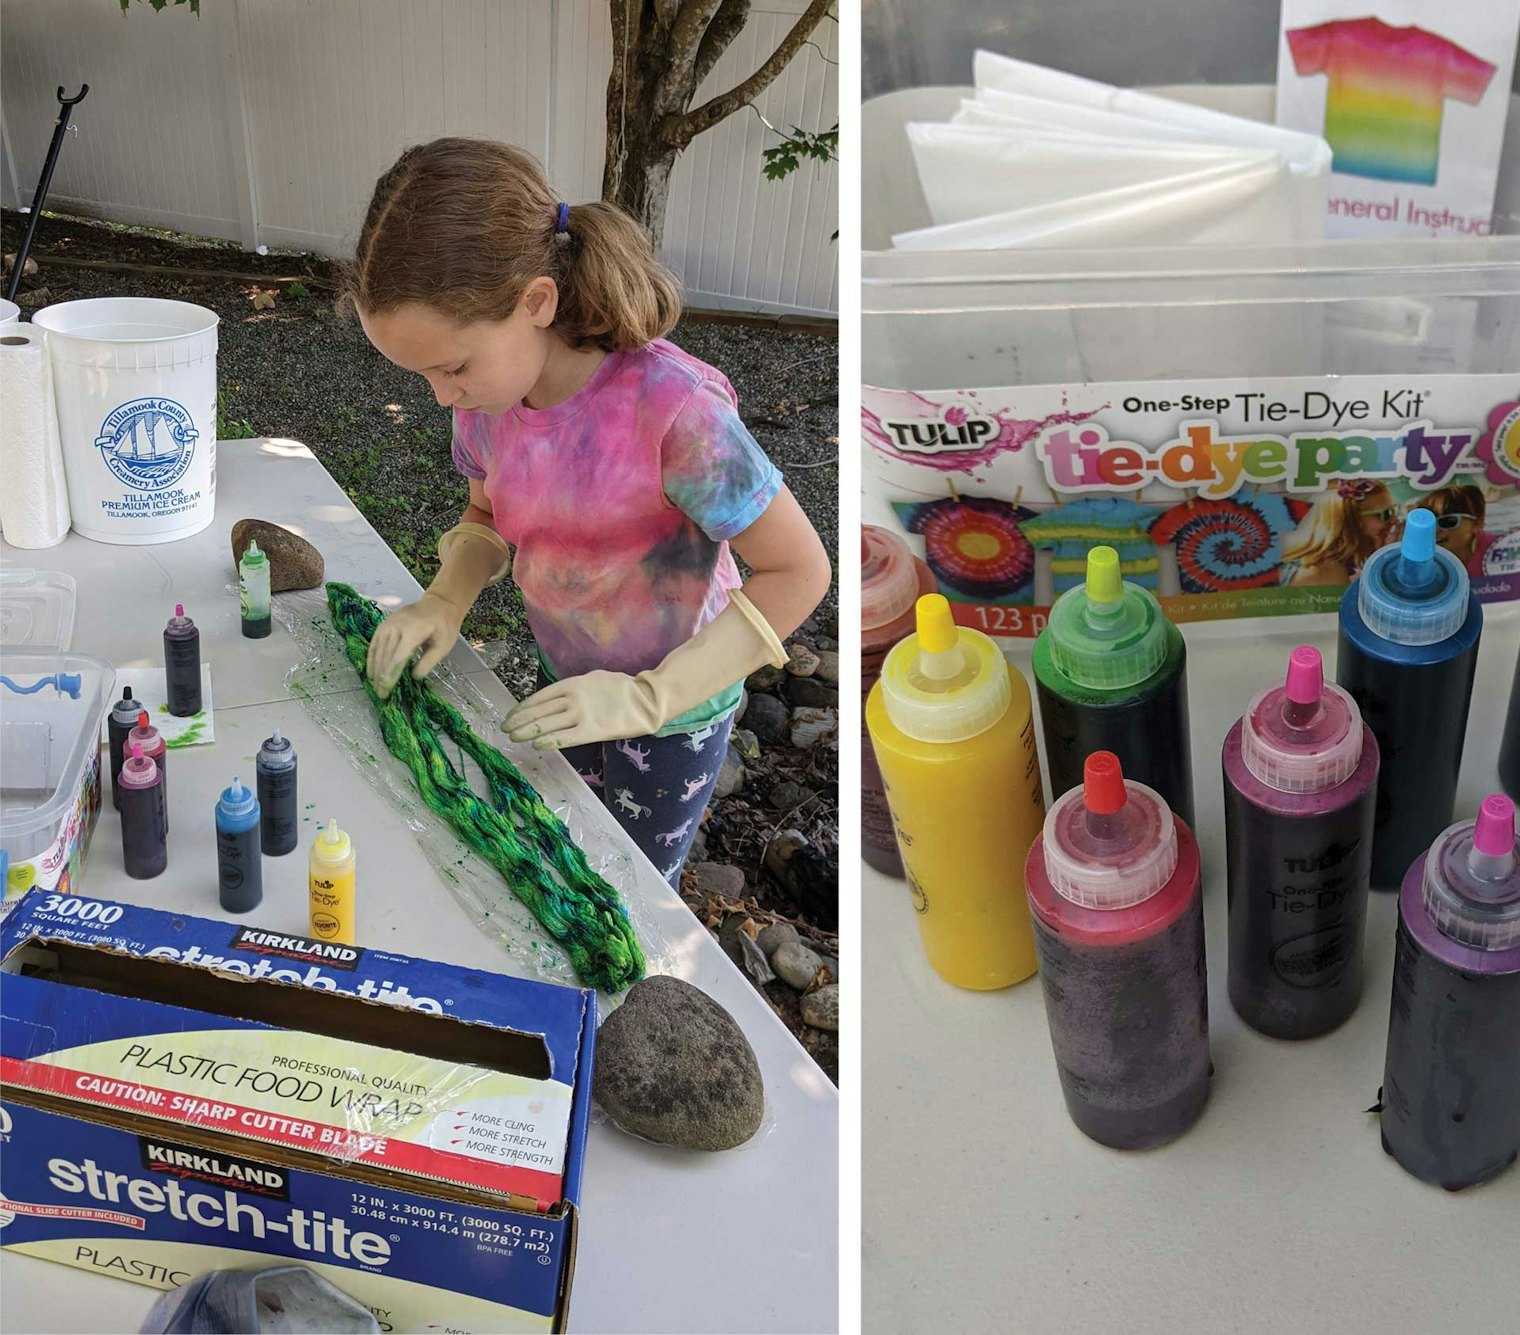
Left: Yarn dyeing parties are fun for all ages. Right: Bottles of dye filled and ready to go
On your dye table, lay out a sheet of plastic wrap, about a foot longer than the length of the skeined yarn. Squeeze out any excess water from the yarn. The more water you squeeze out the more dye can go into the yarn. Dye can now be applied with the squeeze bottles. There are two basic ways to dye yarn using direct application: semisolid and variegated dyeing.
Technically, you can dye with only one color; however, this uses a lot of dye, and it is difficult to apply a single color evenly. For that reason, I recommend using several colors together in a skein or warp. Start with the color you want to be dominant and sprinkle the dye evenly across the yarn. Then use analogous colors, or colors next to one another on the color wheel, to choose accents. If you start with red, then oranges and yellows will make it more fiery, while purples and blues will make it more wine colored. If you want a speckled yarn, use less dye and keep areas of the yarn white. If you want a more even appearance, keep layering dye, a little at a time, until all the white is gone. Use extra dye around the ties to make sure you won’t have any white lines later on. Squish the yarn with gloved hands to help the colors penetrate the yarn. (The Tulip kit comes with plastic gloves, but if you are going to dye regularly, invest in a pair of sturdy kitchen gloves.) Flip the yarn over and repeat the process. Fan out the yarn and make sure the dye has penetrated all of the strands.
Check out photos online or in books and magazines to find color inspiration. If you like the colors together in a photo, then you will probably like them on your yarn. I recommend staying away from complementary colors, those across the color wheel from each other, such as yellow and purple, because they can make muddy colors. Experientation is key. The more you dye, the more comfortable you will get with what works and what doesn’t.
For a different look, try variegated dyeing and dye color blocks rather than layering and overlapping colors. The skein or warp can be divided in half or in quarters or even in 1-inch blocks, depending on how big you want each color block to be. I have fun using the last of the dyes to do about an inch of each color randomly. It doesn’t take much dye at all. Just make sure there is enough to do both sides. When you are satisfied with the top side of the yarn, flip it over and repeat the colors on the opposite side. Fan out the yarn and make sure all the strands are covered in the colors you want.
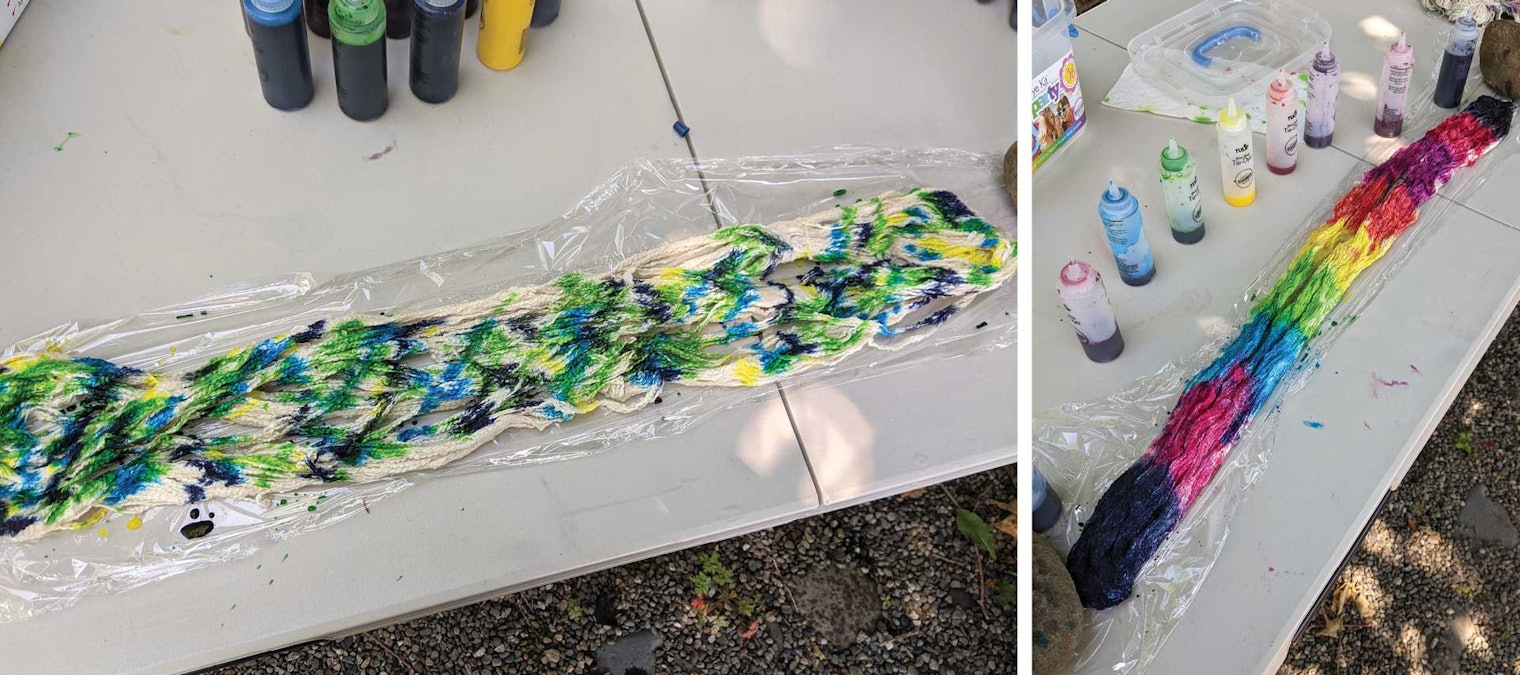
Left: Example of handpainted yarn. Right: Example of variegated dyed yarn.
Once the yarn is dyed, roll it into a tube with the plastic wrap. If there is an excess amount of dye, squeeze it out into a separate container. I use this dye on other skeins of yarn as an accent. Next, fold up one end of the plastic wrap to seal it. Roll up the wrapped skein, cinnamon-roll style. Use another smaller piece of plastic wrap to wrap around the outside. Follow the directions for setting the dye. Tulip suggests keeping it wrapped for 6 to 8 hours before rinsing; however, I usually wait 24 hours. If your friends need to take their yarn home, slip the roll into a gallon-size ziplock bag for safe transportation.
Rinse in a sink or bucket. A lot of dye will come out with the first rinse, which is normal. If there are lighter areas with yellow or white, carefully rinse those first and then hold them out of the way of darker colors, while rinsing the rest of the yarn. This keeps them from accidentally being overdyed by the rinse water.
Hang the yarn to dry where drips won’t be a problem, such as outside on a laundry line or in a shower. The yarn may feel slightly stiff after drying. It typically softens up after being wound on a ball winder or a warping board.
Now all that's left to do is admire your colors and plan something fun with your yarn!
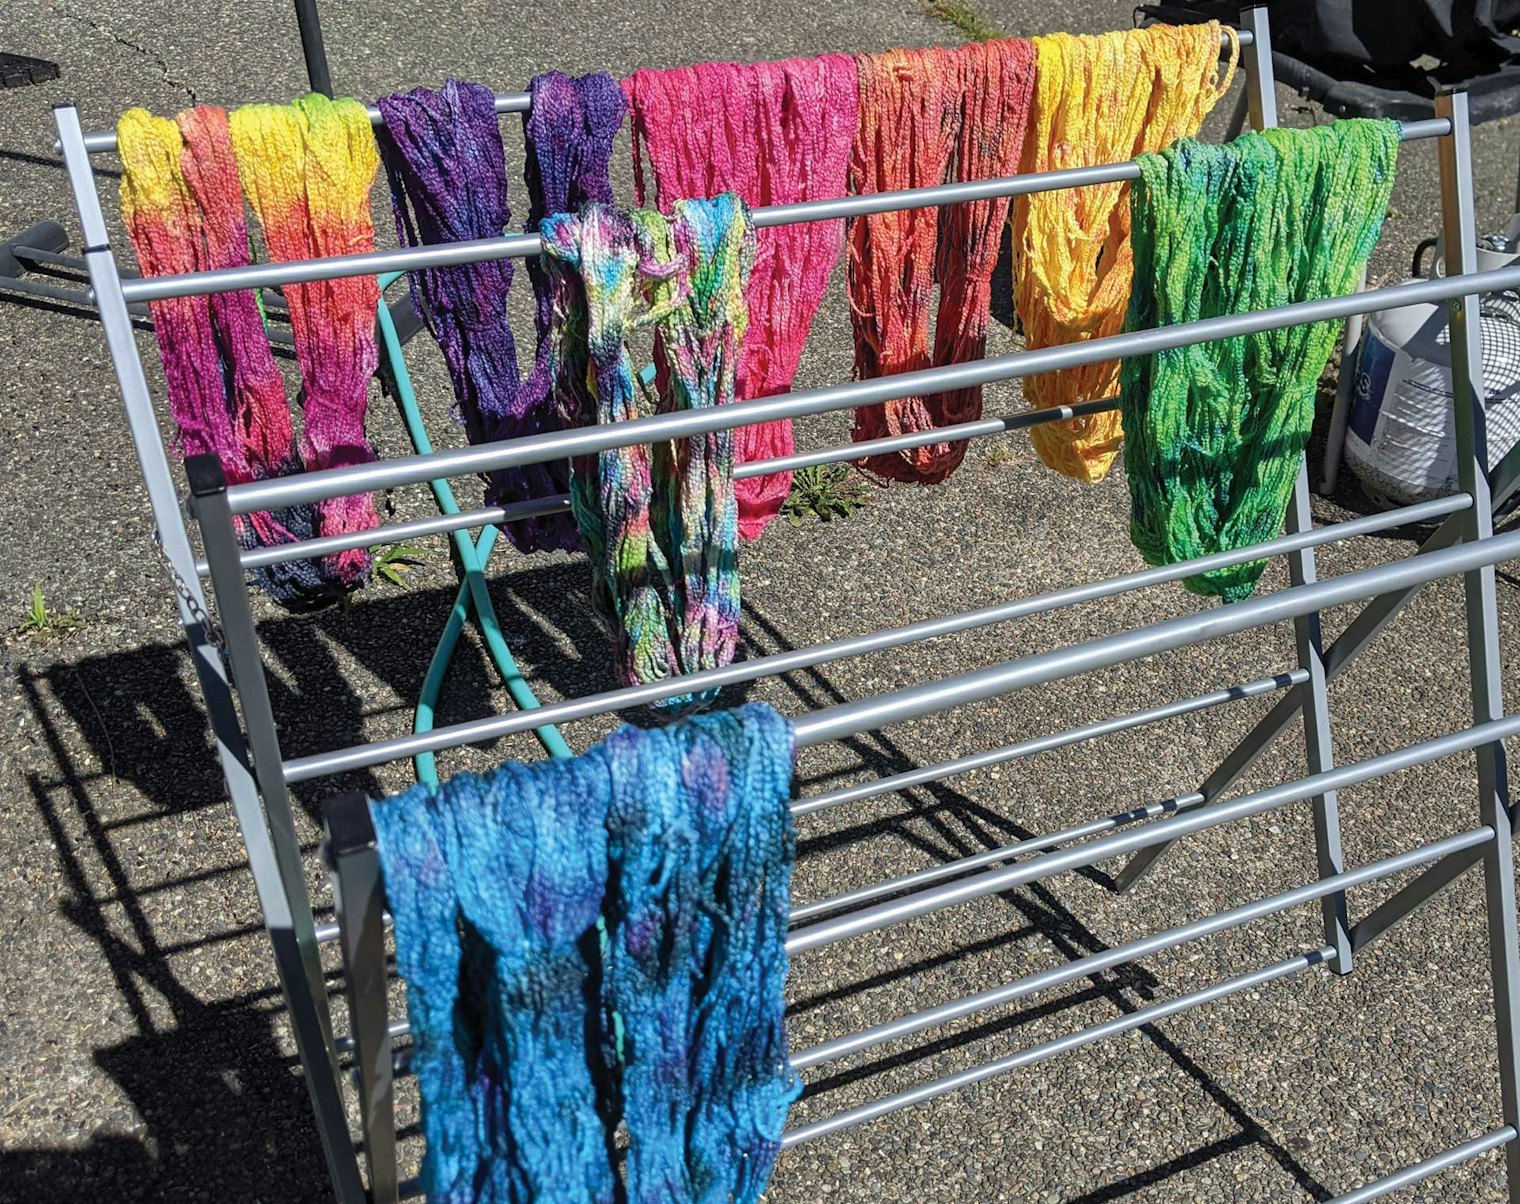
Dyed yarn hung out to dry.
More from Little Looms
 5 More Things to Know before You Start Natural DyeingReady to start natural dyeing? Learn five helpful tips from experienced dyer Wendy Arnott that will set you up for success!Wendy Arnott · May 22, 2025
 5 Things to Know Before You Start Natural DyeingWendy Arnott shares 5 things she wishes she had known when she began dyeing.Wendy Arnott · May 1, 2025
 Dyeing Play SilksSummer is the perfect time to try dyeing. Learn from Christina how easy it is to create a rainbow of cloth with some silk blanks and mud dyes.Christina Garton · August 5, 2024
 Summer Means Backyard DyeingPlaying with safe and easy mud dye seems like the perfect summer activity.Susan E. Horton · June 19, 2024
 Always Say DyeLearn why mud dyes might be the perfect starting point for anyone wanting to start natural dyeing. They're safe, easy to use, and come in a variety of beautiful colors. Elisabeth Hill · April 10, 2024Planning a Dye GardenYou don't need to be a natural dyer to enjoy a dye garden, although it does help. Christina shares 5 tips learned from a master dyer and dye garden expert. Christina Garton · February 14, 2024
 You Can’t Resist Woven ShiboriHave you ever wondered about the difference between woven and regular shibori or why you might choose one over the other? Learn the basics of what makes woven shibori! Christina Garton · July 13, 2023
 Summer Is for DyeingSummertime is the perfect time to get started dyeing. If you’re a newbie, check out this rundown of some easy ways to get started.Christina Garton · June 7, 2022
 Eco Dyeing for Earth DayIn honor of Earth Day, learn how to dye cloth using nothing but leaves and boiling water--no mordant required!Judilee Fitzhugh · April 19, 2022
 A Transcontinental Dye DayMud dyeing is simple, safe, and fun regardless what age you are.Susan E. Horton · August 14, 2020
From the Library


Comments
No comments yet — be the first to share your thoughts.
Sign in to join the conversation — commenting is for signed-in members.